Who is online?
In total there are 18 users online :: 0 Registered, 0 Hidden and 18 Guests
None
Most users ever online was 180 on Tue Nov 05, 2019 6:03 am
Latest topics
Search
Most Viewed Topics
Statistics
Our users have posted a total of 12476 messages in 1986 subjects
We have 1017 registered users
The newest registered user is Bazdiving
Similar topics
+5
david f
profesorul
tattooed
Tom(ADMIN)
Dr.Schmidt
9 posters
Germany's first military submarine, the S.M. U-1

Tom(ADMIN)- AMS Forum Owner
- Posts : 3026
Join date : 2010-11-05
Age : 64
Location : Nevada, USA
Outstanding workmanship...I am very jealous!

profesorul- Guest
- Posts : 386
Join date : 2011-07-03
Age : 59
Location : Bucuresti, ROMANIA
HI,
ANDREEAS
You did an amazing job until know.
Are You SHORE these is Your first SUB!?.
Because if these is the first sub of you , I can only imagine how wheel be the next one.
Absolutely beautiful job.
Please Keep as on post with everything You do.
REGARDS MARIUS
ANDREEAS
You did an amazing job until know.
Are You SHORE these is Your first SUB!?.
Because if these is the first sub of you , I can only imagine how wheel be the next one.
Absolutely beautiful job.
Please Keep as on post with everything You do.
REGARDS MARIUS

Dr.Schmidt- Guest
- Posts : 171
Join date : 2013-03-20
Location : Germany, Bavarya
I built twi subs from kits when I was 18. Didn't work out really. So now 21 years later this is the first submarine I build from scratch, starting with the design, building the molds, making the parts etc.....but I have some skills from building RC planes and I have an engineering background.
So I have a baisc idea how it should work, but this is the first one that I'll have designed and built on my own.
Cheers Andeas
P.S.
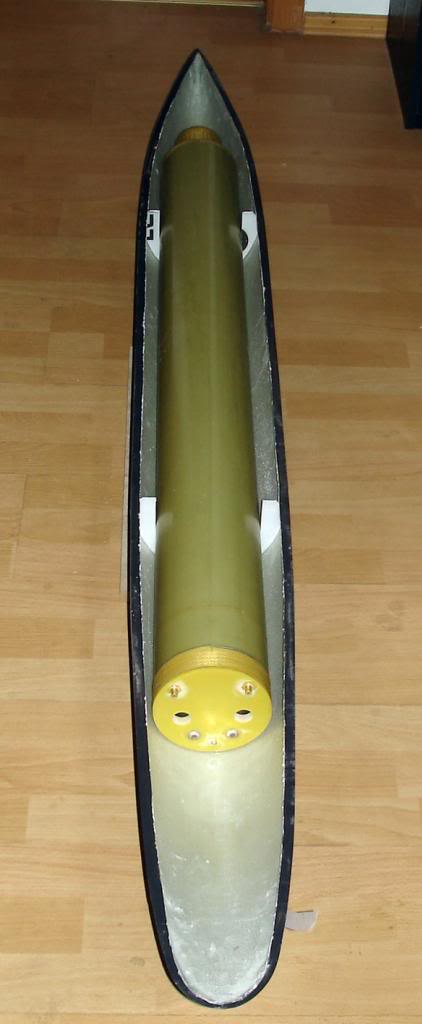
I also make slow but steady progress. Here's the pressure tight compartment in the lower hull:
So I have a baisc idea how it should work, but this is the first one that I'll have designed and built on my own.
Cheers Andeas
P.S.
I also make slow but steady progress. Here's the pressure tight compartment in the lower hull:


Dr.Schmidt- Guest
- Posts : 171
Join date : 2013-03-20
Location : Germany, Bavarya
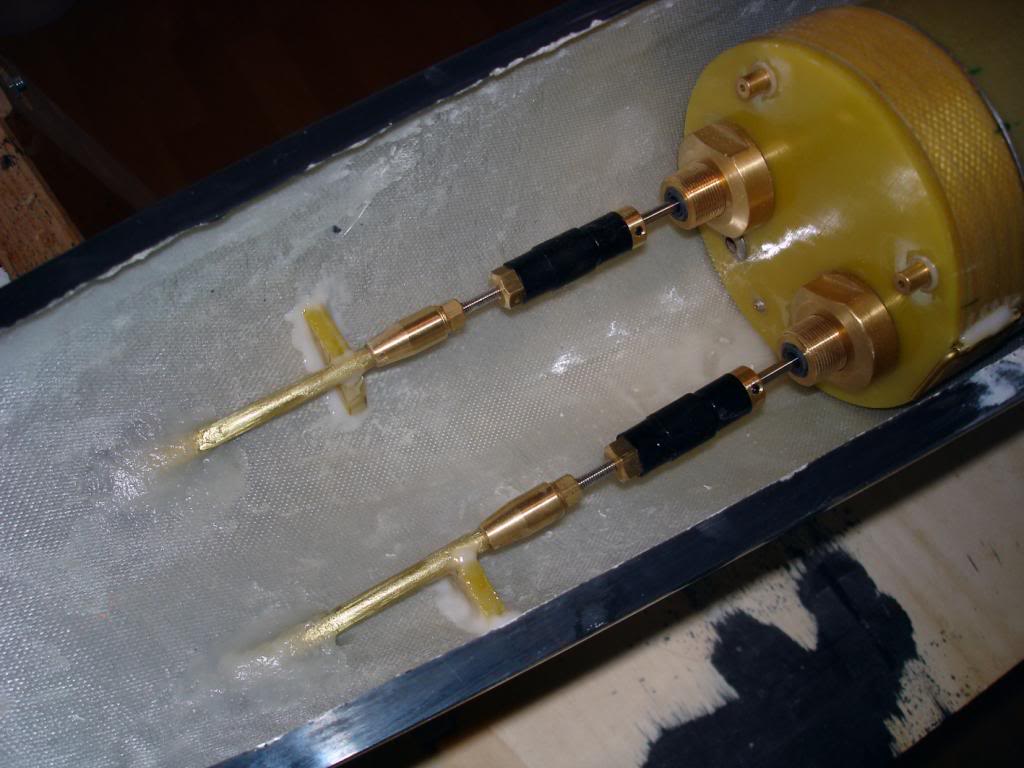
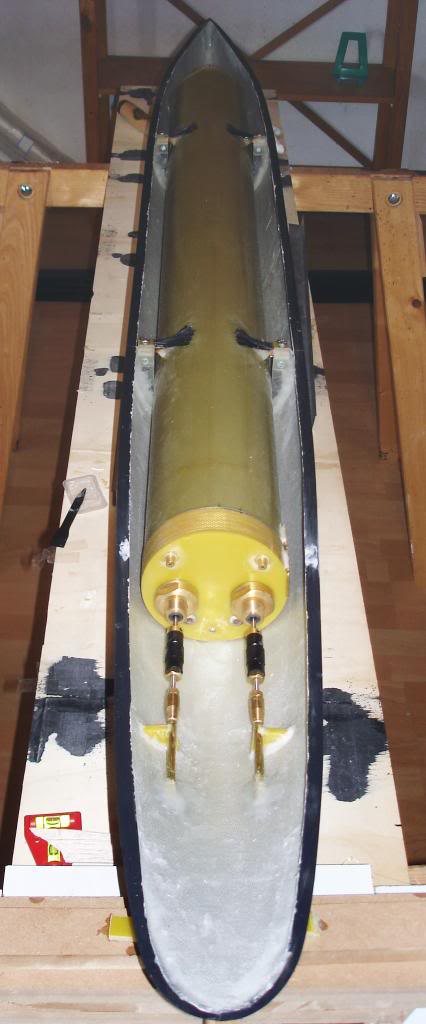
After a longer break, I can report progress again. The struts to hold the pressure tube are installed, the screw points for the pressure tube are in place, the drive shafts are installed and the front servo compartment is secured. Looks like a true two-hull sub.....


Dr.Schmidt- Guest
- Posts : 171
Join date : 2013-03-20
Location : Germany, Bavarya
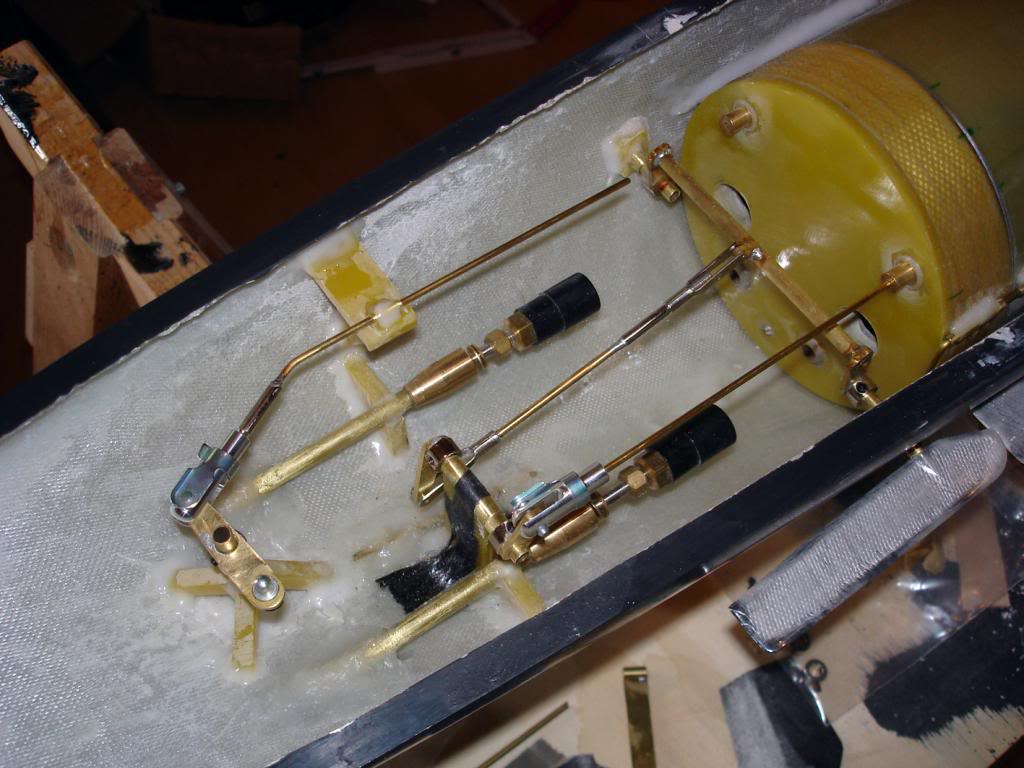
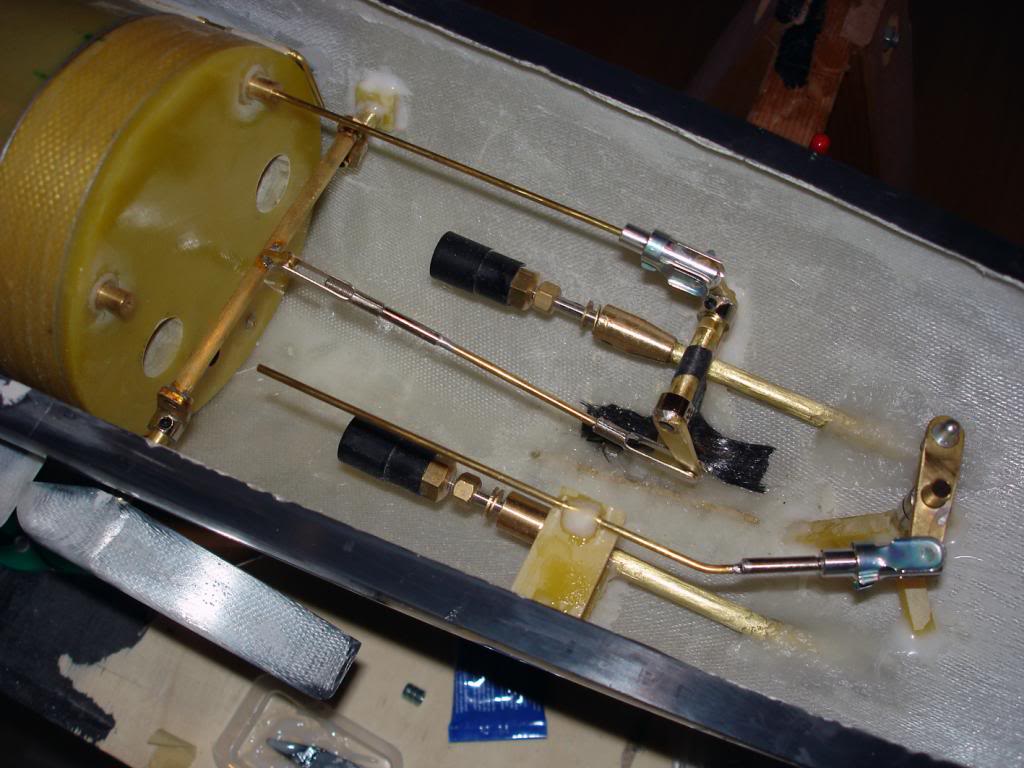
And again some progress. The hydroplanes and the stabilization fins are installed. The mechanics for the rear hydroplanes is somewhat complicated, as the hydroplanes are too close to the pressure tight compartment to be directly connected to the push rods and the propeller axis prohibit a straight hydroplane axis. So everything is controlled via a second axis....the connection for the rudder is installed as well:
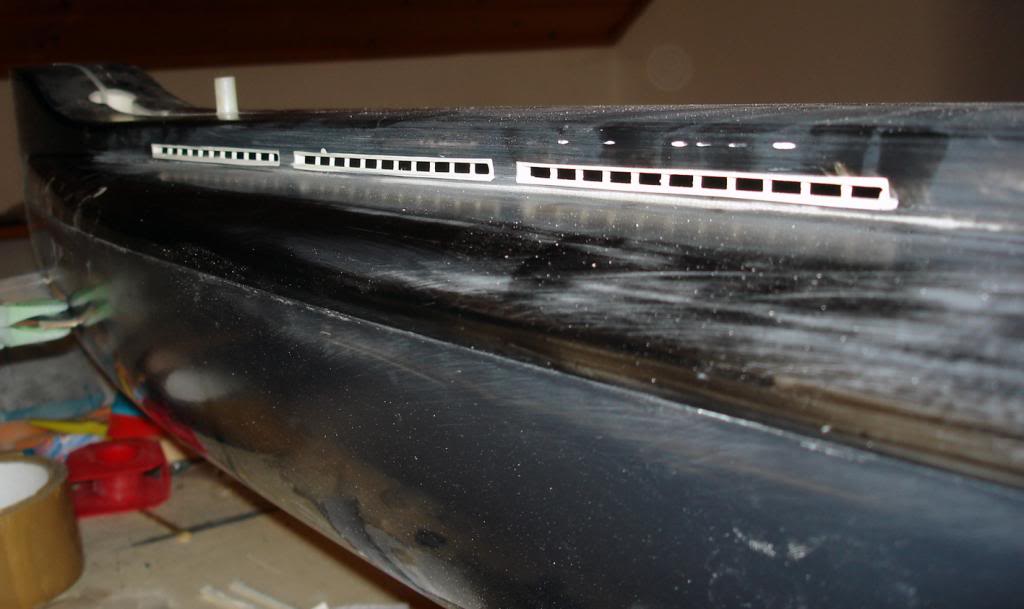
Allot of work as well, the water inlets in the upper hull. I didn't just want to file some, so I fabricated frames from pu-resin and glued them into slits in the upper hull, filled everything and sanded it down flush to the hull's outer surface.
Similar business are the snorkel housings. Got the rapid prototyped and then glued them to the underside of the deck. After that the open parts in the deck were milled and filed away. Front:
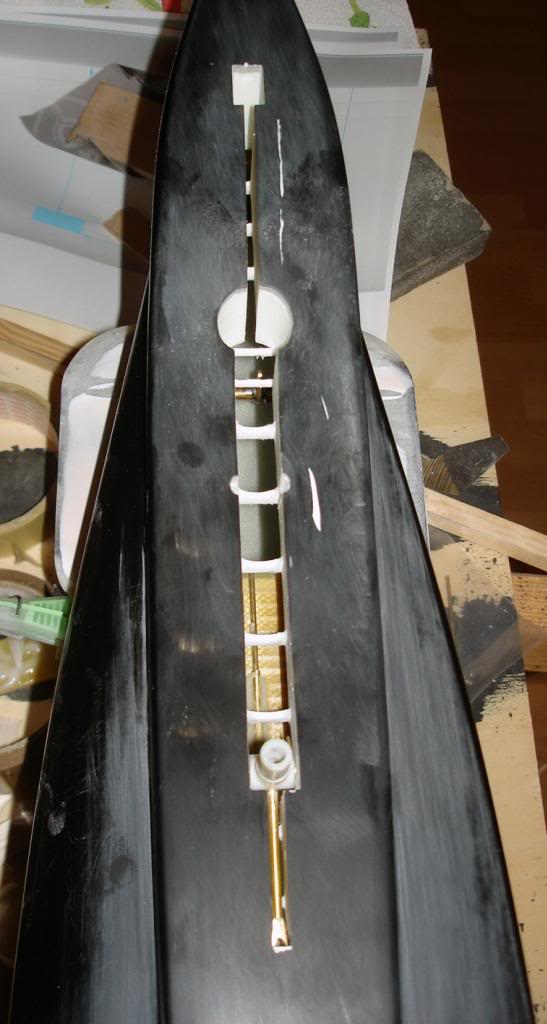
and rear:
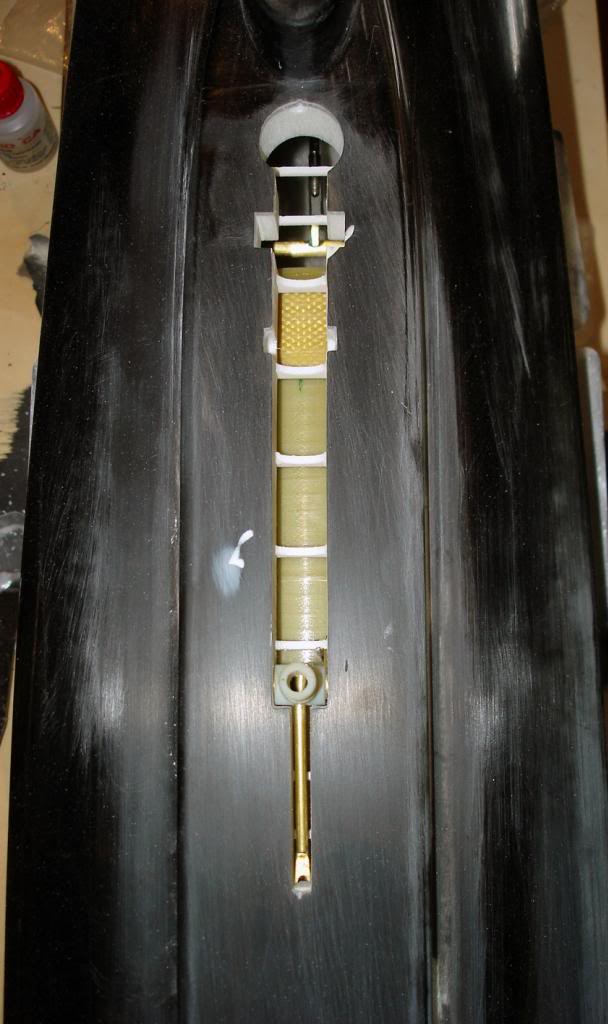
Same thing from the inside - rear:
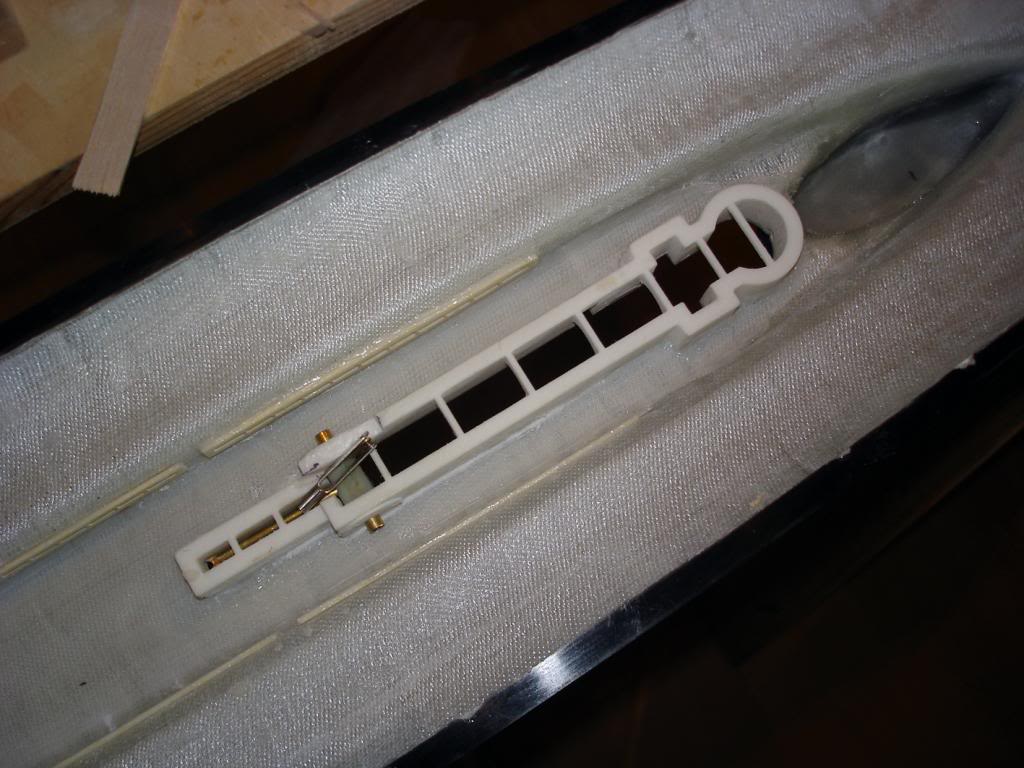
Front:
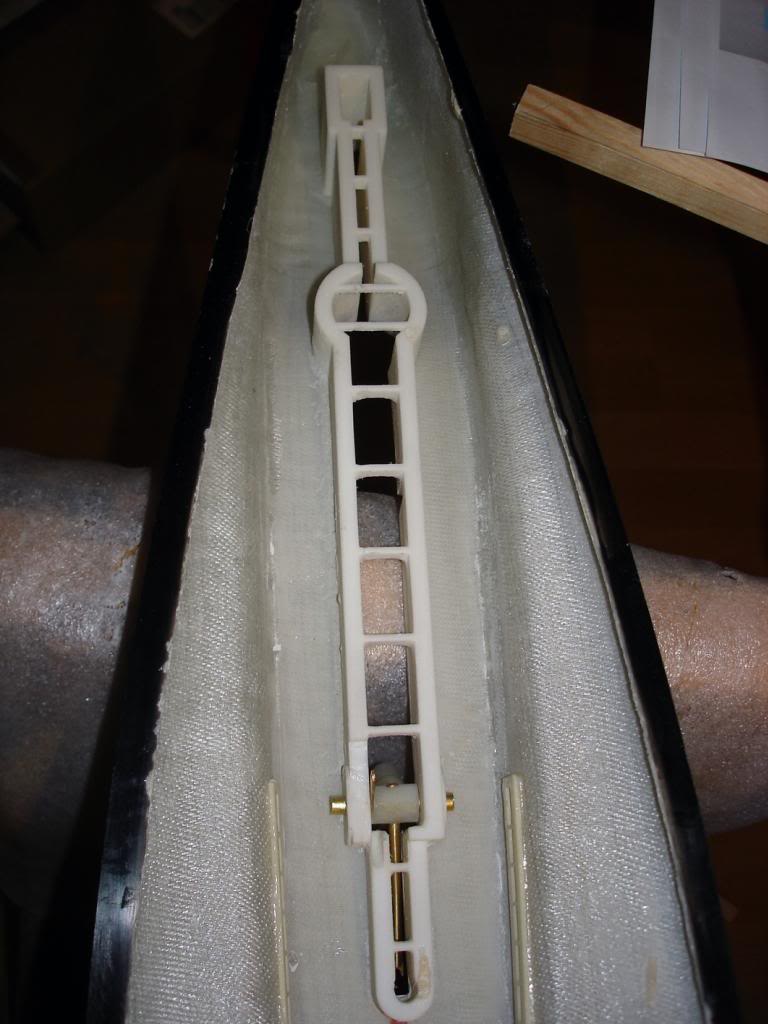
And again the water inlet frames in detail:
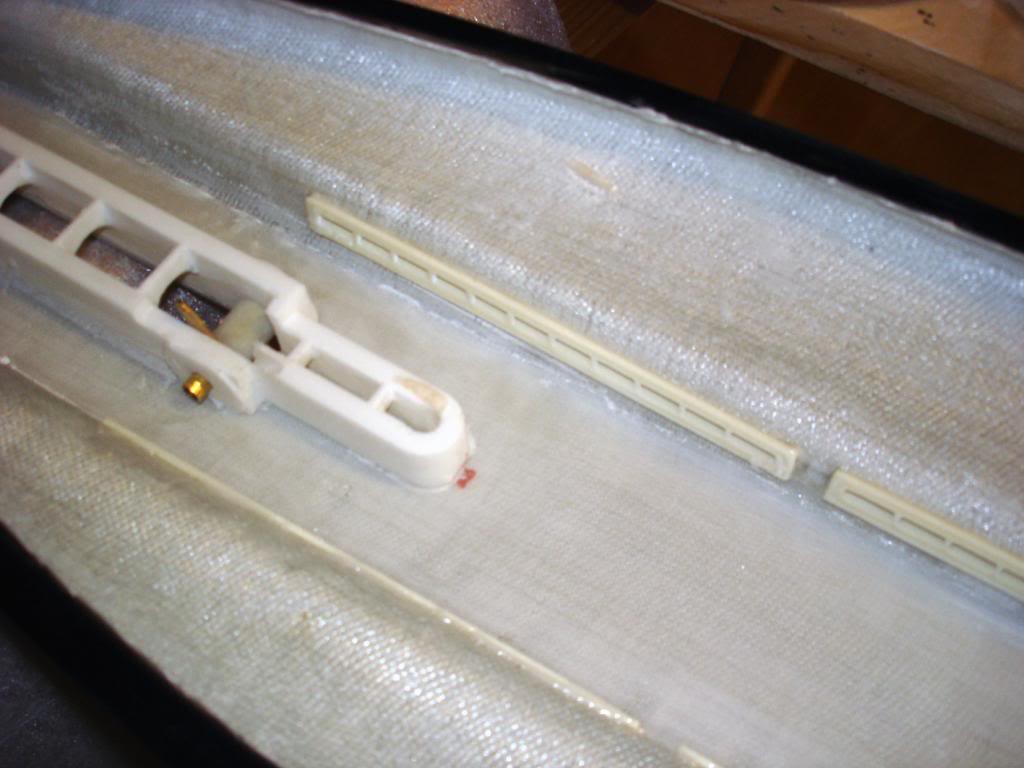


Allot of work as well, the water inlets in the upper hull. I didn't just want to file some, so I fabricated frames from pu-resin and glued them into slits in the upper hull, filled everything and sanded it down flush to the hull's outer surface.

Similar business are the snorkel housings. Got the rapid prototyped and then glued them to the underside of the deck. After that the open parts in the deck were milled and filed away. Front:

and rear:

Same thing from the inside - rear:

Front:

And again the water inlet frames in detail:


Dr.Schmidt- Guest
- Posts : 171
Join date : 2013-03-20
Location : Germany, Bavarya
O.K., againe some progress....
The lower hull got its base coat, was sanded to a good finish and now it gets its rivets. Latter are surface detail decals from Archer Fine Tranfers aufbringe. Slow, not cheap, but it looks good:
Bow with torpedo hatch:
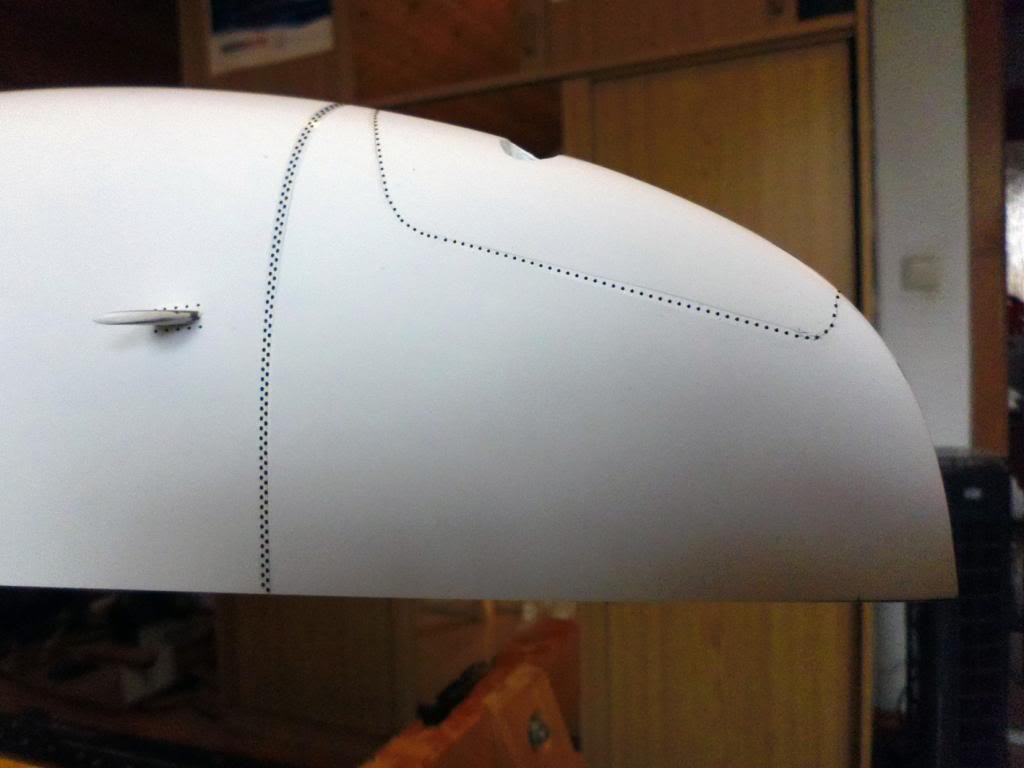
middship:

stern:

The tower also got its base coat and is ready to be painted:

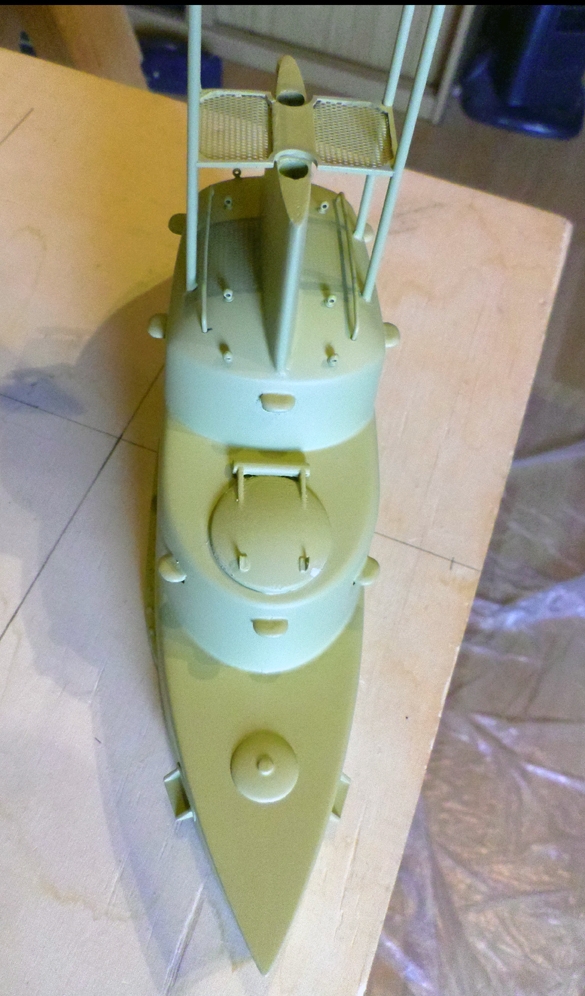
The lower hull got its base coat, was sanded to a good finish and now it gets its rivets. Latter are surface detail decals from Archer Fine Tranfers aufbringe. Slow, not cheap, but it looks good:
Bow with torpedo hatch:

middship:

stern:

The tower also got its base coat and is ready to be painted:


Tom(ADMIN)- AMS Forum Owner
- Posts : 3026
Join date : 2010-11-05
Age : 64
Location : Nevada, USA
Very nice work indeed, sir...those rivets look really good, much easier than applying drops of glue by hand.
Richard
Richard

Dr.Schmidt- Guest
- Posts : 171
Join date : 2013-03-20
Location : Germany, Bavarya
And the dimensions become much more scale than glue droplets....

Dr.Schmidt- Guest
- Posts : 171
Join date : 2013-03-20
Location : Germany, Bavarya
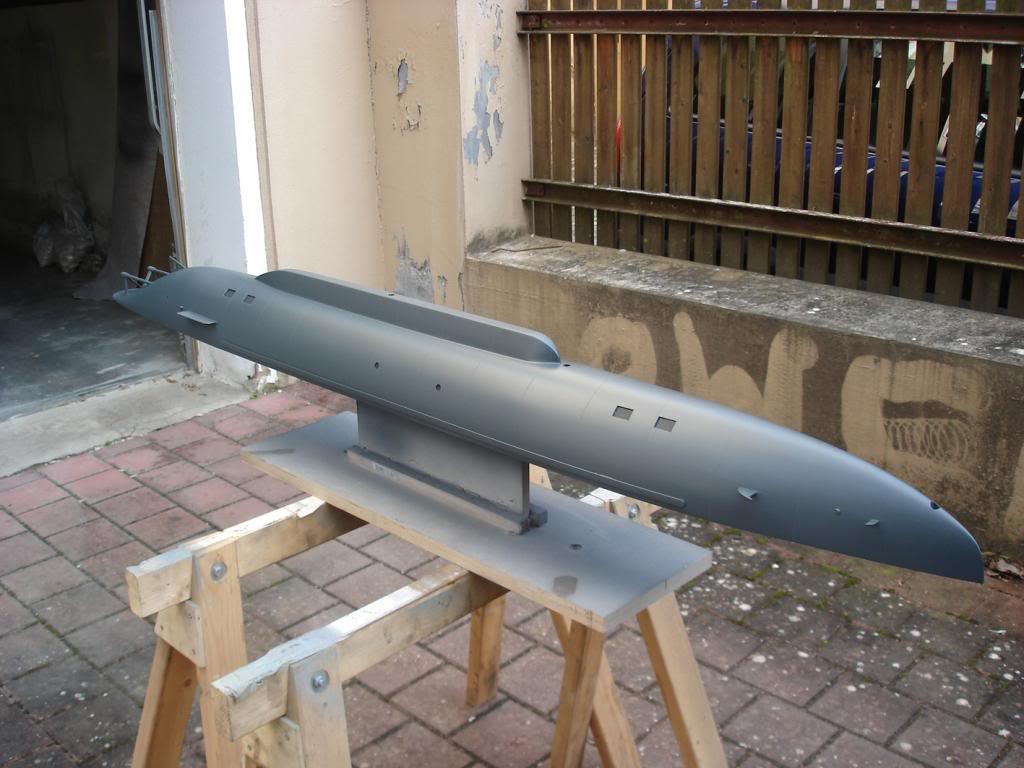
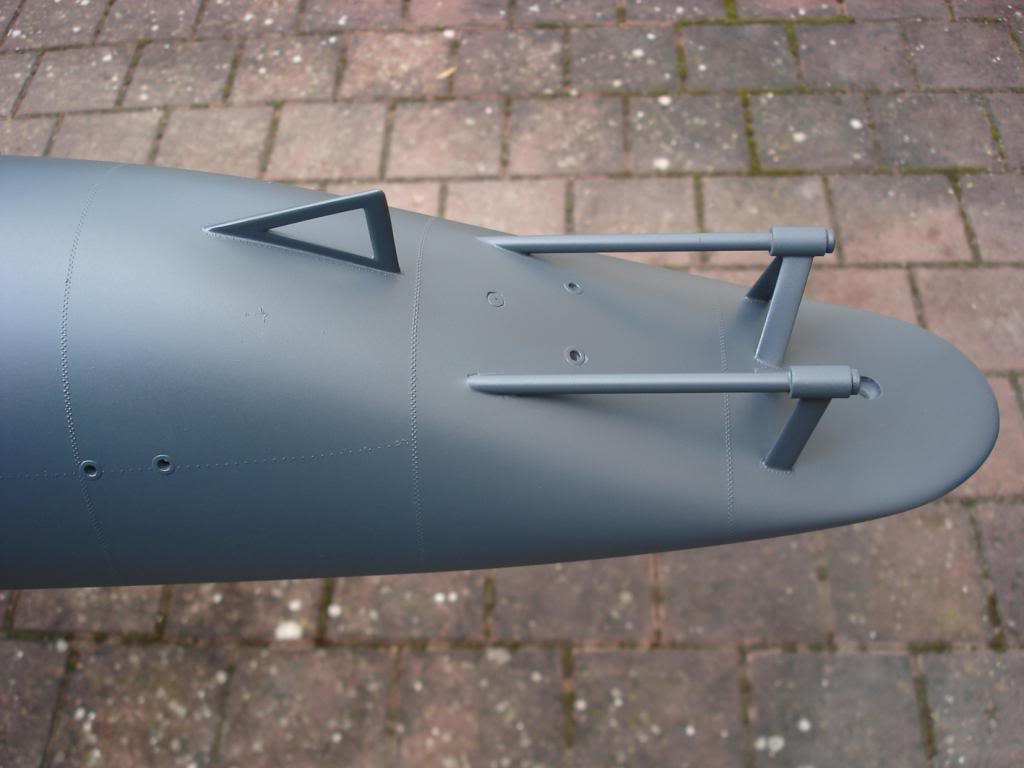
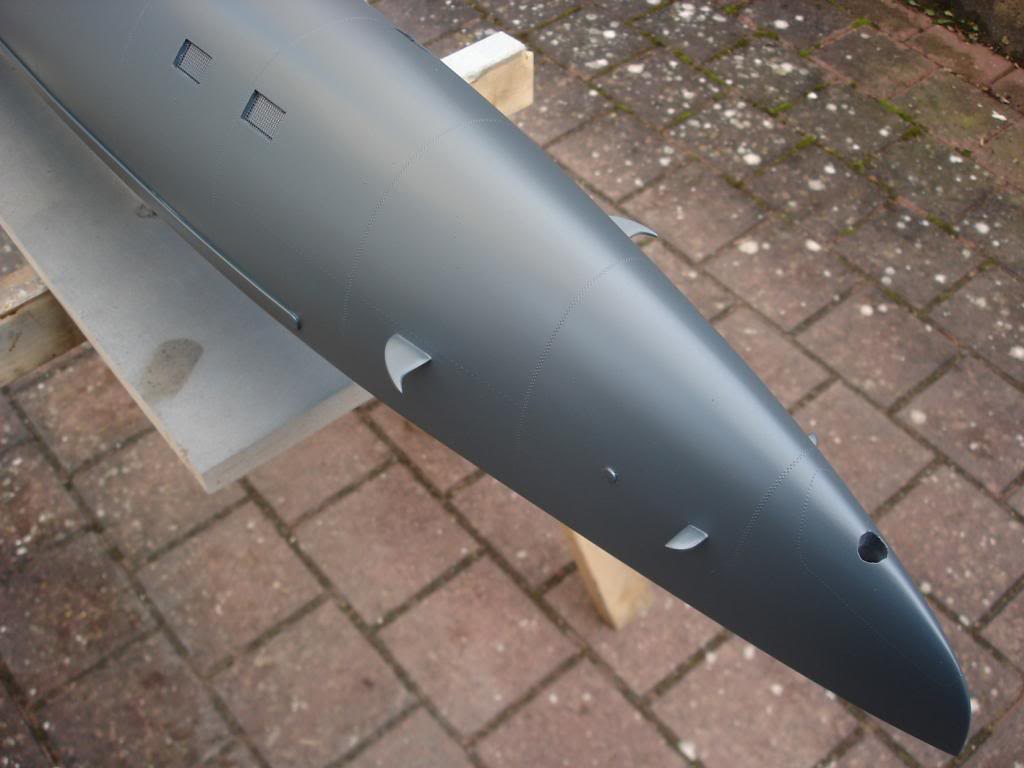
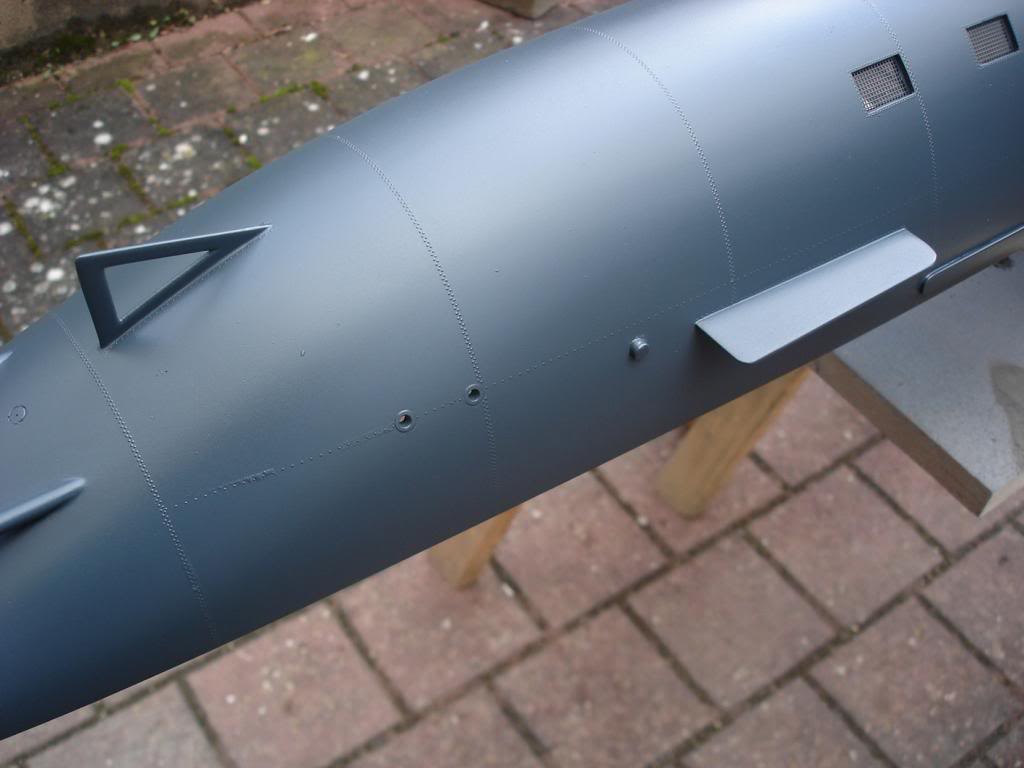
Lower hull is painted in RAL7016. Turned out good and the rivets look nice....





Tom(ADMIN)- AMS Forum Owner
- Posts : 3026
Join date : 2010-11-05
Age : 64
Location : Nevada, USA
Superb work, sir...absolutely superb. My congratulations...
Richard
Richard

Giovanni LiCalsi- Guest
- Posts : 170
Join date : 2010-11-15
Age : 74
Location : Alameda, California, USA
Beautiful craftsmanship!

Dr.Schmidt- Guest
- Posts : 171
Join date : 2013-03-20
Location : Germany, Bavarya
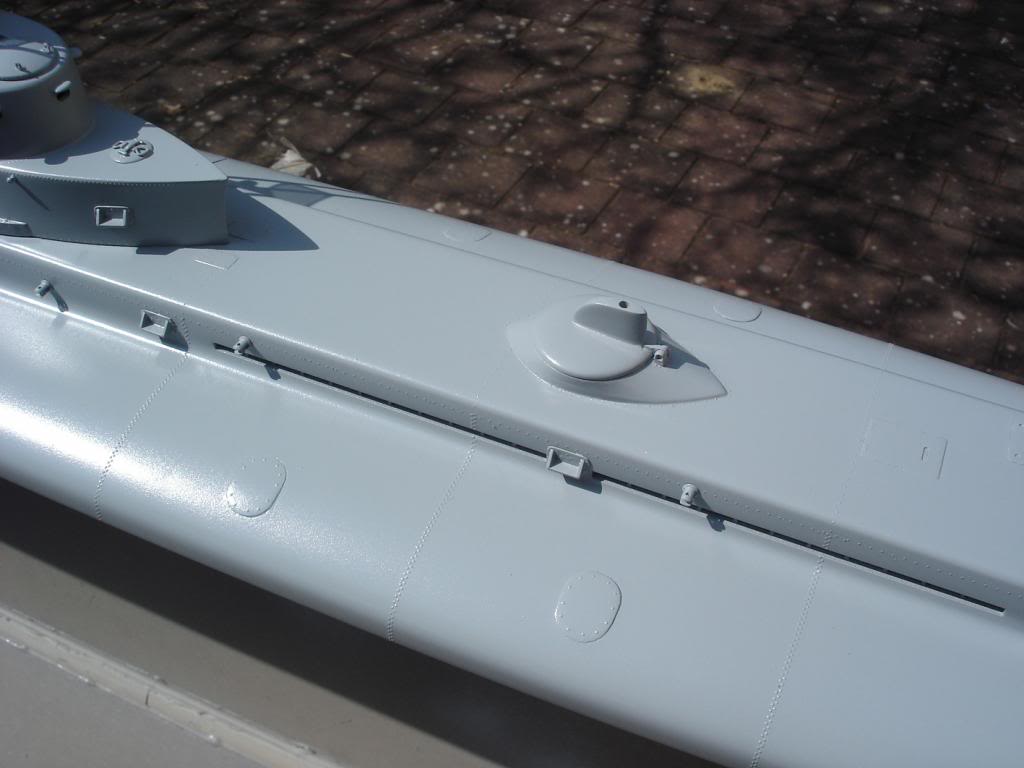
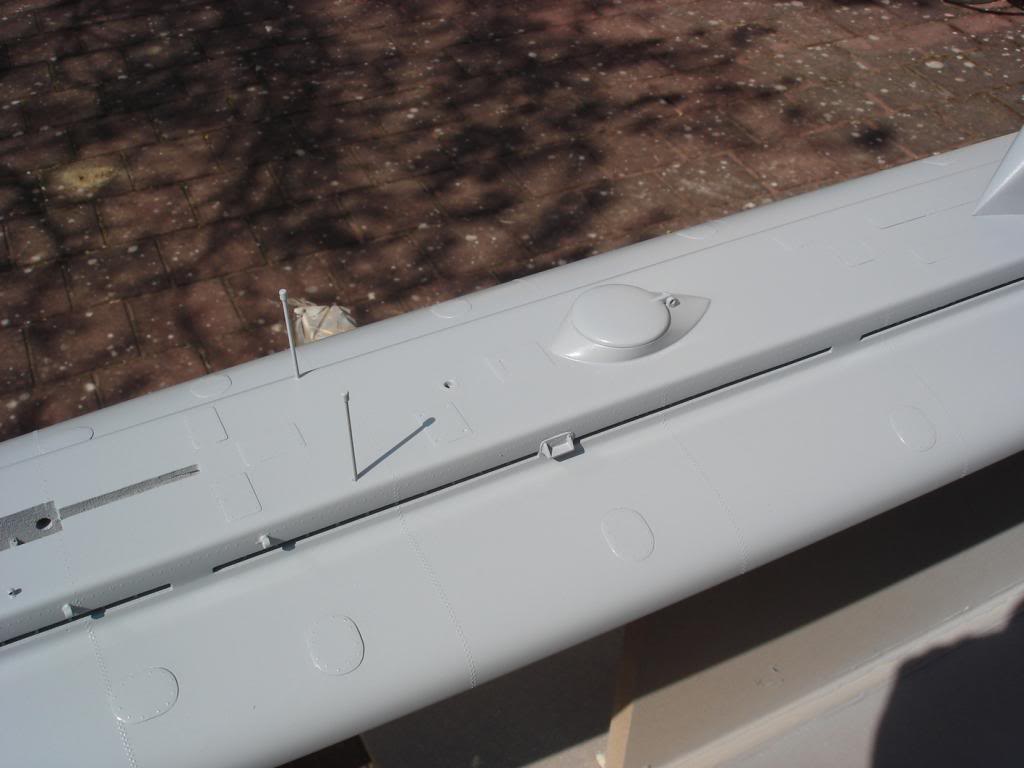
O.K., I have a few weeks of filling, grinding, applying details and rivets and cleaning behind me, and yesterday we finally could paint the upper hull in RAL7001. Here are the first impressions. I'm rather pleased.


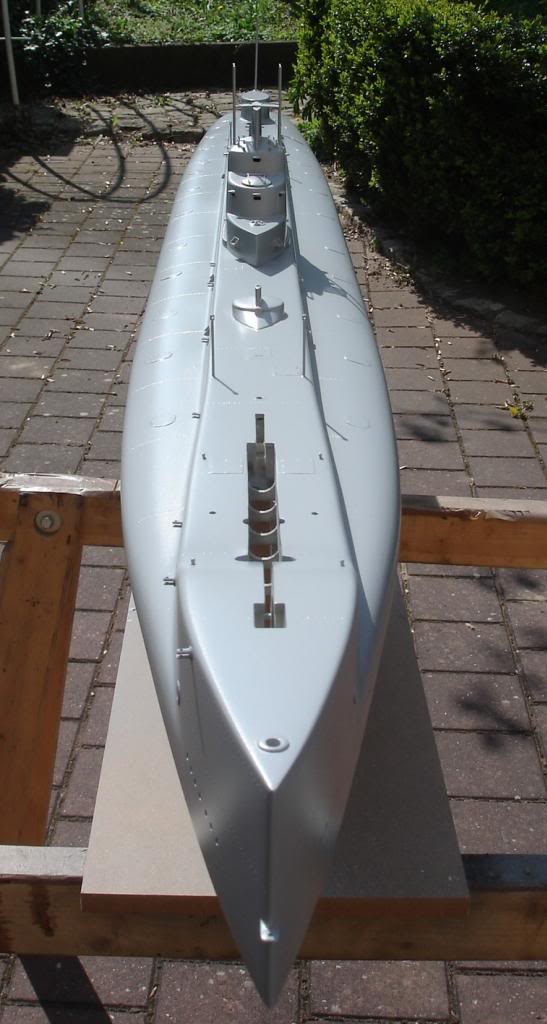

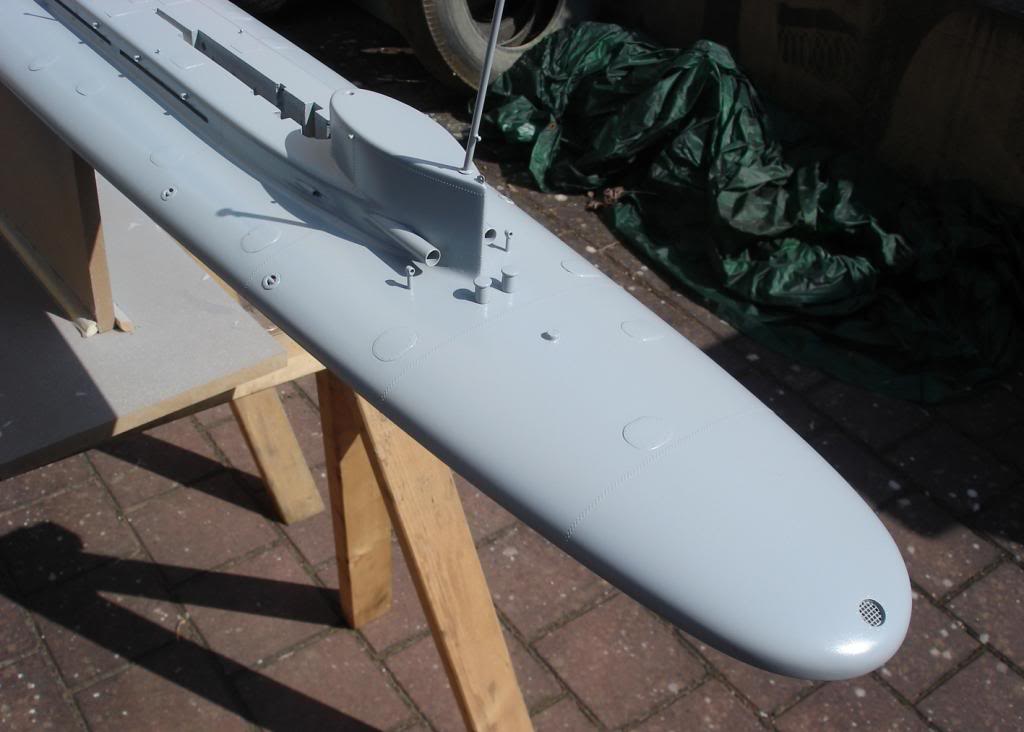


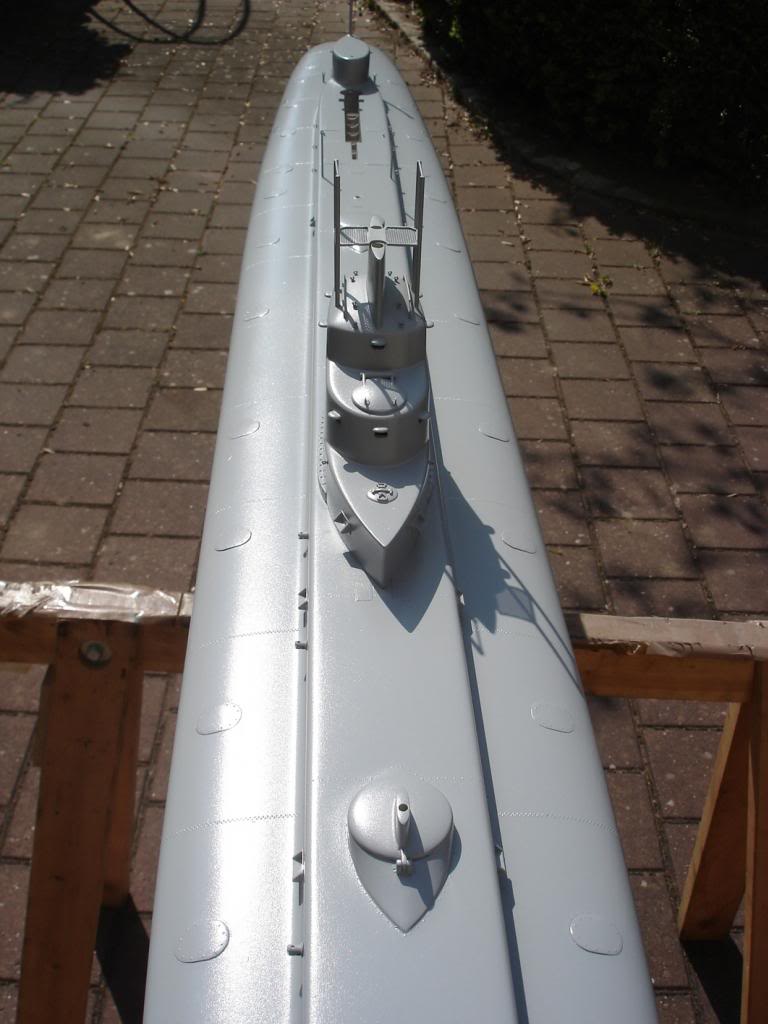


And of course we have to look at the assembly as well........puts a smile on my face :D


And of course we have to look at the assembly as well........puts a smile on my face :D


david f- AMS Treasurer
- Posts : 2406
Join date : 2010-11-10
Age : 73
Location : Cumbria
That looks lovely!
David
David

Dr.Schmidt- Guest
- Posts : 171
Join date : 2013-03-20
Location : Germany, Bavarya
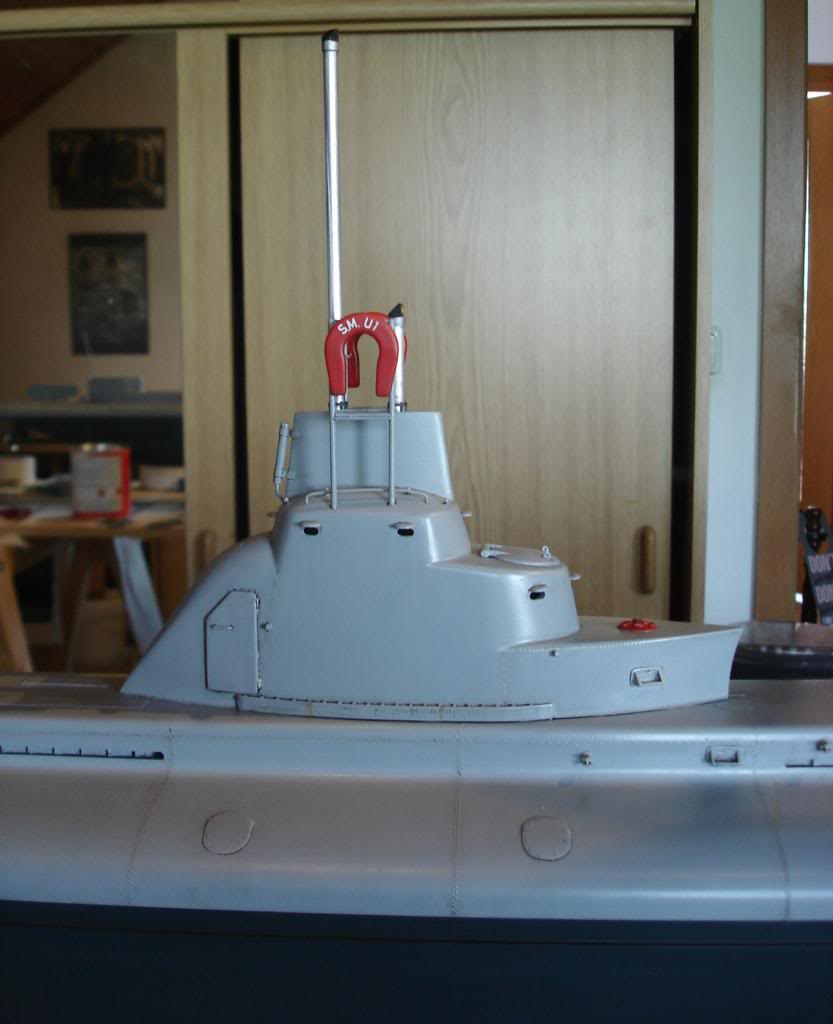
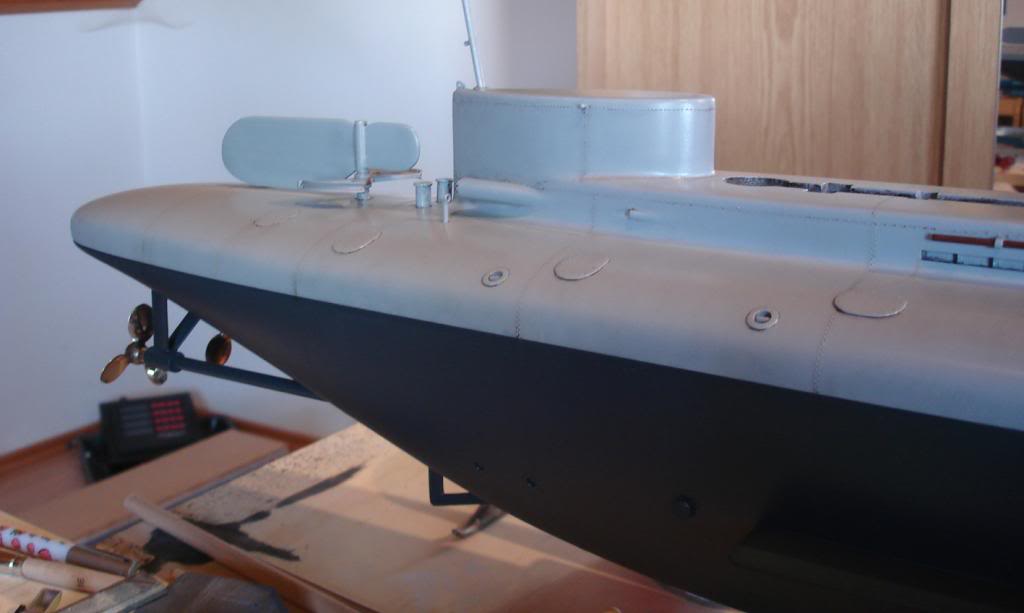
O.K., spent two weeks with filters and washings to weather the upper hull. I did a subtle job and on the photos it looks even more subtle. I'm not a big fan of weatherings that look like the bot got sunk five times. I hope the washings and filters will go well together with the acrylic clear coat I'm going to apply next. Well, we'll see. Next is the weathering of the lower hull. As it is les detailed, it should be a quicker job than the upper hull.



salmon- AMS Forum Owner
- Posts : 312
Join date : 2011-09-02
Age : 64
Location : Las Vegas, Nevada - USA
Came out VERY nice!
_________________
If you can cut, drill, saw, hit things and swear a lot, you're well on the way to building a working model sub.

profesorul- Guest
- Posts : 386
Join date : 2011-07-03
Age : 59
Location : Bucuresti, ROMANIA
ABSOLUTELY SUPERB WORK . CONGRATULATION and PLEASE Don't stop here .
MARIUS
P.S. What happened to the FORUM ?!
MARIUS
P.S. What happened to the FORUM ?!

Dr.Schmidt- Guest
- Posts : 171
Join date : 2013-03-20
Location : Germany, Bavarya
And on we go.....the machine frame is ready.Here some pictures. Just the receiver, gaskets and bellows, and then I can check if everything is watertight.
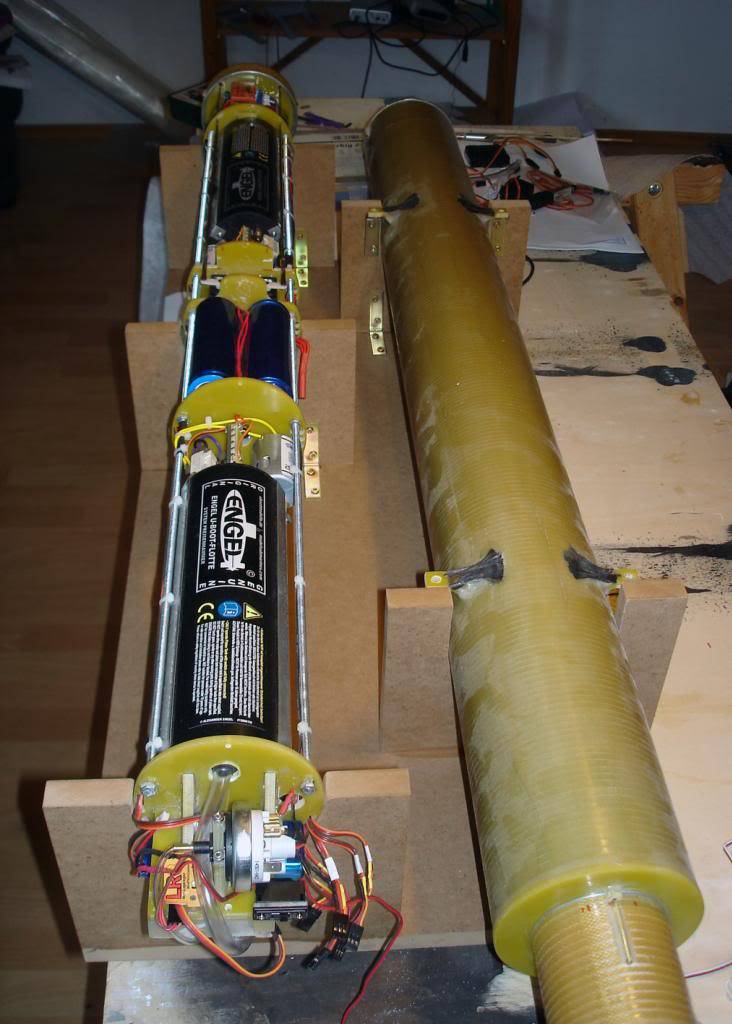

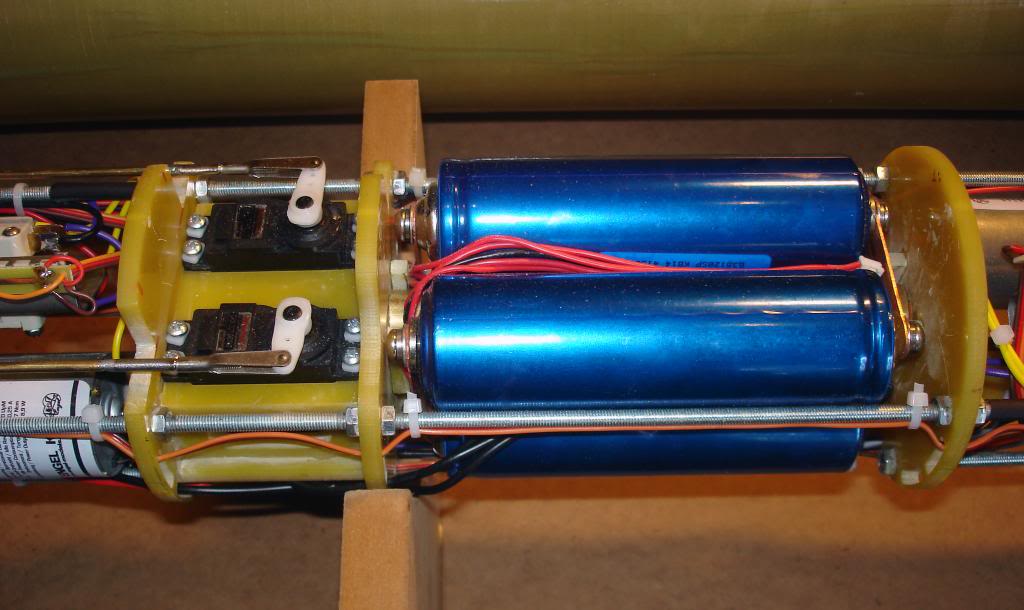
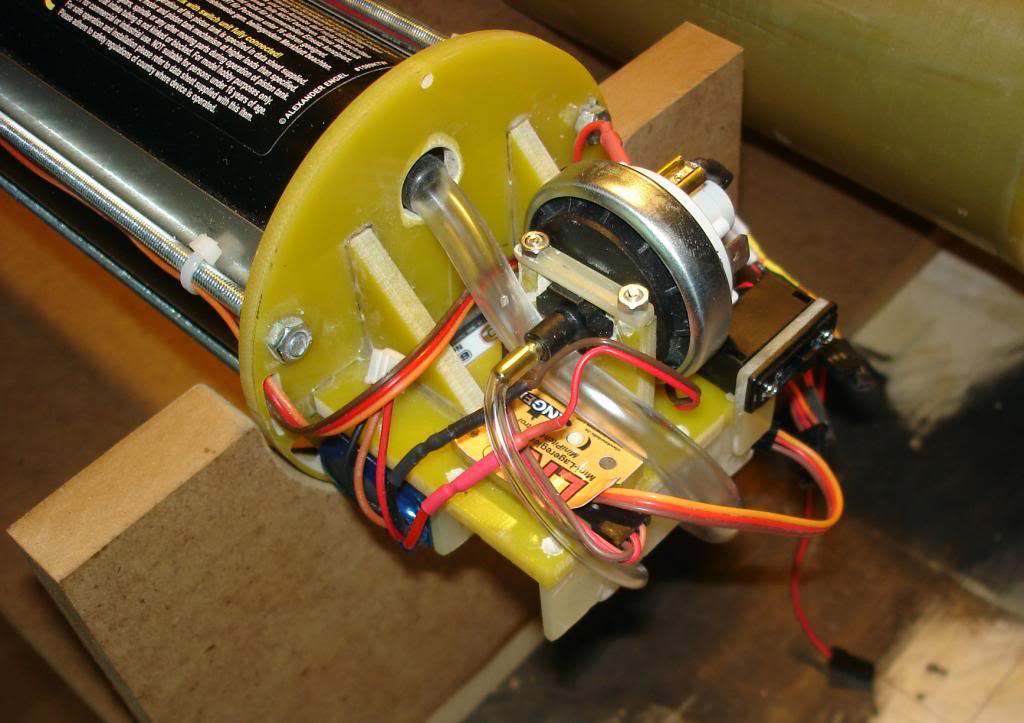
Also additional work on the upper hull. Finished the mechanics to extend the snorkels and the chain drive of the upper rudder. The snorkels are actuated via a Firgelli linear servo which is located in an watertight compartment below the conning tower.
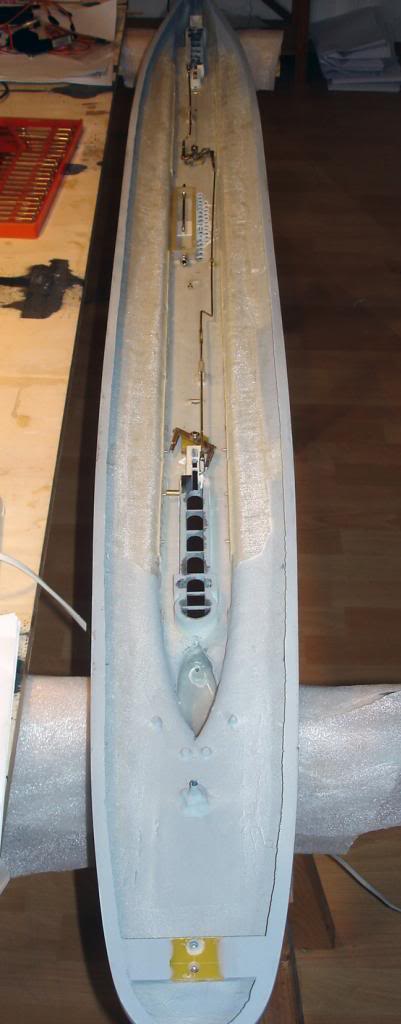

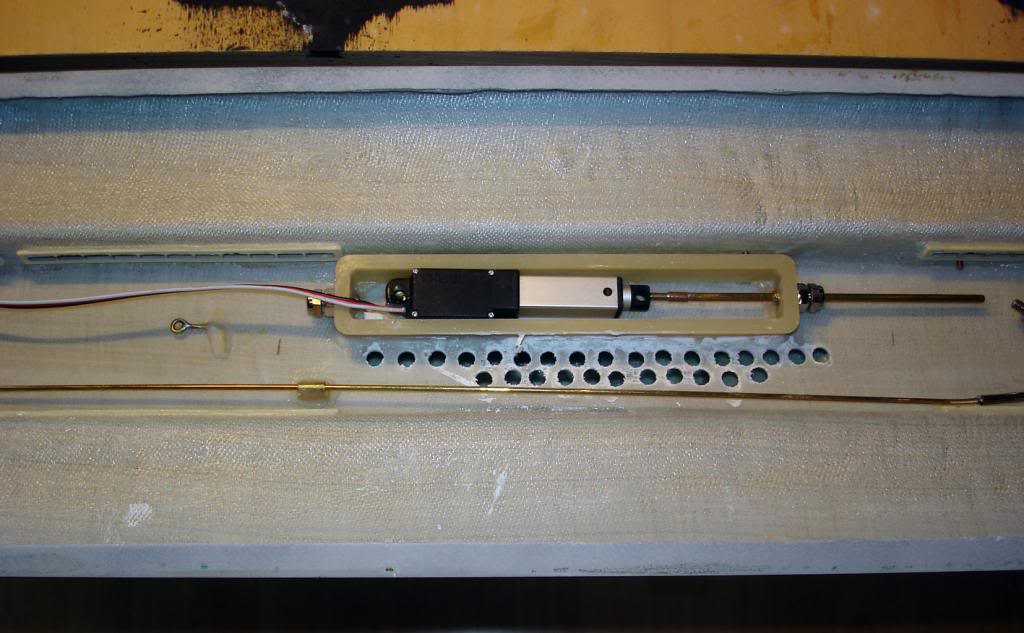
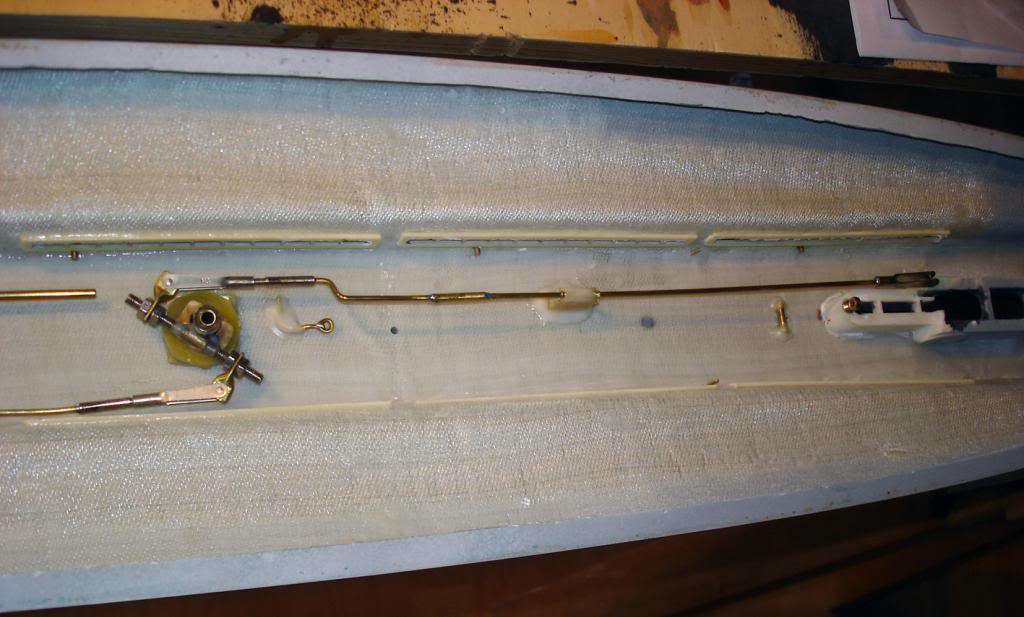


Also additional work on the upper hull. Finished the mechanics to extend the snorkels and the chain drive of the upper rudder. The snorkels are actuated via a Firgelli linear servo which is located in an watertight compartment below the conning tower.


Dr.Schmidt- Guest
- Posts : 171
Join date : 2013-03-20
Location : Germany, Bavarya
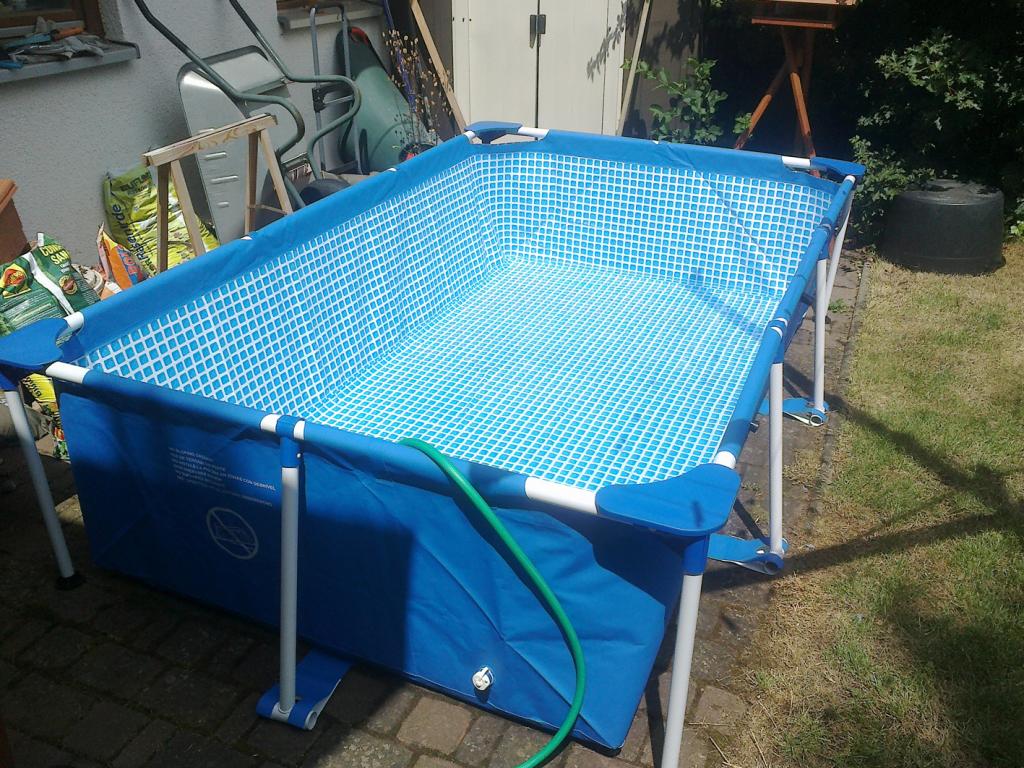
Well, the submarine test pool has been installed :D
And the first tests of the WTC have been performed. So far everything works fine. Tomorrow I'll conduct a harder test program.....
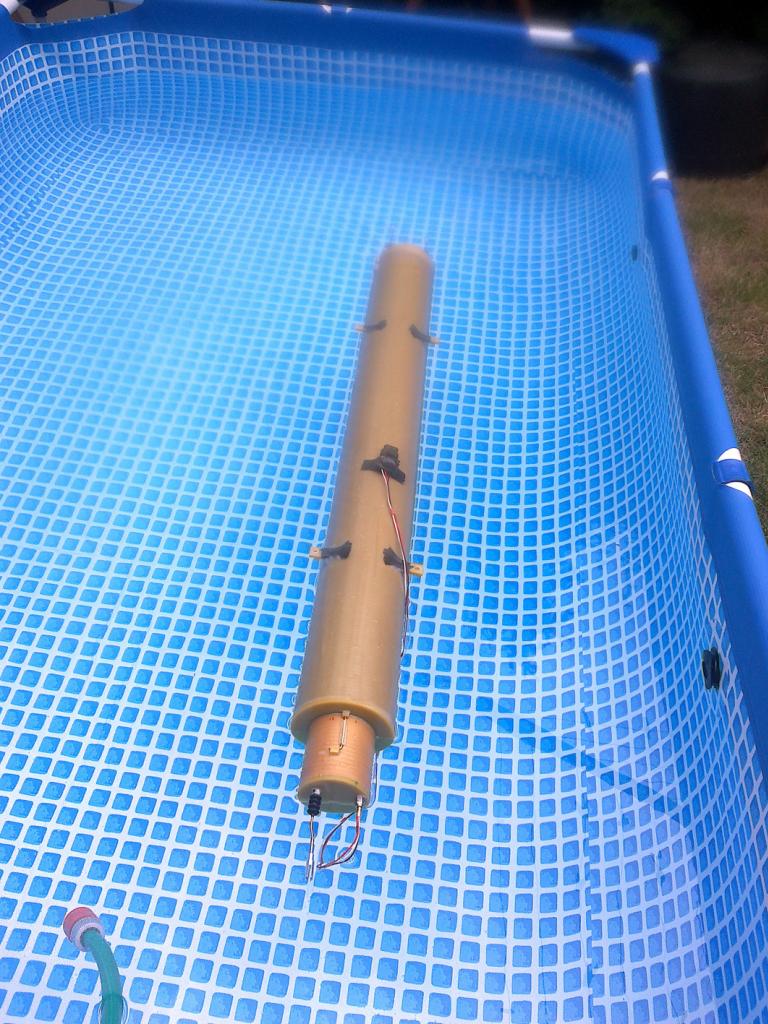

And the first tests of the WTC have been performed. So far everything works fine. Tomorrow I'll conduct a harder test program.....


david f- AMS Treasurer
- Posts : 2406
Join date : 2010-11-10
Age : 73
Location : Cumbria
Really nice! I'm even impressed by your test tank!
David
David

Dr.Schmidt- Guest
- Posts : 171
Join date : 2013-03-20
Location : Germany, Bavarya
Works a treat for 65€...

Dr.Schmidt- Guest
- Posts : 171
Join date : 2013-03-20
Location : Germany, Bavarya
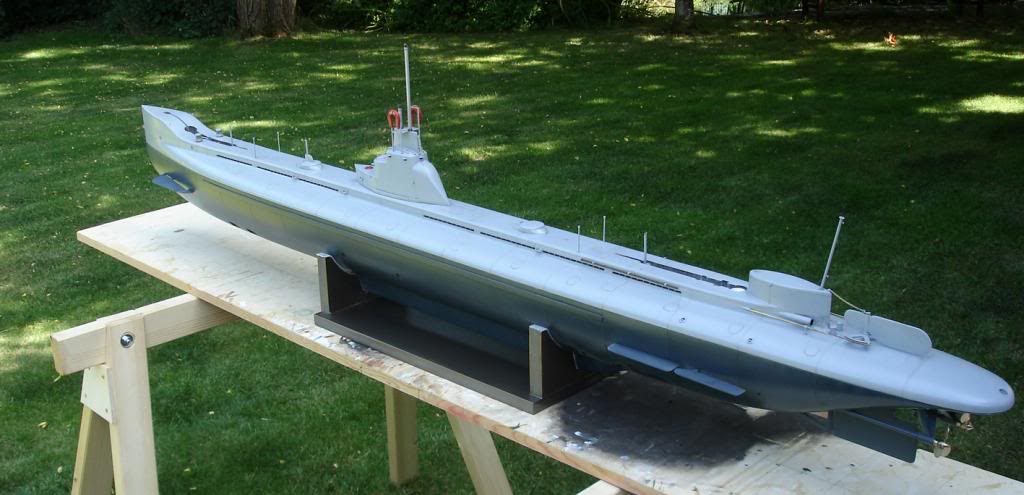
O.K.: The boat is almost ready. Only some ropes are missing, but for handling reasons those will be added later. Next is the balancing of the boat. So here some photos:

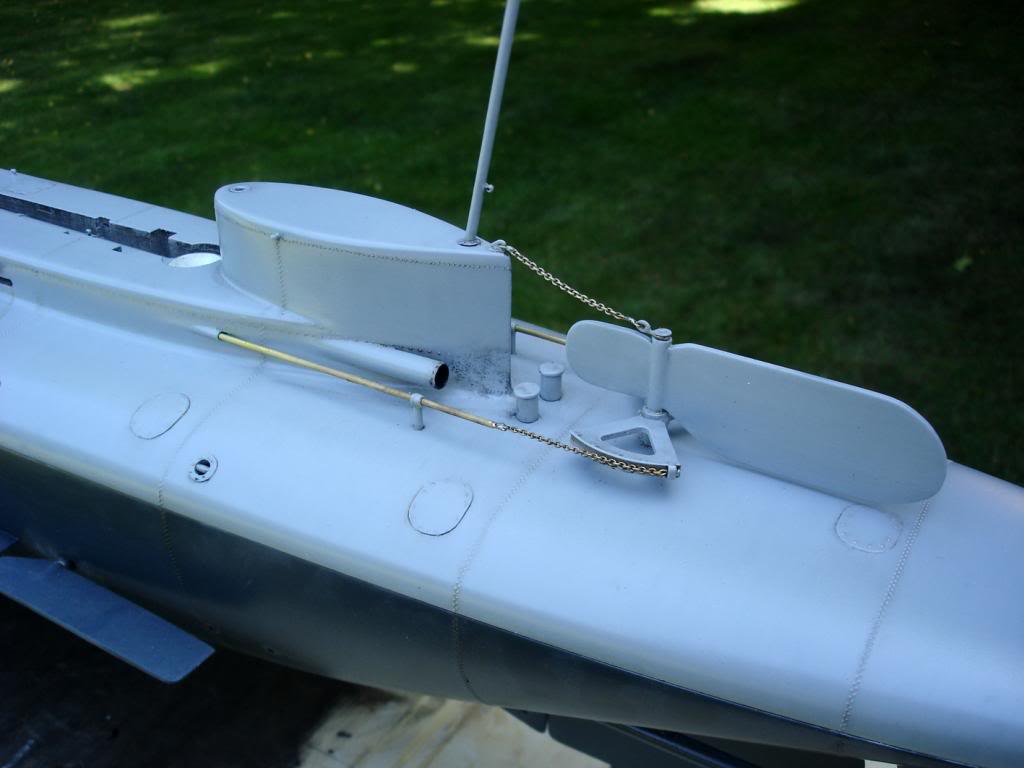
The upper rudder is driven by the main rudder and thereby also drives the push rods and chain drives that used to actuate the rudder in the original:
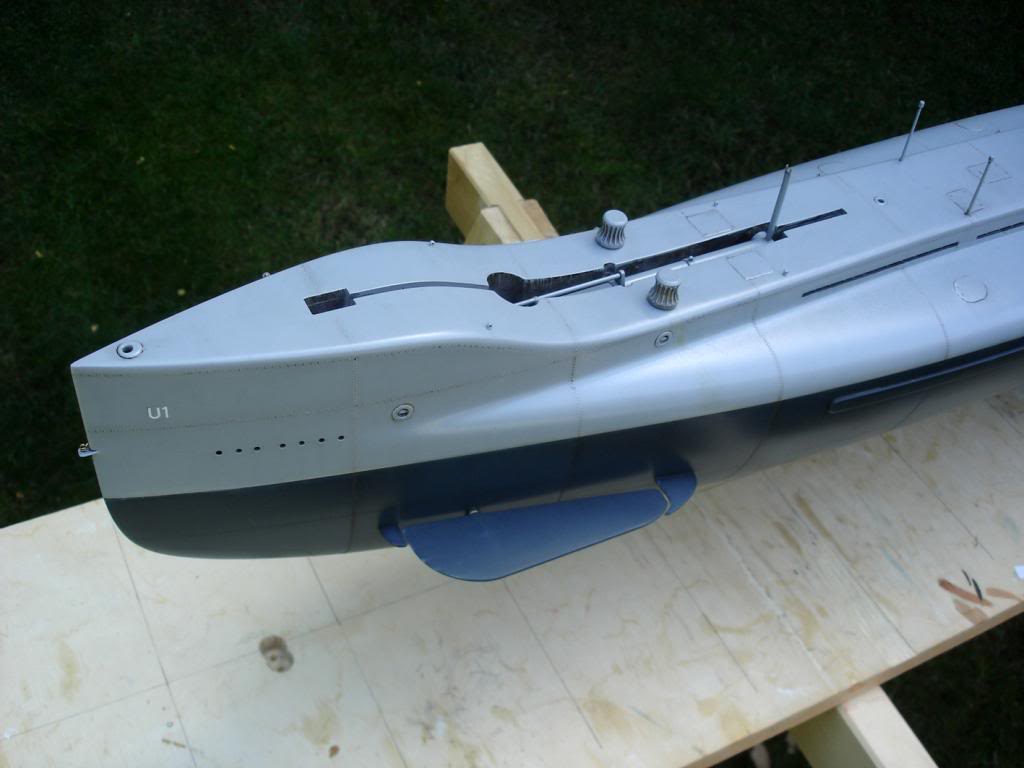
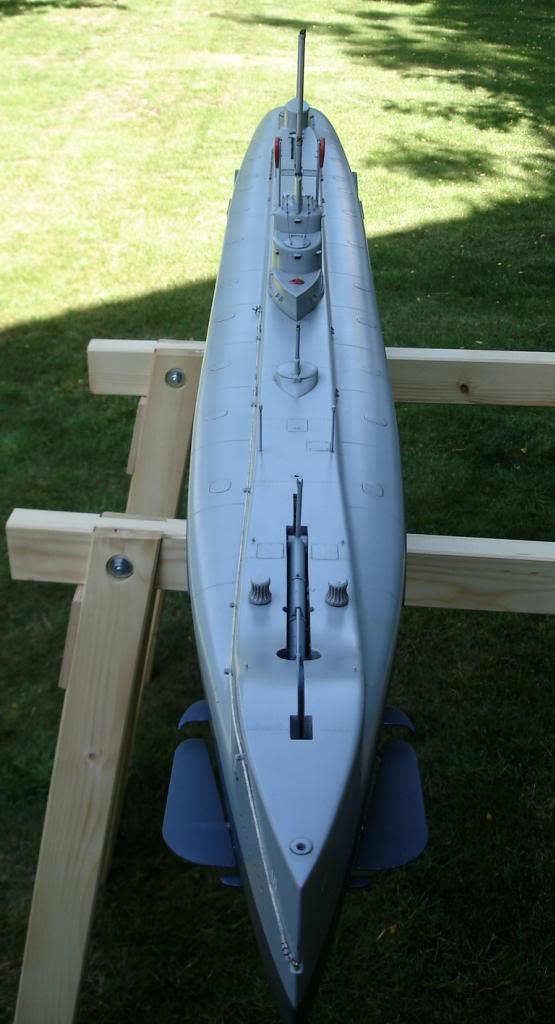
The snorkels can be extended and retracted by a linear servo:




The upper rudder is driven by the main rudder and thereby also drives the push rods and chain drives that used to actuate the rudder in the original:

The snorkels can be extended and retracted by a linear servo:


david f- AMS Treasurer
- Posts : 2406
Join date : 2010-11-10
Age : 73
Location : Cumbria
Very nice!
It is interesting to see how smooth and uncluttered the original design was. The clutter came later before the British R class and the German Type XXI cleared it away again.
David
It is interesting to see how smooth and uncluttered the original design was. The clutter came later before the British R class and the German Type XXI cleared it away again.
David

Dr.Schmidt- Guest
- Posts : 171
Join date : 2013-03-20
Location : Germany, Bavarya
That's one of the reasons I wanted to build the modell. The U-1 was a real nice and smooth design. Very elegant.

Dr.Schmidt- Guest
- Posts : 171
Join date : 2013-03-20
Location : Germany, Bavarya
Adding buoyancy via pu foam did the Job. First time the boat floats on even keel and at the right water line.


Dr.Schmidt- Guest
- Posts : 171
Join date : 2013-03-20
Location : Germany, Bavarya
Click to see the video!
The snorkels are working and the AMP Superseal connector works, too. The boat dives reliably and can sensitively be trimmed using the proportional tank control of the Engel tanks. Some minor adjustments and then I have to answer a question that I had pushed away since now.....where to do the first real test run.



» Futaba -868/915mhz equipment
» Darnell type 21 submarine, need some help
» Robbe Seawolf V2
» bladder bags
» WW2 mini sub build
» Peral Submarine of 1888
» U-Boat R/C?
» Cheap Arduino Auto leveler