


I have now cleaned up the 2 halves, using one of the handles that takes a hacksaw blade, using a full size hacksaw I found I couldn't get close to the line, but a blade in a handle is OK, though the blade does bend if it snags as youre pushing.

I held the 2 halves together using masking tape, though I know that some suggest putting them back into the mould to hold the halves together. I then used a lot of resin internally followed by pre-wetted 50mm woven tape which was very fiddly right up in the bow and stern areas. I did do the taping in several lengths especially at the ends, to make things a bit easier, but in general not too bad.

When I took of the masking tape I wasn't entierly supprised to find voids in the joints in places as I knew the 2 halves didn't have that good a fit, not sure if that was because the hull haves had warped or just poor cutting to the line.
I wanted to fit the prop & shaft before making the stern fins to ensure that the rudder & 'plane hinges cleared the prop, but I had decide to make a stern bearing rather than use a commercial prop shaft assembly, as I wanted to give plenty of bearing surface and I didn't need the shaft sealing and wasn't sure about the brass-resin bonding. The bearing was based on an M12 x 30mm bolt bored for a 5mm shaft (I used the shaft from a standard prop shaft, just not the outer). I machined 4 countersink dimples on the threaded part which when embedded in resin should stop the bearing rotating, even if the fixing becomes loose. I had to ease the bore a bit as well, as either the shaft was a tad oversize or the drill a tad under.
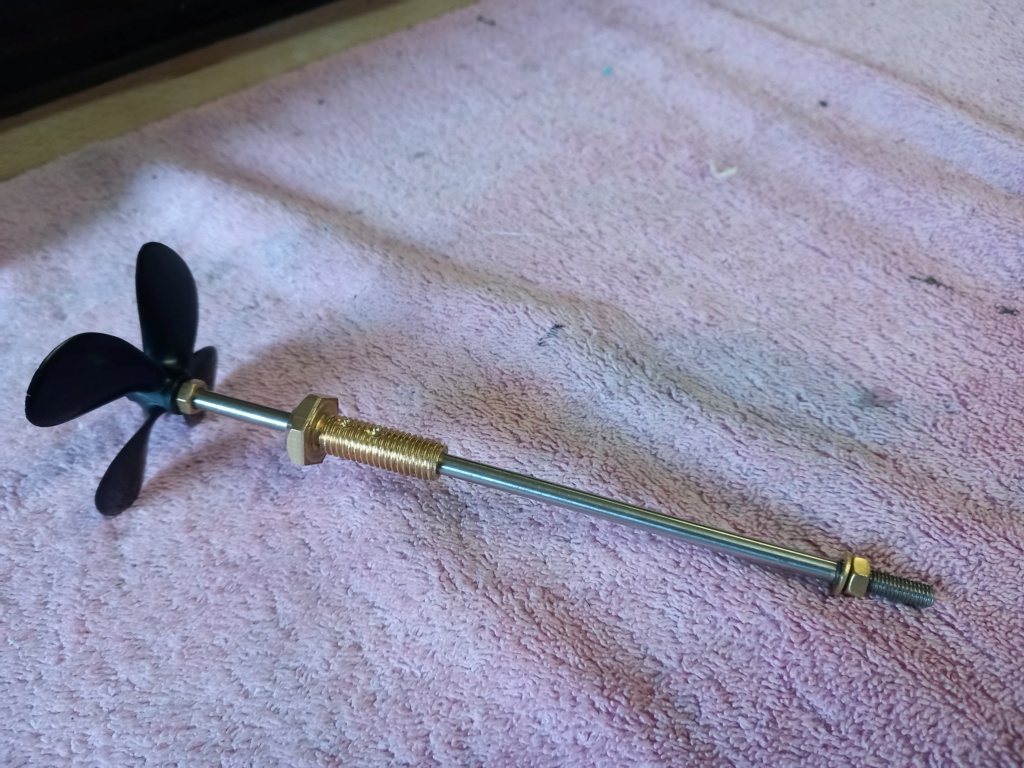
The shaft is a standard 6" x M5 with a 70mm dia 4 bladed prop, about the biggest I could get. Eventually it will need a collar on the inside to take the reversing thrust.
I fixed the bearing to the hull using resin loaded with glass micro-balloons (basically look like a white powder) added after the resin & catalyst were mixed, with enough added to make a thicker paste that would stay in place a bit better.
I used 2 batches, the first to fill in the gaps between the hull halves (on the outside) and the 2nd to 'pour' into the hull to retain the bearing. I did use masking tape again to hold the bearing in place, with an inner block to keep the shaft straight, but it leaked so I had to hold the bearing by hand with the hull on end untill it cured sufficiently to stay in place - tedious and a bit messy.
Once rubbery I could cut off most the excess with a sharp craft knife, including freeing the shaft from the bearing that had stuck due to the leakage.
Mixing small batches of resin (50ml & 25ml) even with a syringe to add catalyst seems a bit hit and miss, but I had no problems with the resin not curing using 1% (by volume) catalyst in an unheated garage.

I'm quite pleased with the way the resin has filled the end of the hull, though where I poured it it is a bit obvious.

It's now starting to look like something nautical!
I might add an inboard shaft bearing for additional support, and if I was doing it again I would think about recssing the bearing into the hull as it looks a bit ugly due to the gap between the end of the hull and the actual propeller. I could have used the supplied outer tube, but it is so smooth I was woried about it bonding and there wasn't enough material to go machining lumps out of it. Maybe solder a tappered perforated metal plate next time as it would obviate the need for an additional inboard bearing.
The next job is to tidyup the outer before starting on the fins.


» Futaba -868/915mhz equipment
» Darnell type 21 submarine, need some help
» Robbe Seawolf V2
» bladder bags
» WW2 mini sub build
» Peral Submarine of 1888
» U-Boat R/C?
» Cheap Arduino Auto leveler