Who is online?
In total there are 31 users online :: 0 Registered, 0 Hidden and 31 Guests
None
Most users ever online was 180 on Tue Nov 05, 2019 6:03 am
Latest topics
Search
Most Viewed Topics
Statistics
Our users have posted a total of 12476 messages in 1986 subjects
We have 1017 registered users
The newest registered user is Bazdiving
Similar topics
+3
profesorul
acrowot (Geof)
Tom(ADMIN)
7 posters
The Dragonfish revisited.

tattooed- AMS member
- Posts : 340
Join date : 2011-05-16
Age : 60
Location : Bristol
- Post n°26
 Re: The Dragonfish revisited.
thanks rich that will be a great help

Tom(ADMIN)- AMS Forum Owner
- Posts : 3026
Join date : 2010-11-05
Age : 64
Location : Nevada, USA
- Post n°27
 Re: The Dragonfish revisited.
So far, they seem to be pretty good Geoff, there's not too much friction in them, and they seem not to load the servos too much. Like I say, if they don't work too well, it's a simple job to retrofit a set of bellows over them.
I really should get round to doing a full immersion test, and see what happens after an hour or so underwater.
Andy..how much O ring cord do you need, mate?
I really should get round to doing a full immersion test, and see what happens after an hour or so underwater.
Andy..how much O ring cord do you need, mate?

Tom(ADMIN)- AMS Forum Owner
- Posts : 3026
Join date : 2010-11-05
Age : 64
Location : Nevada, USA
- Post n°28
 Re: The Dragonfish revisited.
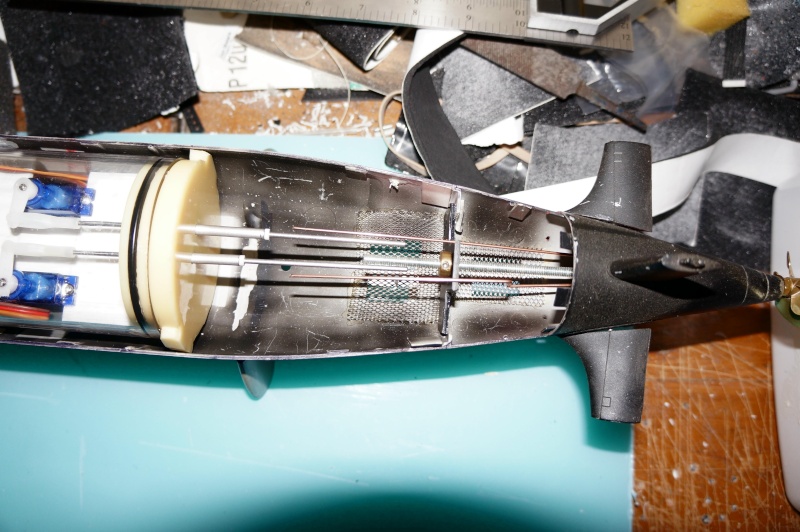
I hadn't really noticed just how close things were in the stern section until just now...looks as though some fiddley wire bending will be needed.


Tom(ADMIN)- AMS Forum Owner
- Posts : 3026
Join date : 2010-11-05
Age : 64
Location : Nevada, USA
- Post n°29
 Re: The Dragonfish revisited.
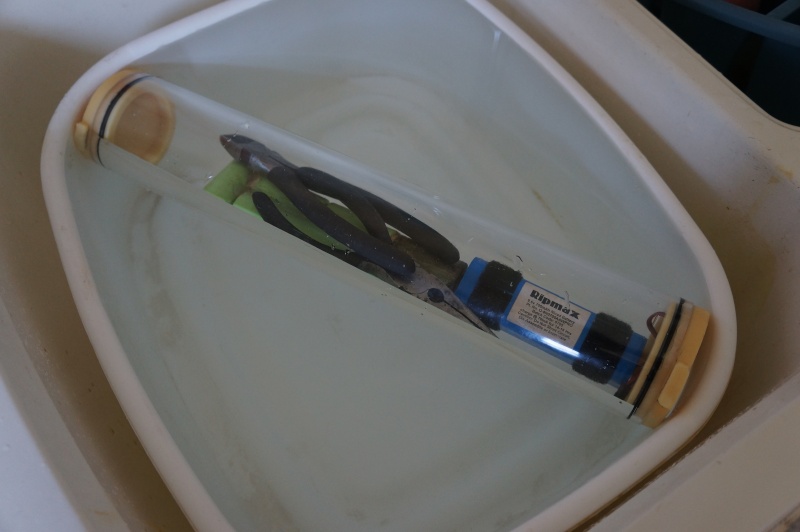
Initial immersion tests on the wtc commenced this morning at 0930hrs...I'm surprised just how bouyant the thing is! And don't panic, the battery packs are dead, I just keep them for this very purpose. Another ten minutes, and I'll submerge it fully.


Tom(ADMIN)- AMS Forum Owner
- Posts : 3026
Join date : 2010-11-05
Age : 64
Location : Nevada, USA
- Post n°30
 Re: The Dragonfish revisited.
Memo to oneself...must remember to clean the washing up bowl when I'm done...

Tom(ADMIN)- AMS Forum Owner
- Posts : 3026
Join date : 2010-11-05
Age : 64
Location : Nevada, USA
- Post n°31
 Re: The Dragonfish revisited.
I reckon that'll do...fifteen minutes at half immersed, then fifteen minutes totally immersed. Not a drop of water inside, dry as a gorilla's armpit. I'm well pleased with that...onwards and upwards now.

Tom(ADMIN)- AMS Forum Owner
- Posts : 3026
Join date : 2010-11-05
Age : 64
Location : Nevada, USA
- Post n°32
 Re: The Dragonfish revisited.
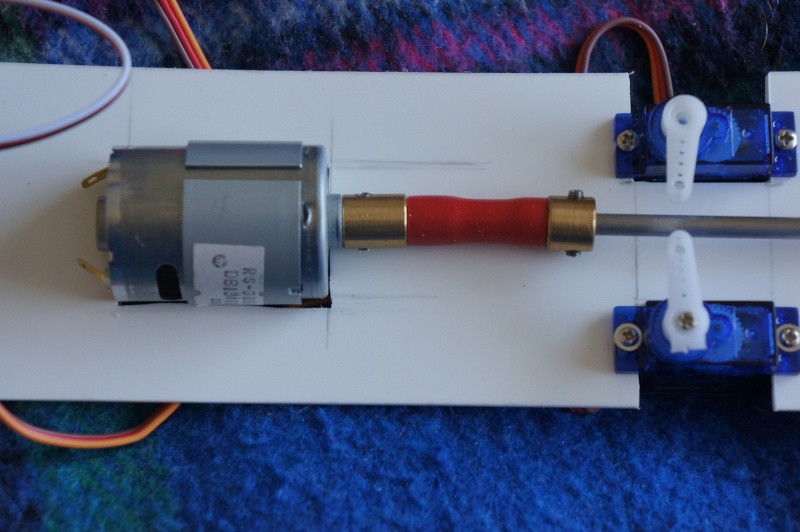
Cut the slot in the radio tray to take the motor, a Como 385...very low drain and very high torque, should be ok with that big prop on.
Just got to work out how to secure the motor to the tray, and that's another job done.
Just got to work out how to secure the motor to the tray, and that's another job done.


acrowot (Geof)- Guest
- Posts : 158
Join date : 2011-01-21
Age : 53
Location : chessington surrey
- Post n°33
 Re: The Dragonfish revisited.
i had better get my skates and stop messing around on my motorcycle the speed your going mines going slow in comparison
when you checked for leaks did you take the push rods out?
one other question is are you going to hold the end caps on with anything or just relying on the friction of the oring to stop the end caps coming of.
geof
when you checked for leaks did you take the push rods out?
one other question is are you going to hold the end caps on with anything or just relying on the friction of the oring to stop the end caps coming of.
geof

Tom(ADMIN)- AMS Forum Owner
- Posts : 3026
Join date : 2010-11-05
Age : 64
Location : Nevada, USA
- Post n°34
 Re: The Dragonfish revisited.
Yea, c'mon mate..get stuck into it! We want to see it on the water!
My watertight tests were done minus the push rods, I just stuck a length of plastic insulating tape over the holes, I wanted to start from the bottom up, so to speak, and make sure that the wtc is watertight before I start to add anything, that way I have dry base to start from and it should be easier to identify any leaks in the future.
My end caps will just be secured by a good fit and a layer of vaseline, there's no pressure changes in the tube, so the old 'threaded rod and lock nuts' approach shouldn't be needed. I hope...

Tom(ADMIN)- AMS Forum Owner
- Posts : 3026
Join date : 2010-11-05
Age : 64
Location : Nevada, USA
- Post n°35
 Re: The Dragonfish revisited.
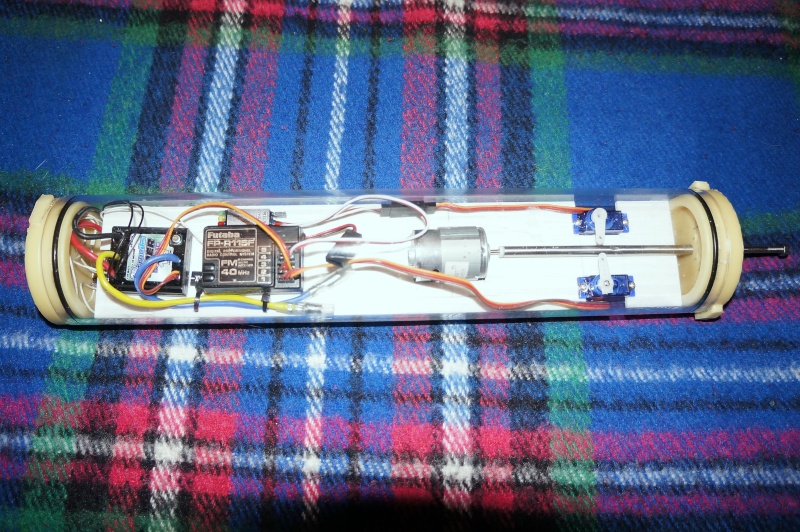
Nothing on the tv, so that equates to me to building time..just drilled out the end cap and fitted the prop shaft tube. It needs to positioned properly, but I need the propshaft for that, and that's in the post. Still, it's one more little job done.


Tom(ADMIN)- AMS Forum Owner
- Posts : 3026
Join date : 2010-11-05
Age : 64
Location : Nevada, USA
- Post n°36
 Re: The Dragonfish revisited.
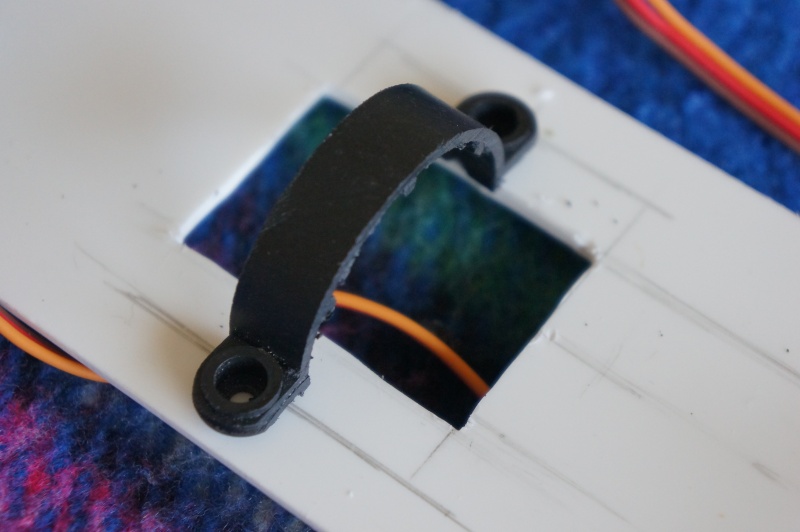
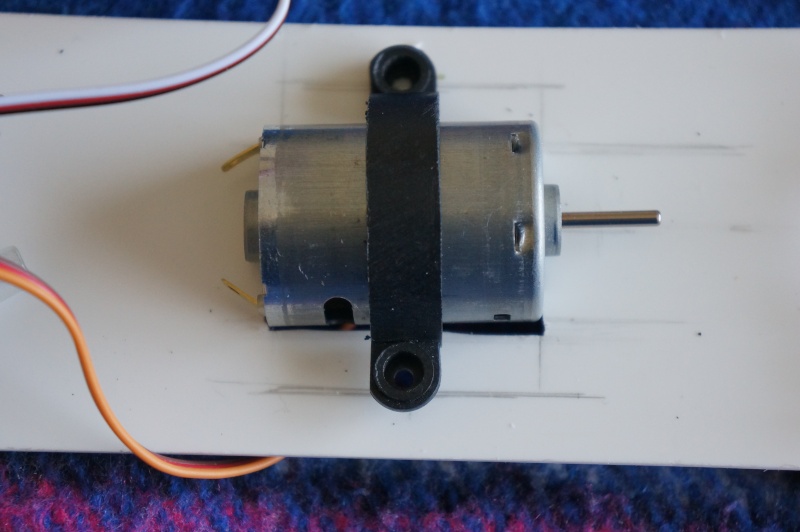
The motor mount problem is solved...took me all of ten minutes.
Take an old toy boat motor mount, couple of minutes with a razor saw, and cut away most of it...drill two holes, and reinforce the underside of the tray with two styrene strips. Just needs a run over with the wet n' dry now.
Job's a good'un...or it would be if I could find the two screws that I took out of the mount prior to cutting it up!


Tom(ADMIN)- AMS Forum Owner
- Posts : 3026
Join date : 2010-11-05
Age : 64
Location : Nevada, USA
- Post n°37
 Re: The Dragonfish revisited.
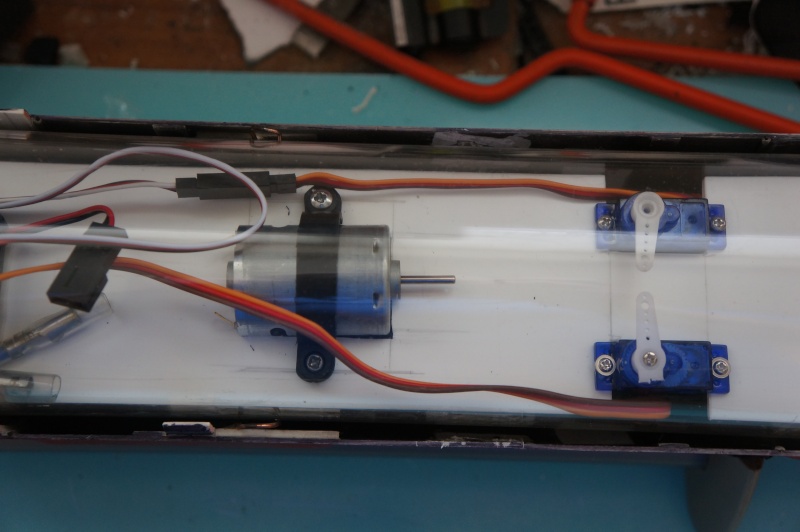
Job done..I never did find the two screws I took out of the mount though.


tattooed- AMS member
- Posts : 340
Join date : 2011-05-16
Age : 60
Location : Bristol
- Post n°38
 Re: The Dragonfish revisited.
looking good mate think i'll have to raid the stores at work to get you some supplies

Tom(ADMIN)- AMS Forum Owner
- Posts : 3026
Join date : 2010-11-05
Age : 64
Location : Nevada, USA
- Post n°39
 Re: The Dragonfish revisited.
I'm ok at the moment mate, but I do need some alloy tube...it needs to fit over a 2.3mm shaft, to make up the coupling.

tattooed- AMS member
- Posts : 340
Join date : 2011-05-16
Age : 60
Location : Bristol
- Post n°40
 Re: The Dragonfish revisited.
how long does it need to be mate

Tom(ADMIN)- AMS Forum Owner
- Posts : 3026
Join date : 2010-11-05
Age : 64
Location : Nevada, USA
- Post n°41
 Re: The Dragonfish revisited.
Oh blimey mate, I only need a couple of inches, just to increase the shaft diameter so it fits inside the coupling.

Tom(ADMIN)- AMS Forum Owner
- Posts : 3026
Join date : 2010-11-05
Age : 64
Location : Nevada, USA
- Post n°42
 Re: The Dragonfish revisited.
My problem is that the motor shaft only clears the tray by 1mm, so as I see it there's two options:
1: Cut a slot in the the tray from the end cap up to the motor, reinforce it from underneath, and use a conventional coupling.
2: Make up a rigid coupling from alloy tube.
Having sat and worked it out on paper, I've decided that it's going to be the slot in the tray method. That will allow me to use a conventional coupling maybe those small Graupner ones. All in all, I think this will be the better way, albeit a bit fiddly to start with to cut the slot out accurately, but with concentration and my painkillers working, I think it can be done.

Tom(ADMIN)- AMS Forum Owner
- Posts : 3026
Join date : 2010-11-05
Age : 64
Location : Nevada, USA
- Post n°43
 Re: The Dragonfish revisited.
I cut the slot in the tray this morning, and then discovered I'd made a major cock up..
I'd cut the slot too long, right up to the motor, so when I put the motor back in the tray to try it, it fell right through...gosh and bother it, I said. (or words to that effect..)
I've had to cut a tiny piece of styrene out and weld it back in the slot using plastic weld, so the front of the motor is supported again. Now it looks a right mess, so I've got some tidying and sanding to do...


acrowot (Geof)- Guest
- Posts : 158
Join date : 2011-01-21
Age : 53
Location : chessington surrey
- Post n°44
 Re: The Dragonfish revisited.
richard it will look fine when you put all the stuff back in any way cant see it under water ha ha

Tom(ADMIN)- AMS Forum Owner
- Posts : 3026
Join date : 2010-11-05
Age : 64
Location : Nevada, USA
- Post n°45
 Re: The Dragonfish revisited.
I'm glad you said that, Geoff...saved me a lot of work sanding!
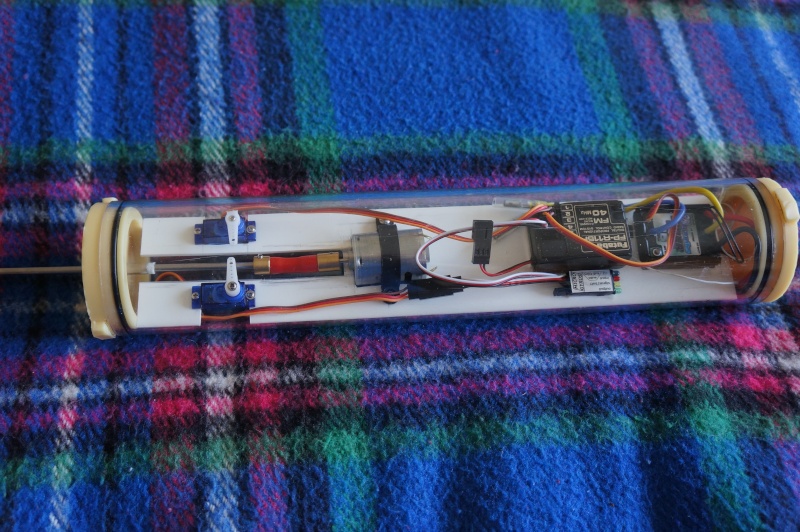
Here's the first attempt at repairing my cock up, with most of the equipment reinstalled...it's only now that I notice that the coupling between the motor and the stub shaft is misaligned, the hole has been drilled off centre, which has thrown everything out of line, it looks like a donkey's hind leg...dammed annoying. I've never really liked these type of couplings anyway, so it's going in the bin, and due to be replaced by a proper Huco or a Graupner jointed coupling when pension day arrives. Mind you, it would help if I'd have put the motor in straight, that makes it look even worse...think I'll go back to bed and start today again!
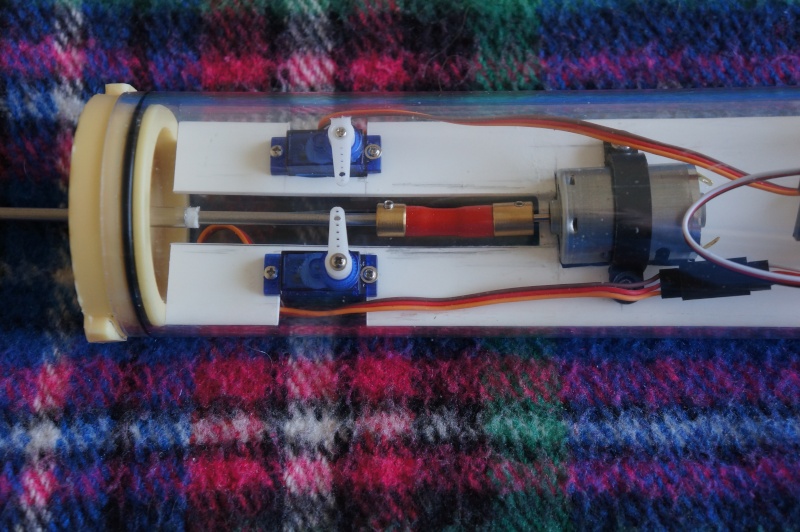
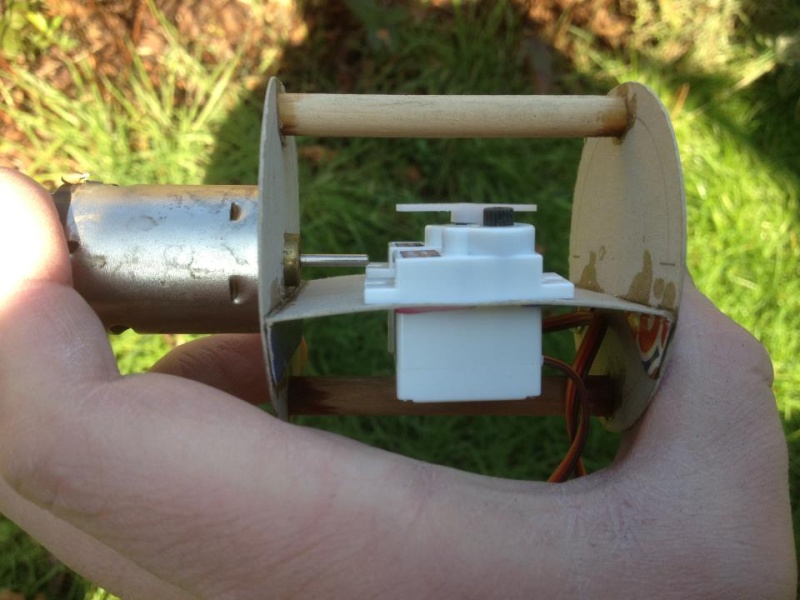
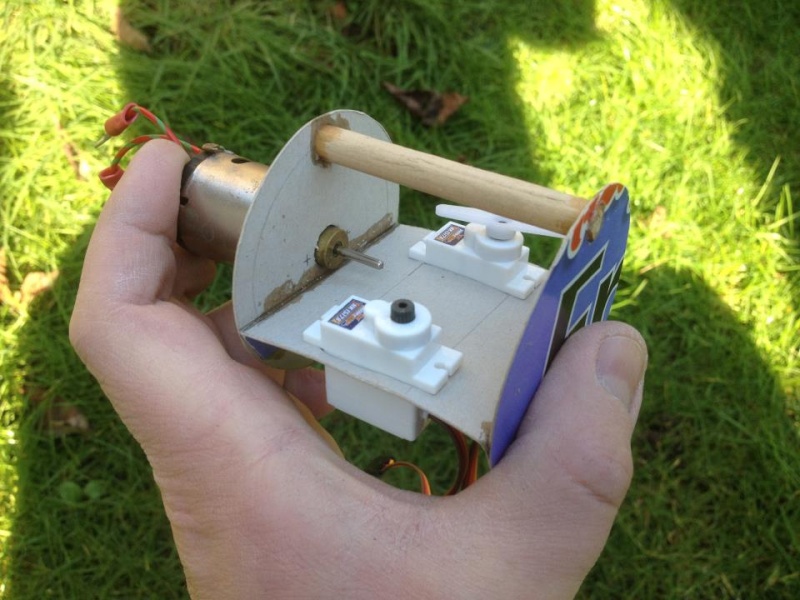
Then a kind soul on Facebook came up with this idea as part of a new tray, he's concerned that the repair might not be strong enough. This is a quick mock up using odds of carboard, but it gives you an idea of the design. It's very interesting, I'll have a go at making one up later, then I'll have one ready to go if my repair fails.
Here's the first attempt at repairing my cock up, with most of the equipment reinstalled...it's only now that I notice that the coupling between the motor and the stub shaft is misaligned, the hole has been drilled off centre, which has thrown everything out of line, it looks like a donkey's hind leg...dammed annoying. I've never really liked these type of couplings anyway, so it's going in the bin, and due to be replaced by a proper Huco or a Graupner jointed coupling when pension day arrives. Mind you, it would help if I'd have put the motor in straight, that makes it look even worse...think I'll go back to bed and start today again!


Then a kind soul on Facebook came up with this idea as part of a new tray, he's concerned that the repair might not be strong enough. This is a quick mock up using odds of carboard, but it gives you an idea of the design. It's very interesting, I'll have a go at making one up later, then I'll have one ready to go if my repair fails.


profesorul- Guest
- Posts : 386
Join date : 2011-07-03
Age : 59
Location : Bucuresti, ROMANIA
- Post n°46
 Re: The Dragonfish revisited.
HI RICHRD,
Don't wait until is going to break!.If you can,do it know those Motor Support.
That small joint on thickness of the material is TOO week if You ask me.Look great already!.
For me the most important part is HOW YOU DO the Rudder/Dive planes conection.
I have serious problem with my Seawolf regarding these.
MARIUS

acrowot (Geof)- Guest
- Posts : 158
Join date : 2011-01-21
Age : 53
Location : chessington surrey
- Post n°47
 Re: The Dragonfish revisited.
richard would a solid coupling help with lining up the motor and stub shaft then the coupling on the outside this is what i am doing to my uboat or am i barking up the wrong tree
geof
geof

Tom(ADMIN)- AMS Forum Owner
- Posts : 3026
Join date : 2010-11-05
Age : 64
Location : Nevada, USA
- Post n°48
 Re: The Dragonfish revisited.
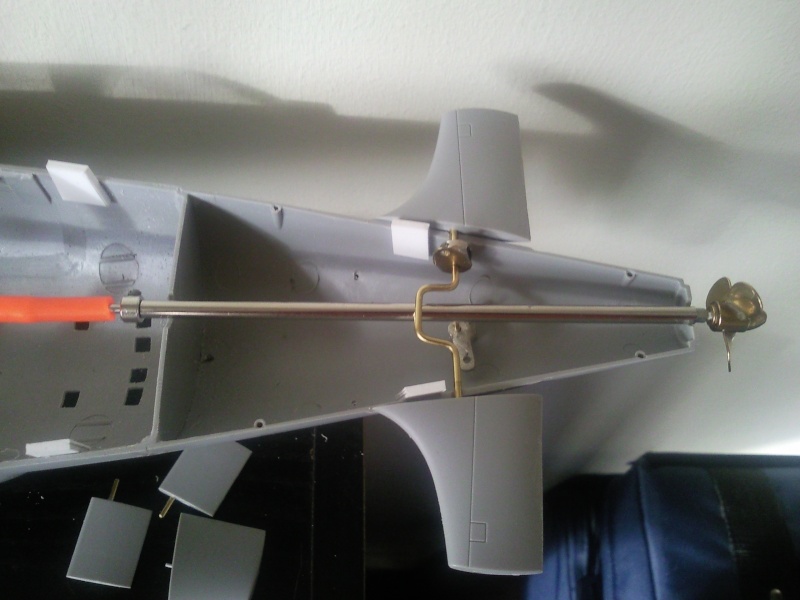
I've already started on a whole tray, Marius...it will incorporate the new idea.
here's how I did my linkages...hope this helps?
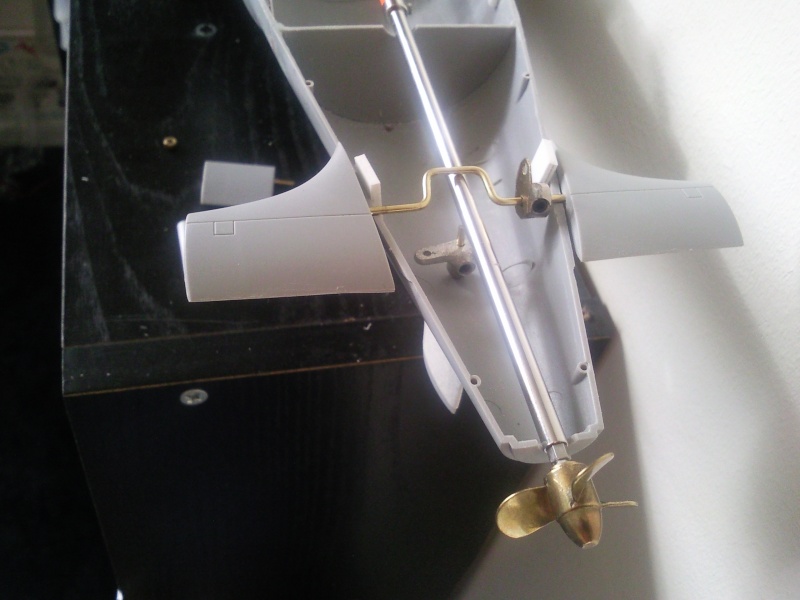
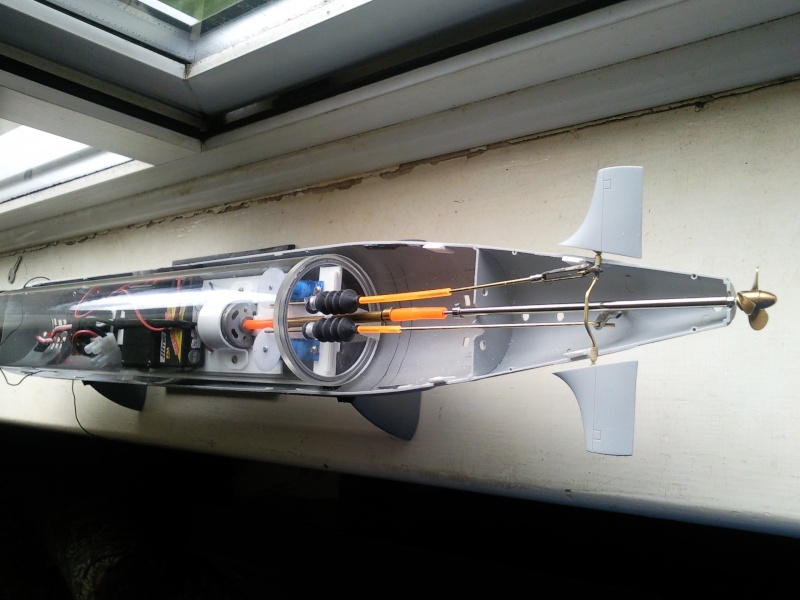
here's how I did my linkages...hope this helps?


Tom(ADMIN)- AMS Forum Owner
- Posts : 3026
Join date : 2010-11-05
Age : 64
Location : Nevada, USA
- Post n°49
 Re: The Dragonfish revisited.
I've tried a solid coupling Geoff, and for some reason it vibrated something terrible, whether I hadn't lined things up properly I don't know, but it was awful. I'll need a jointed coupling at the stern end anyway, so I may as well put them at both ends, that way I'll be sure that things are smooth running as possible.

profesorul- Guest
- Posts : 386
Join date : 2011-07-03
Age : 59
Location : Bucuresti, ROMANIA
- Post n°50
 Re: The Dragonfish revisited.
CRAYNG loud!...
I was badly inspired to stick the two halves of the aft cone!.


How should I do if I have these(from the second picture).
I was badly inspired to stick the two halves of the aft cone!.


How should I do if I have these(from the second picture).
Last edited by profesorul on Tue Feb 19, 2013 4:31 pm; edited 1 time in total


» Futaba -868/915mhz equipment
» Darnell type 21 submarine, need some help
» Robbe Seawolf V2
» bladder bags
» WW2 mini sub build
» Peral Submarine of 1888
» U-Boat R/C?
» Cheap Arduino Auto leveler