After reading the "online how to do it", it took me about ten minutes to get these fitted and working properly. Next up are the top and bottom rudders.
Who is online?
In total there are 4 users online :: 0 Registered, 0 Hidden and 4 Guests
None
Most users ever online was 180 on Tue Nov 05, 2019 6:03 am
Latest topics
Search
Most Viewed Topics
Statistics
Our users have posted a total of 12533 messages in 1992 subjects
We have 1019 registered users
The newest registered user is Flyboy21
Similar topics
+7
sloop
timgarrod
merriman
gingyer
tattooed
salmon
Tom(ADMIN)
11 posters
Skipjack.part 2

Tom(ADMIN)- AMS Forum Owner
- Posts : 3026
Join date : 2010-11-05
Age : 64
Location : Nevada, USA
- Post n°51
 Re: Skipjack.part 2
It makes life so much easier, Andy...saves all that bending of wire and making up parts to fit.
After reading the "online how to do it", it took me about ten minutes to get these fitted and working properly. Next up are the top and bottom rudders.
After reading the "online how to do it", it took me about ten minutes to get these fitted and working properly. Next up are the top and bottom rudders.

salmon- AMS Forum Owner
- Posts : 312
Join date : 2011-09-02
Age : 64
Location : Las Vegas, Nevada - USA
- Post n°52
 Re: Skipjack.part 2
Richard,Richard(Admin) wrote:It makes life so much easier, Andy...saves all that bending of wire and making up parts to fit.
After reading the "online how to do it", it took me about ten minutes to get these fitted and working properly. Next up are the top and bottom rudders.
I really appreciate the work David has done on the fittings for the Skipjack. The quality is top notch and it has made my build go very quick. Keep up the great work there sir!
Peace,
Tom
_________________
If you can cut, drill, saw, hit things and swear a lot, you're well on the way to building a working model sub.
merriman- Guest
- Posts : 347
Join date : 2011-10-16
Age : 75
Location : Virginia Beach, Virginia
- Post n°53
 Re: Skipjack.part 2
I should mention here that Tom has been a big help getting those instructions sorted out; to make them a bit more clear and useful. Thanks, Tom.
David
David

Tom(ADMIN)- AMS Forum Owner
- Posts : 3026
Join date : 2010-11-05
Age : 64
Location : Nevada, USA
- Post n°54
 Re: Skipjack.part 2
Tell you what, Tom...the man is a master at this. I can't get over how easily everything fits...and fits first time.

Tom(ADMIN)- AMS Forum Owner
- Posts : 3026
Join date : 2010-11-05
Age : 64
Location : Nevada, USA
- Post n°55
 Re: Skipjack.part 2
I didn't know that...thanks, Tom!

salmon- AMS Forum Owner
- Posts : 312
Join date : 2011-09-02
Age : 64
Location : Las Vegas, Nevada - USA
- Post n°56
 Re: Skipjack.part 2
Thank you for the kind words.
_________________
If you can cut, drill, saw, hit things and swear a lot, you're well on the way to building a working model sub.

Tom(ADMIN)- AMS Forum Owner
- Posts : 3026
Join date : 2010-11-05
Age : 64
Location : Nevada, USA
- Post n°57
 Re: Skipjack.part 2
Day off building today, these dammed fingers are just not cooperating with me, so rather than cock things up, I decided to leave things alone for today.

Tom(ADMIN)- AMS Forum Owner
- Posts : 3026
Join date : 2010-11-05
Age : 64
Location : Nevada, USA
- Post n°58
 Re: Skipjack.part 2
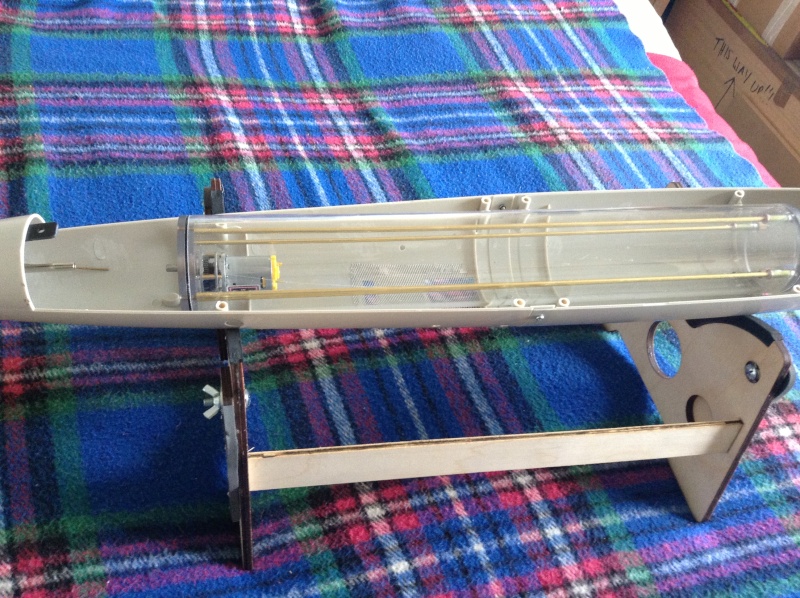
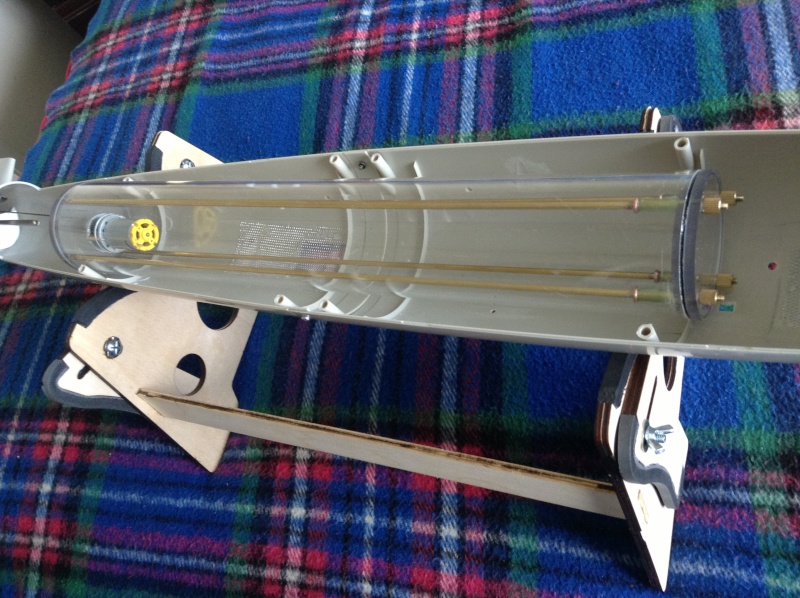
The cylinder has just arrived from Nigel (thanks Nige..lovely job) fits perfectly and there's plenty of room to install everything.


Tom(ADMIN)- AMS Forum Owner
- Posts : 3026
Join date : 2010-11-05
Age : 64
Location : Nevada, USA
- Post n°59
 Re: Skipjack.part 2
And here's the clever bit...note in the photos the small plastic lugs directly in front of the end caps. These are where the stand fits if you are building a static model...they are perfectly positioned to locate the cylinder and stop it moving in a fore/aft plane, and allow spot on positioning every time the cylinder is removed/replaced.
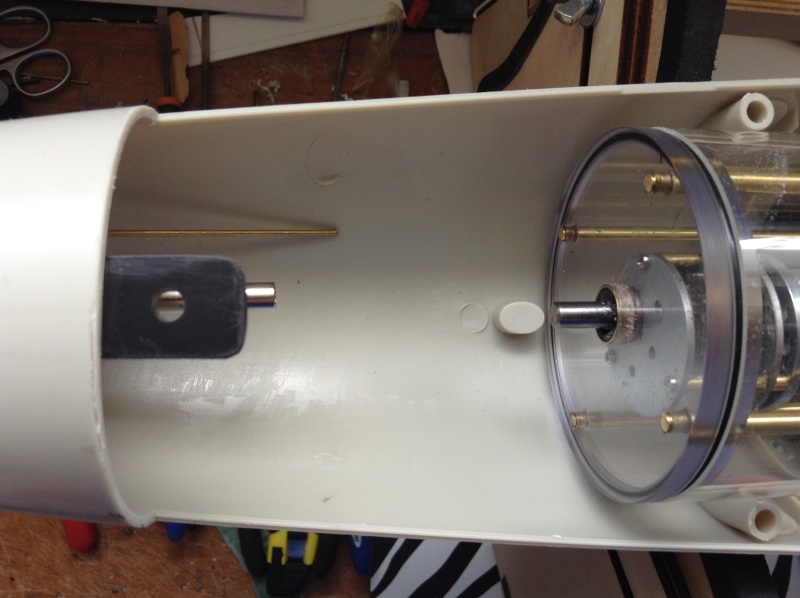
Also note the tubes at the top end of the cylinder in the hull...they are where the locating pins for the top deck fit. I'm not using those, so I figure that a small strip of brass, drilled and secured into those holes with self tapping screws, will secure the cylinder in position. Clever stuff, huh?
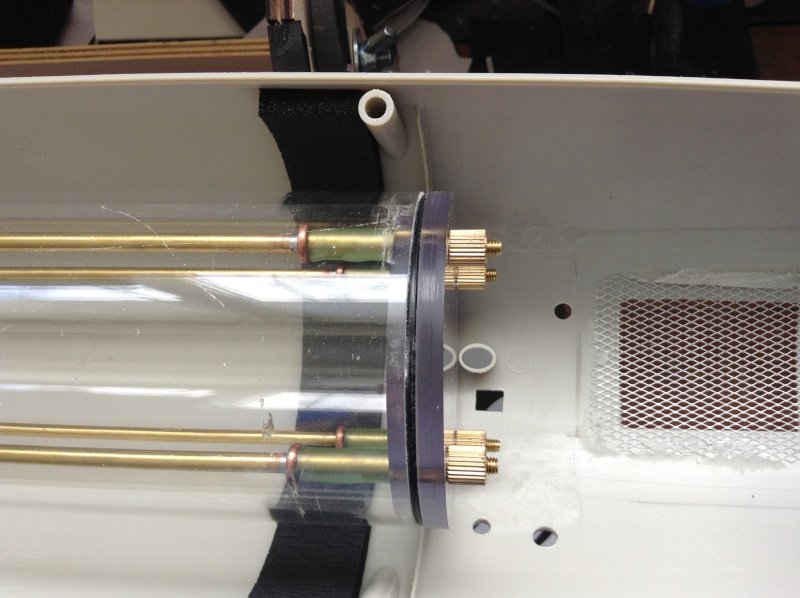
Also note the tubes at the top end of the cylinder in the hull...they are where the locating pins for the top deck fit. I'm not using those, so I figure that a small strip of brass, drilled and secured into those holes with self tapping screws, will secure the cylinder in position. Clever stuff, huh?


Tom(ADMIN)- AMS Forum Owner
- Posts : 3026
Join date : 2010-11-05
Age : 64
Location : Nevada, USA
- Post n°60
 Re: Skipjack.part 2
Nothing done yesterday, I'm afraid...and here's why.
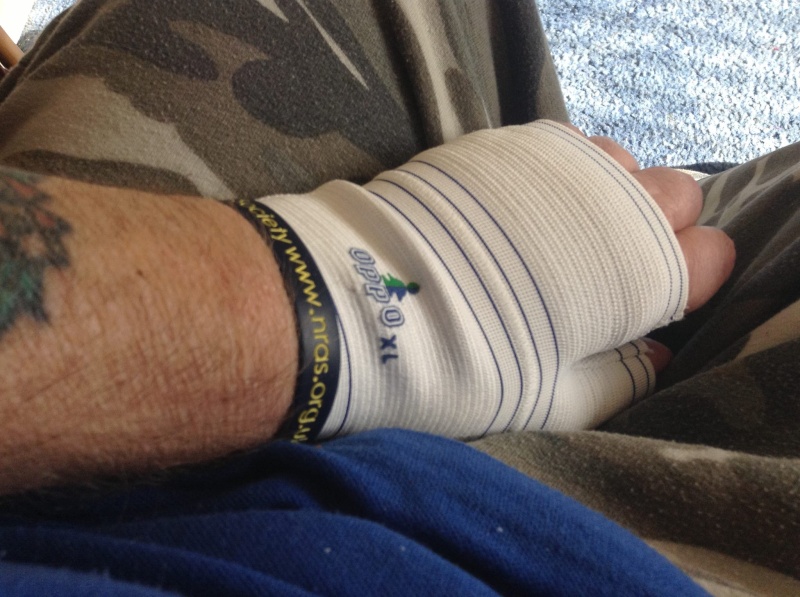
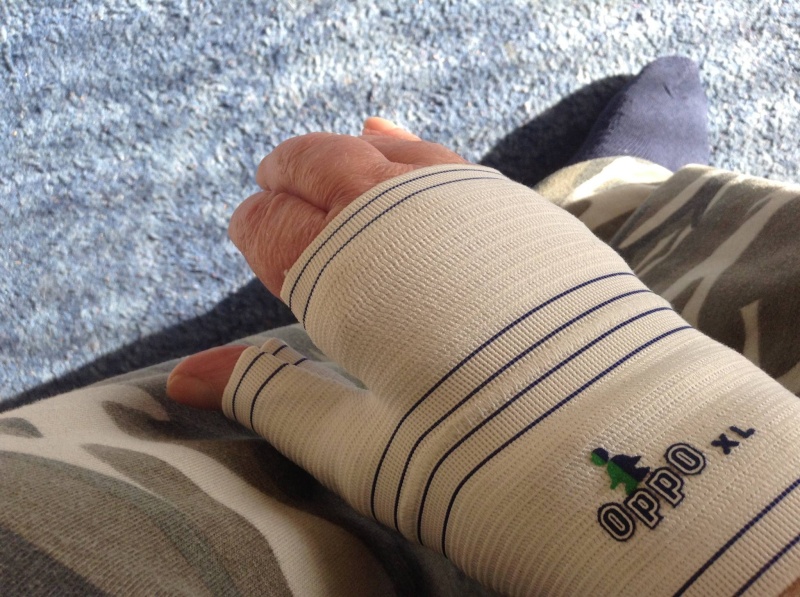


Tom(ADMIN)- AMS Forum Owner
- Posts : 3026
Join date : 2010-11-05
Age : 64
Location : Nevada, USA
- Post n°61
 Re: Skipjack.part 2
So, what does the team think? I have two brand new Turnigy 9gramme mini servos which I'd like to use in the Skipjack for the rudder (via a MicroGyros leveller) and the rear 'planes...will they be man enough, do we think? Or will I need to use standard size servos?
Your recommendations please, guys...
Your recommendations please, guys...

merriman- Guest
- Posts : 347
Join date : 2011-10-16
Age : 75
Location : Virginia Beach, Virginia
- Post n°62
 Re: Skipjack.part 2
'mini' or larger servo recommended.Richard(Admin) wrote:So, what does the team think? I have two brand new Turnigy 9gramme mini servos which I'd like to use in the Skipjack for the rudder (via a MicroGyros leveller) and the rear 'planes...will they be man enough, do we think? Or will I need to use standard size servos?
Your recommendations please, guys...
David

Tom(ADMIN)- AMS Forum Owner
- Posts : 3026
Join date : 2010-11-05
Age : 64
Location : Nevada, USA
- Post n°63
 Re: Skipjack.part 2
Ok, thanks for that David...larger it will be.

Tom(ADMIN)- AMS Forum Owner
- Posts : 3026
Join date : 2010-11-05
Age : 64
Location : Nevada, USA
- Post n°64
 Re: Skipjack.part 2
I haven't had chance to do much over the last two days due to badly swollen and very painful knees, but this afternoon I managed to make a start on the trays for the cylinder. The gap inbetween the two trays is where the ballast tank will sit. Hopefully I want to cut the ballast tank to size tomorrow, fingers and knees permitting.


acrowot (Geof)- Guest
- Posts : 158
Join date : 2011-01-21
Age : 53
Location : chessington surrey
- Post n°65
 Re: Skipjack.part 2
Hi richard I turn my back For five miniutes and your of building another sub good on you I thought I would see whats happening while I'm waiting for a chinese take away and yes its 1.20 am but I'm sitting in florida watching a nice thunder storm the problem is ill be home friday errr and I promise pictures of u boat keep up the good work richard
Take care geof
Take care geof

Tom(ADMIN)- AMS Forum Owner
- Posts : 3026
Join date : 2010-11-05
Age : 64
Location : Nevada, USA
- Post n°66
 Re: Skipjack.part 2
Hello Geoff...Florida? Obviously got far too much money mate, I can't even afford to go to Eastbourne! Yep, cracking on mate, slowly but surely with this one...what used to take me five minutes to do now takes me an hour, but it's coming.
And here's the ballast tank cut to size and in it's approximate position inside the cylinder...now to cut the end caps and a couple of baffles.
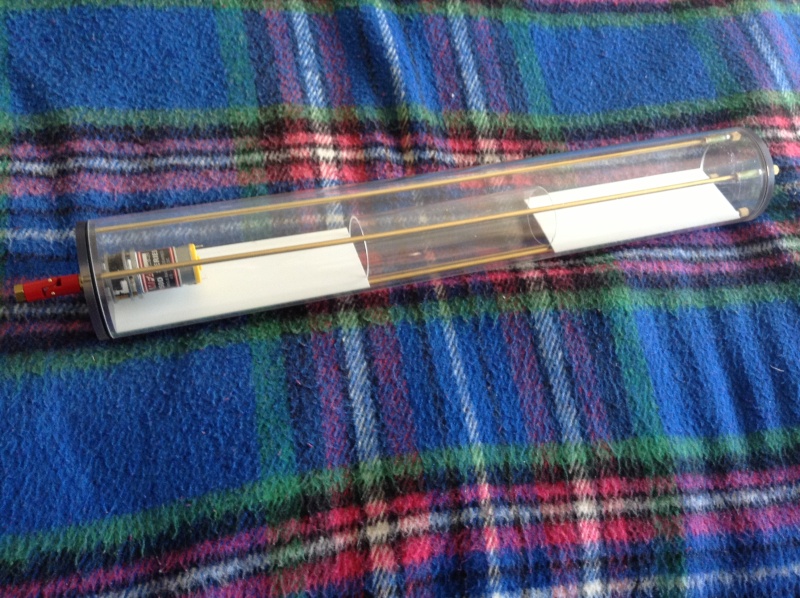
Another small step for model submariners...a giant leap for me!
And here's the ballast tank cut to size and in it's approximate position inside the cylinder...now to cut the end caps and a couple of baffles.

Another small step for model submariners...a giant leap for me!

Tom(ADMIN)- AMS Forum Owner
- Posts : 3026
Join date : 2010-11-05
Age : 64
Location : Nevada, USA
- Post n°67
 Re: Skipjack.part 2
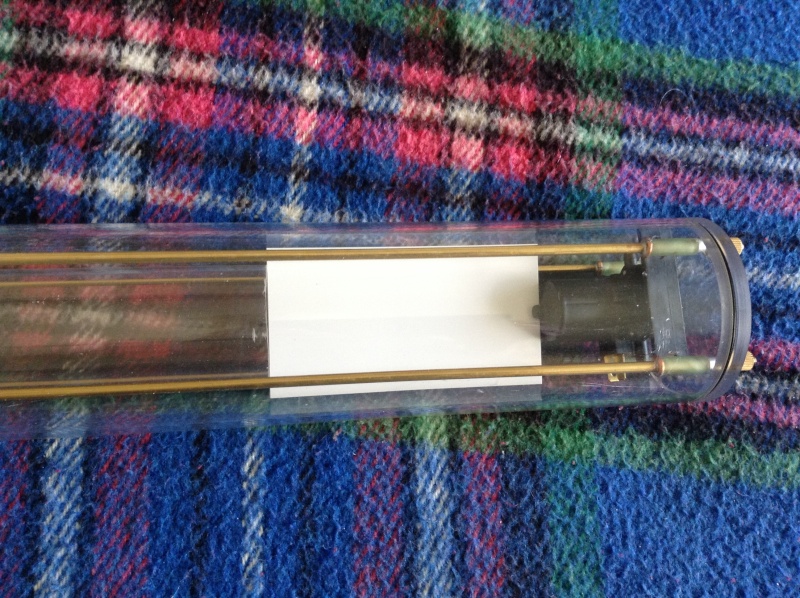
Made a start today on fitting out the cylinder...so far installed are the rudder and dive plane servos, auto leveller, and the receiver on the rear tray, and the ballast pump on the forward tray (although I may have to move that a little)




Tom(ADMIN)- AMS Forum Owner
- Posts : 3026
Join date : 2010-11-05
Age : 64
Location : Nevada, USA
- Post n°68
 Re: Skipjack.part 2
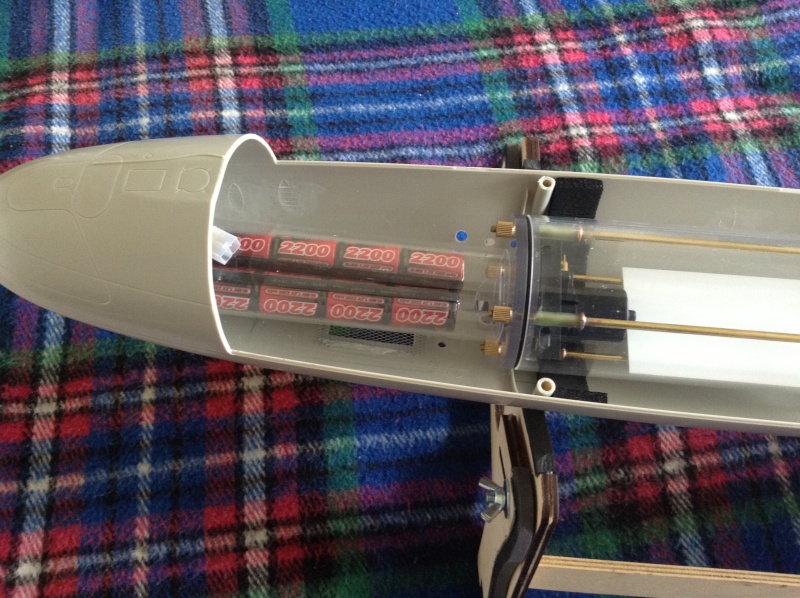
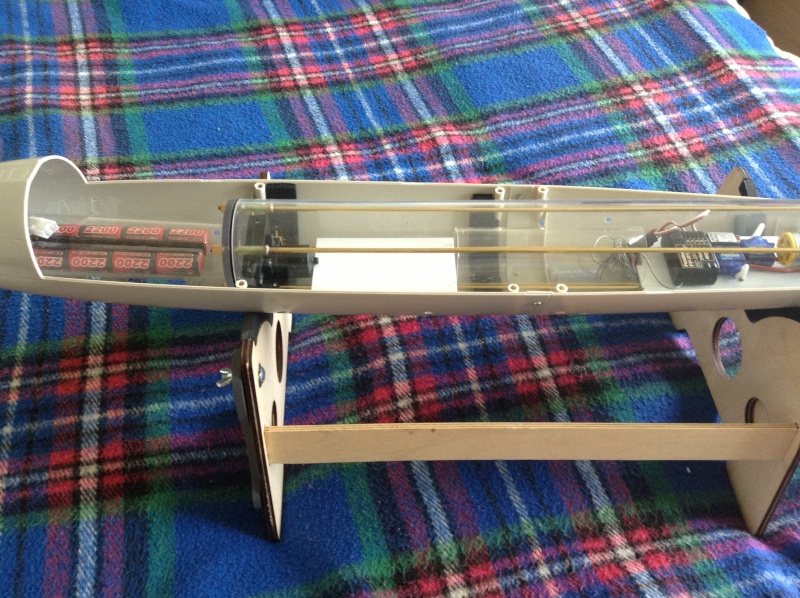
This is the battery layout...a 12v 2200a/h Sub C cell pack in it's own wtc, tucked away in the forward flood area. Once again, Nigel is making the end caps for me for both the battery wtc ad the ballast tank...thanks Nigel.


Tom(ADMIN)- AMS Forum Owner
- Posts : 3026
Join date : 2010-11-05
Age : 64
Location : Nevada, USA
- Post n°69
 Re: Skipjack.part 2
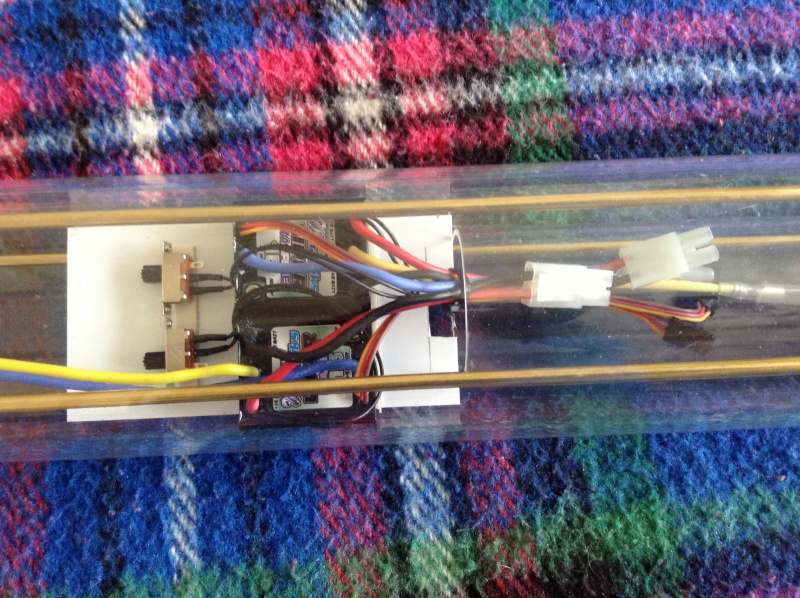
Made a start on fitting out the rear tray today...wires and cables and bad language in all directions!

The ballast bag I ordered from RC-Sub Workshop in Hong Kong (via eBay) arrived earlier, so I thought I'd check it out...think I may have ordered the wrong size, don't you?
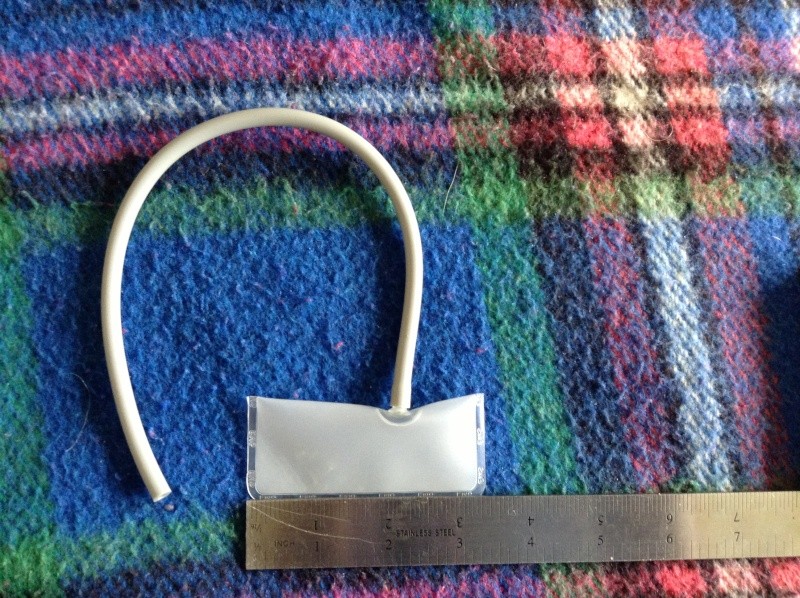


The ballast bag I ordered from RC-Sub Workshop in Hong Kong (via eBay) arrived earlier, so I thought I'd check it out...think I may have ordered the wrong size, don't you?


Tom(ADMIN)- AMS Forum Owner
- Posts : 3026
Join date : 2010-11-05
Age : 64
Location : Nevada, USA
- Post n°70
 Re: Skipjack.part 2
Is it worthwhile installing an inline filter in the inlet pipe to my water pump, chaps?
tattooed- AMS member
- Posts : 340
Join date : 2011-05-16
Age : 61
Location : Bristol
- Post n°71
 Re: Skipjack.part 2
can't do any harm rich but it's only a small bore pipe and i'd think anything able to go through the pipe would go through the pump with no problem

Tom(ADMIN)- AMS Forum Owner
- Posts : 3026
Join date : 2010-11-05
Age : 64
Location : Nevada, USA
- Post n°72
 Re: Skipjack.part 2
You've never seen what's in my bath, mate!

sloop- Guest
- Posts : 7
Join date : 2012-02-21
Age : 78
Location : Pinner
- Post n°73
 your bath
[quote="Richard(Admin)"]You've never seen what's in my bath, mate! [/quote Can we have photos of the bath to make an evaluation.
John B
John B

Tom(ADMIN)- AMS Forum Owner
- Posts : 3026
Join date : 2010-11-05
Age : 64
Location : Nevada, USA
- Post n°74
 Re: Skipjack.part 2
Too late, JB...my carer cleaned the bathroom yesterday before I could oblige you with some pics...

Tom(ADMIN)- AMS Forum Owner
- Posts : 3026
Join date : 2010-11-05
Age : 64
Location : Nevada, USA
- Post n°75
 Re: Skipjack.part 2
Yesterday I installed the water ballast pump, it fits perfectly onto the rear end cap. At the moment it's secured with double sided tape, but later on I may drill the end cap and attach it with a couple of M4 brass bolts and nuts.
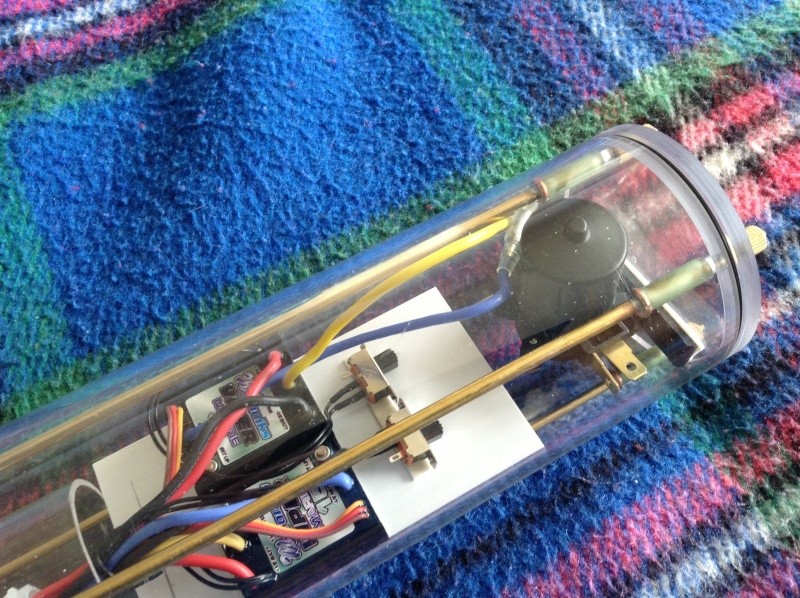
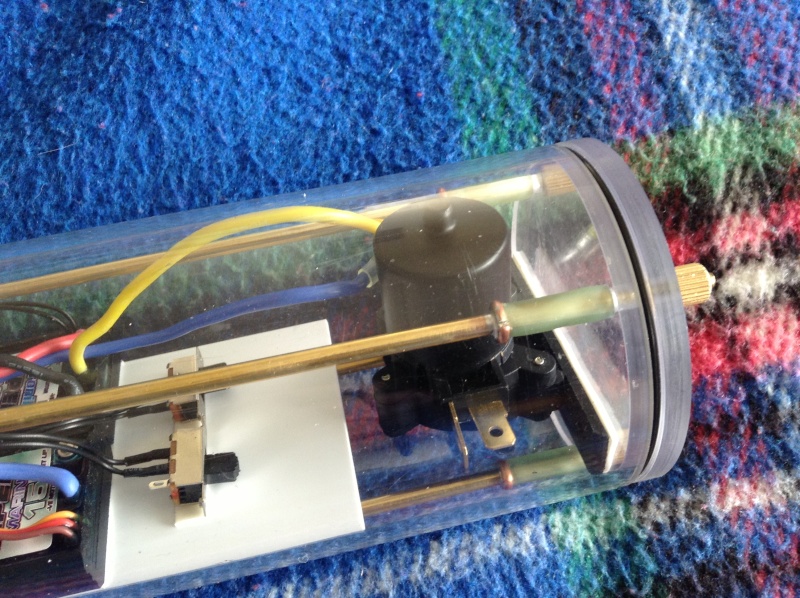
Today's job, once the medication kicks in, is to plumb the pump and get the power leads on.


Today's job, once the medication kicks in, is to plumb the pump and get the power leads on.



» WW2 mini sub build
» sonar data link
» Robbe Seawolf V2
» ExpressLRS - 868/915 Mhz equipment
» Flight controllers as sub levelers
» 868/915 Mhz as a viable frequency for submarines.
» Futaba -868/915mhz equipment
» Microgyro pitch controller corrosion