WELD LINES, HIGH RELIEF PANELS, AND OTHER HULL AND SAIL DETAILING
Building up detail items on the model hull and sail, such as weld lines, raised panels, and fillet plates comes about either because the model did not have the detail in the first place, or some of the detail on the model was lost to filing and sanding operations -- usually in the area of the hull split where a lot of filing and sanding is done to fair in and make tight the seam between the two hull halves. This little discussion is how to both build up such detail on a neat hull or restore detail lost to adjacent assembly operations.

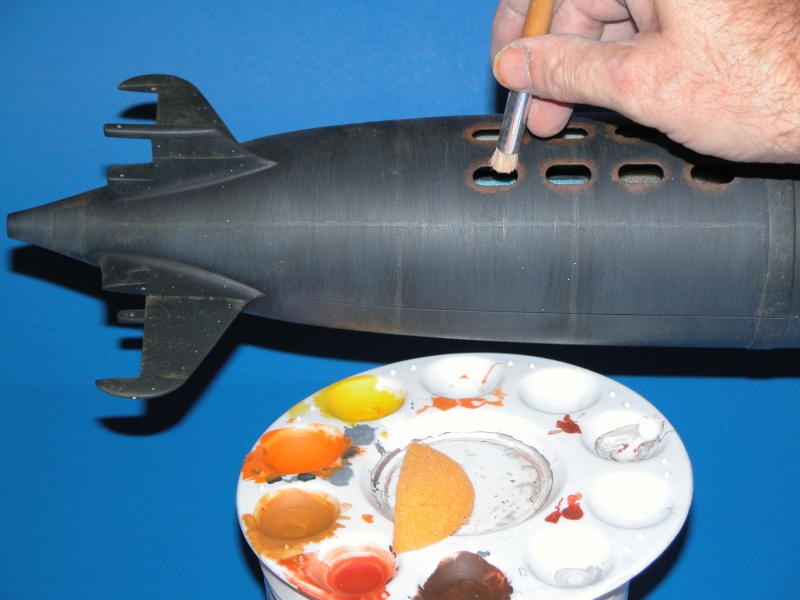
Weld lines on submarines are not abundantly apparent on today's boats as these deep fusions or done in V-shapped bevels between hull sections, with multiple layers built up and the surface of the welds ground flush with the hull or other surface so fused together. However, older welding procedures, particularly those executed by a wartime yard, which has to get a lot of product into the water, and the skill level of the work force available is not ideal, then you will see vessels built during wartime (at least by those nations suffering material and labor shortages) with poor looking, and sometimes poor quality welds. These evidence as high-relief, uneven beading, and 'piling' of bead. 1944 45 Japan comes to mind.
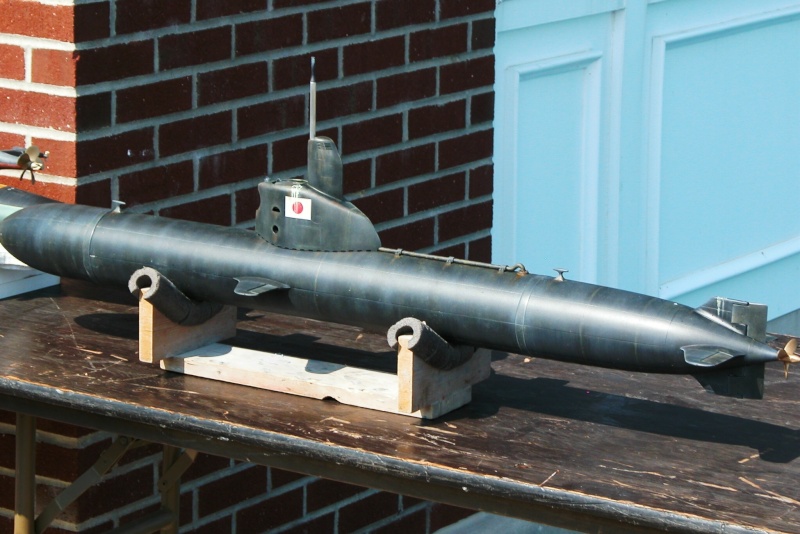
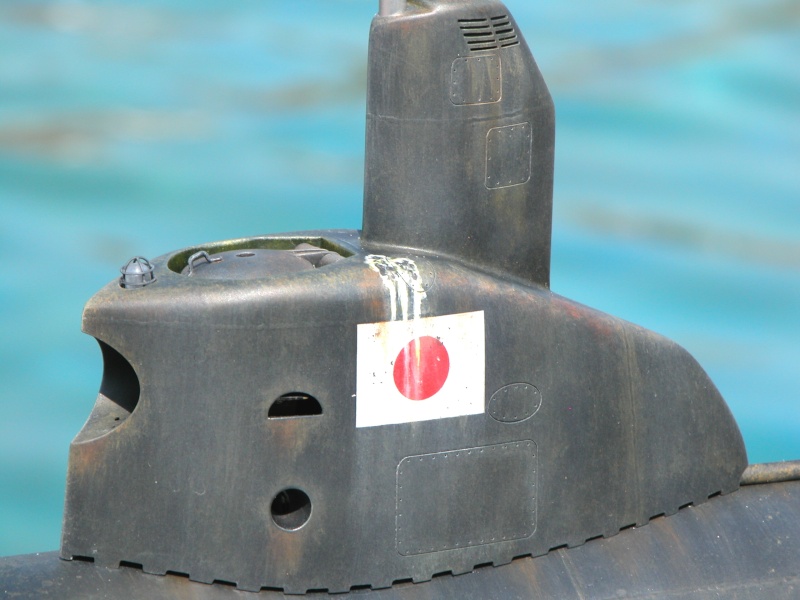
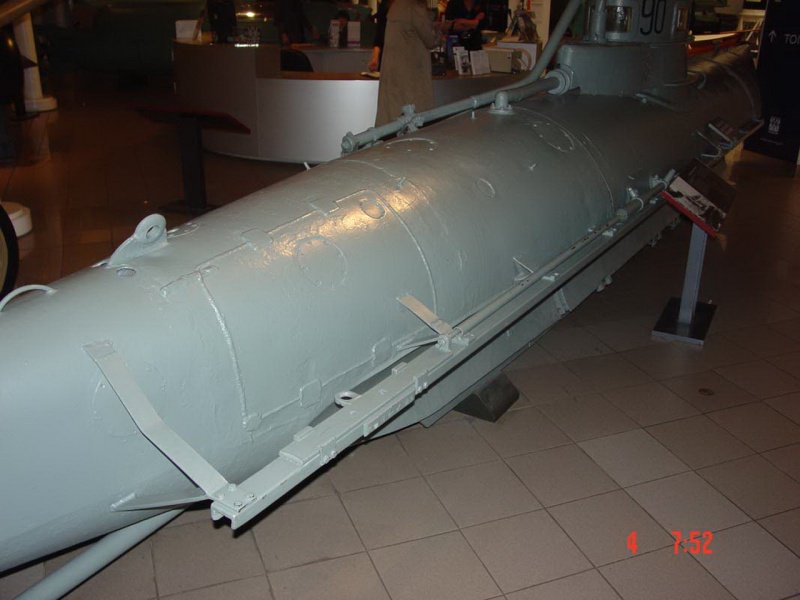
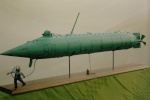
Such was the case with the late-war midgets built for the Imperial Japanese Navy -- this 1/16th Williams KAIRYU kit an example of those wartime last ditch efforts by the Japanese to fight off the expected Allied amphibious assault through use of coastal suicide submarines. My Dad was training for that ghastly invasion of the Japanese home islands when the war in the Pacific came to a screeching halt. Thank God for the Atomic-Bombs!
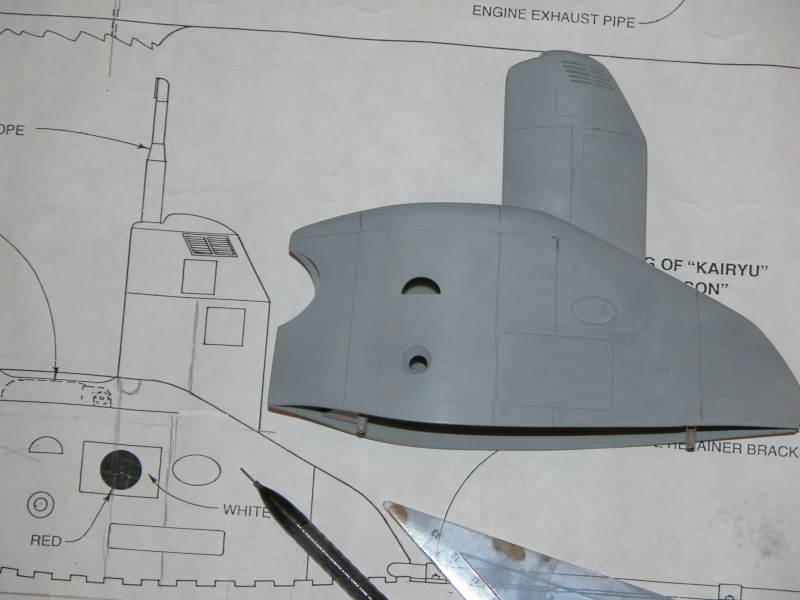
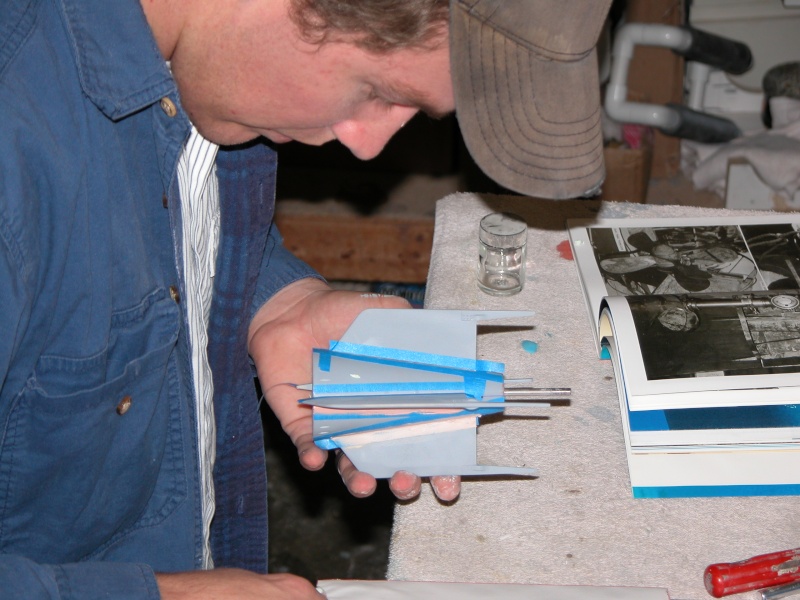
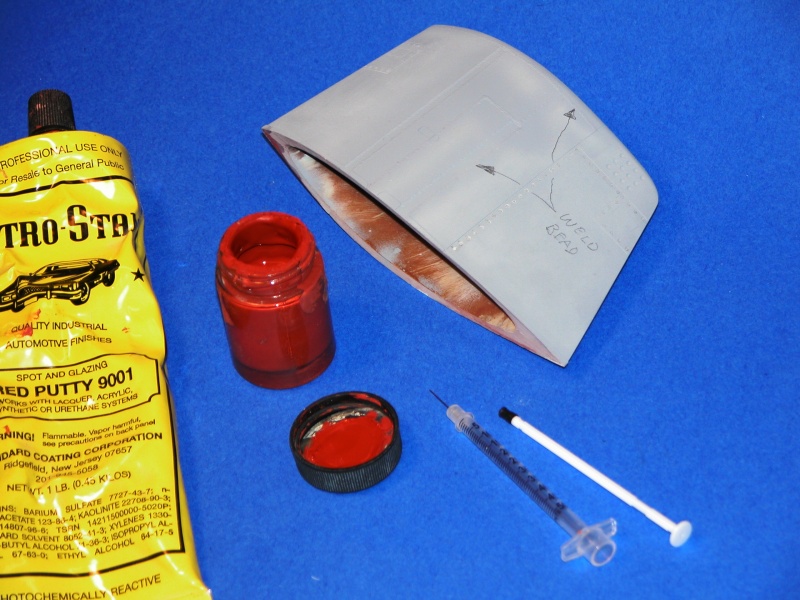
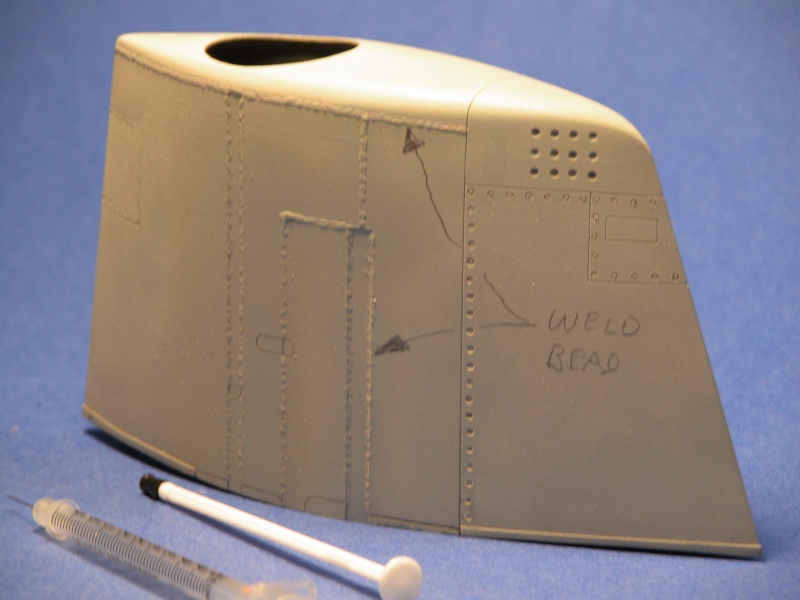
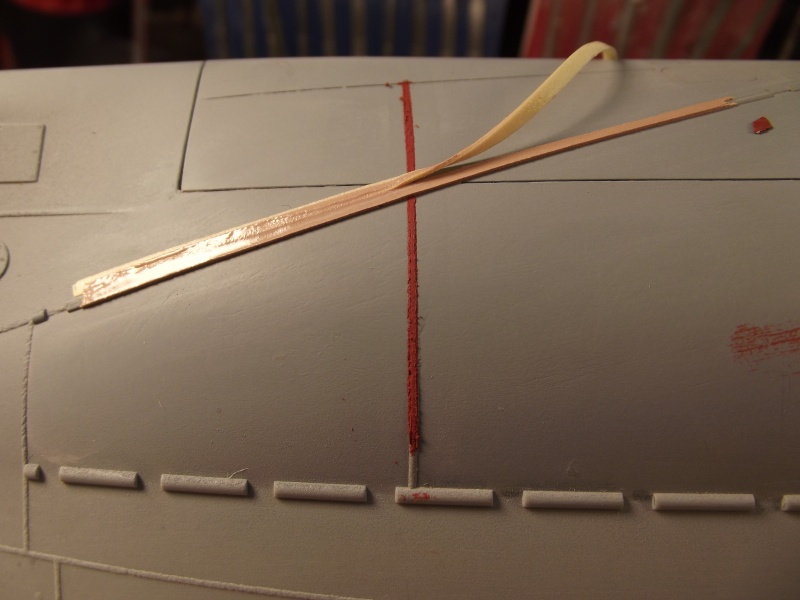
The KAIRYU kit is a good subject here: the hull and appendages were all neat -- no detailing what so ever! I outfitted the hull and sail with both weld lines and raised fillet plates to enhance the display. As you can see I employed a thinned mix of air-dry touch-up putty, applied with a syringe to make the slightly high in relieve radial and longitudinal well beads on the hull.
Study of source materials guided me as I first pencil marked the weld bead locations, then followed the lines with the syringe equipped with a large bore needle. Stippling the needle against the work as I went produced the little goblets of goo that effectively mimicked the 'wavy' pattern you would see on a heavy, single-pass bead.

Research is everything. Such was the case with the KAIRYU weld lines and weathering. Here are just some of the reference pictures used to get a 'feel' on how such things look after exposure to the elements over time.
Some of the actual KAIRYU units sat on marine railways and on the side of sea-side roads for months, exposed to the elements -- awaiting that day the Allied troop ships appeared on the horizon. I so weathered this model.
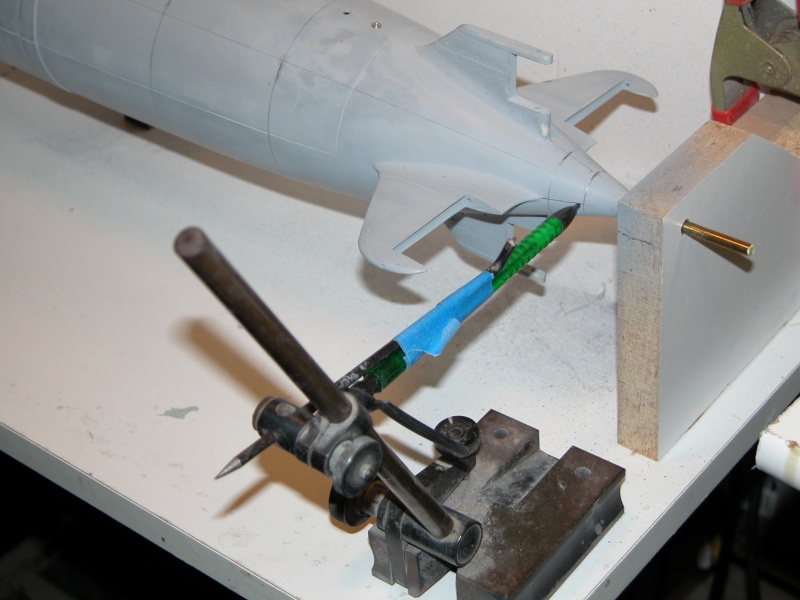
Note the holding, spinning fixture used to manipulate the KAIRYU hull as I pencil marked where the radial and longitudinal weld beads would go.
A pencil secured on a Machinist's surface-gauge is useful when slide along the holding jib base to establishing hull longitudinal line. When held in place on the base and the model rotated under its pencil lead, radial lines are accurately laid down on the model. This is how I established, with accuracy, where I would syringe on the thick 'weld' goo on the hull.


As the syringe tip was pushed into the hull at a slight angle, so that the putty could come out and stick to the hull, it was pulled along to make the weld line. All the while pressing on the plunger to control the amount of putty being applied. An acquired skill, I can assure you. Learned first on a discarded model hull, making all my learning mistakes there ... NOT on the work itself.
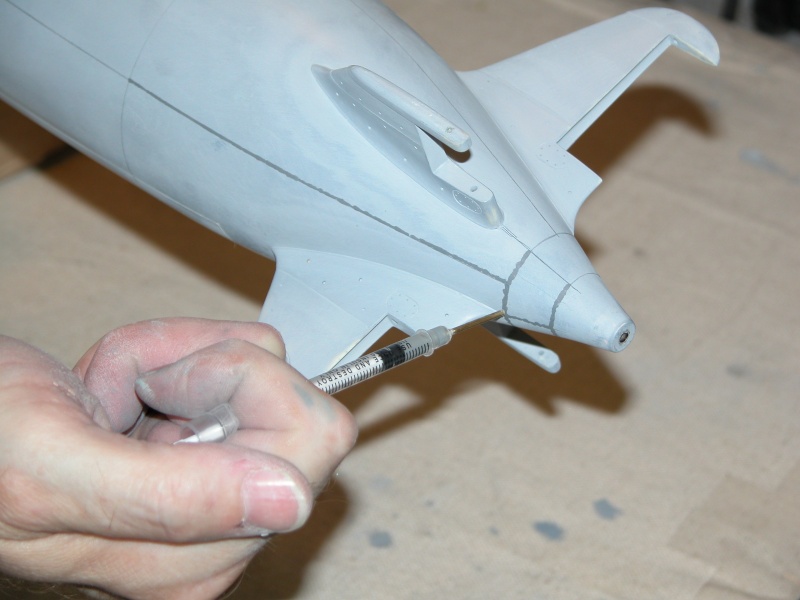
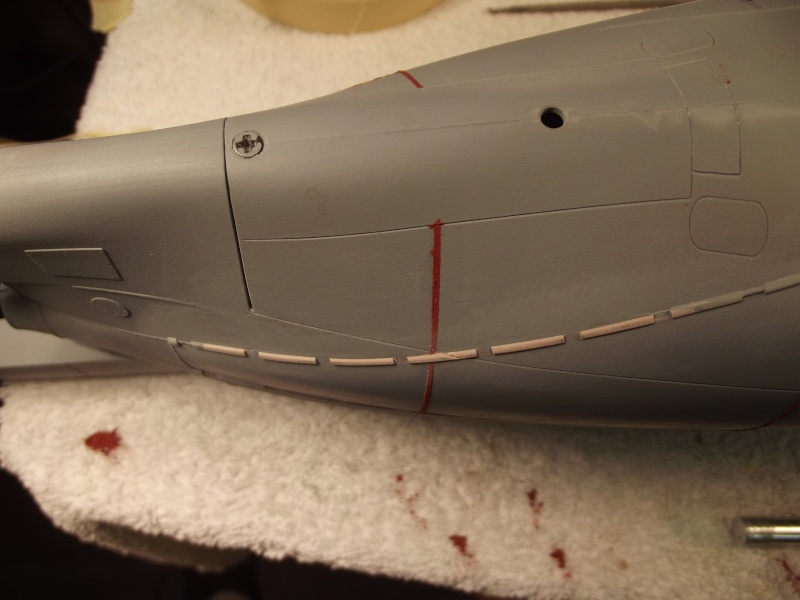
The sail was given the same treatment. First the penciled on lines, their location based on study of research material, then the application of the weld-beads with the syringe applied air-dry putty. As you can see, I strived to keep the height of the weld beads subtle -- not to steal the show, just to complement it. Examine the picture of the completed sail, just a hint of weld line. Less is more.

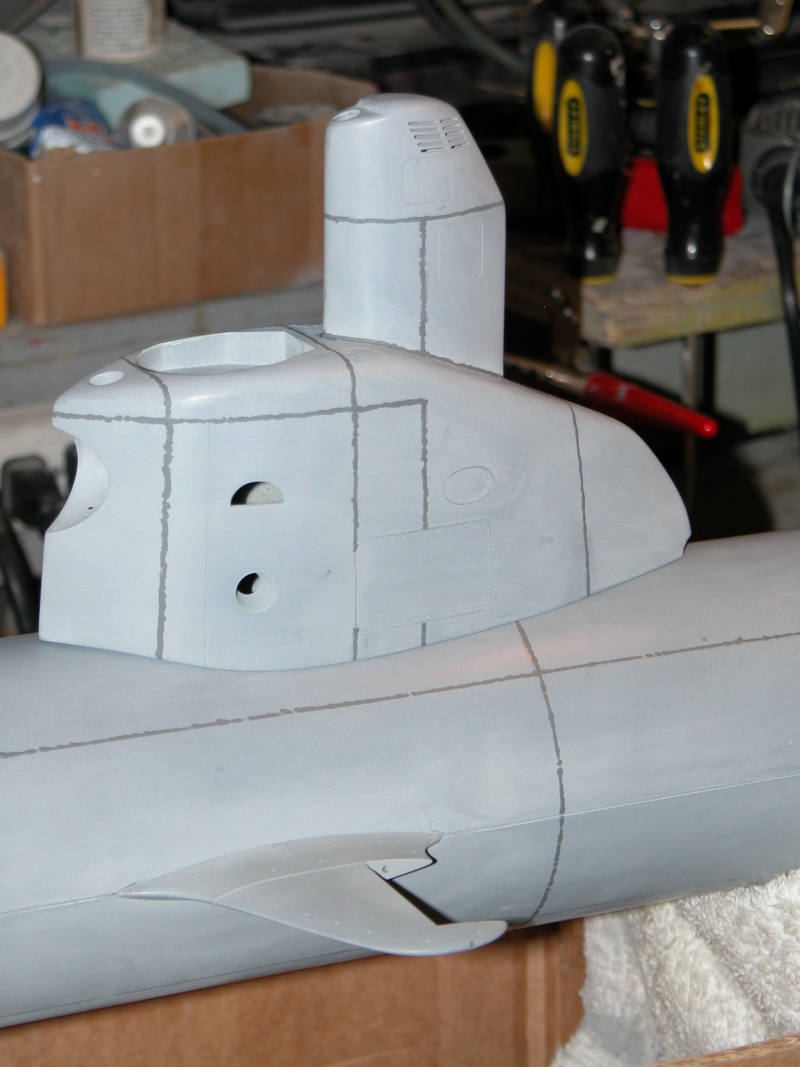
The air-dry putty is mixed up in a bottle with some lacquer thinner till it was thin enough to be shot through a modified syringe. The standard .005" diameter bore of the syringe needle (typical for diabetic syringes) is too small for this work. So, the syringe is modified by substituting the little needle with a brass tube of .030" bore.
I found that once loaded with the thinned putty, the plastic syringe was good for only a few days before its rubber plunger and plastic body began to melt as the solvents in the putty did their awful work.
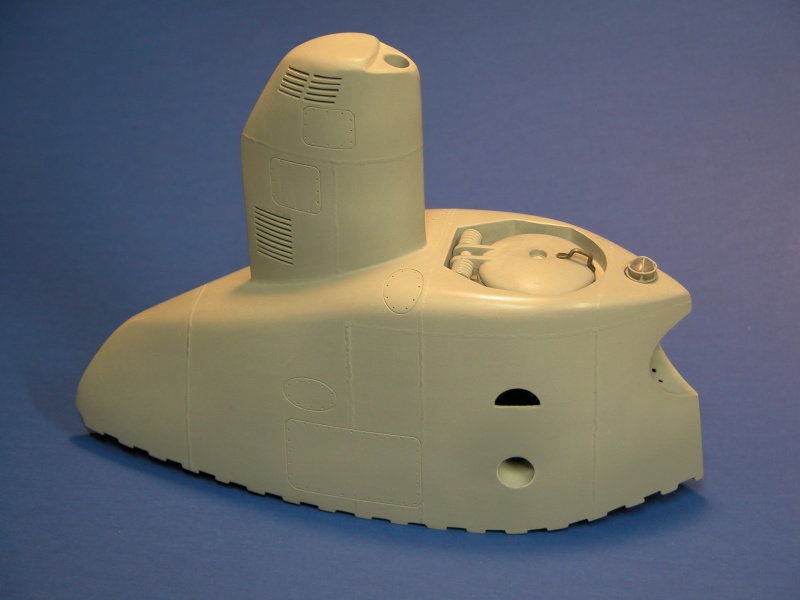
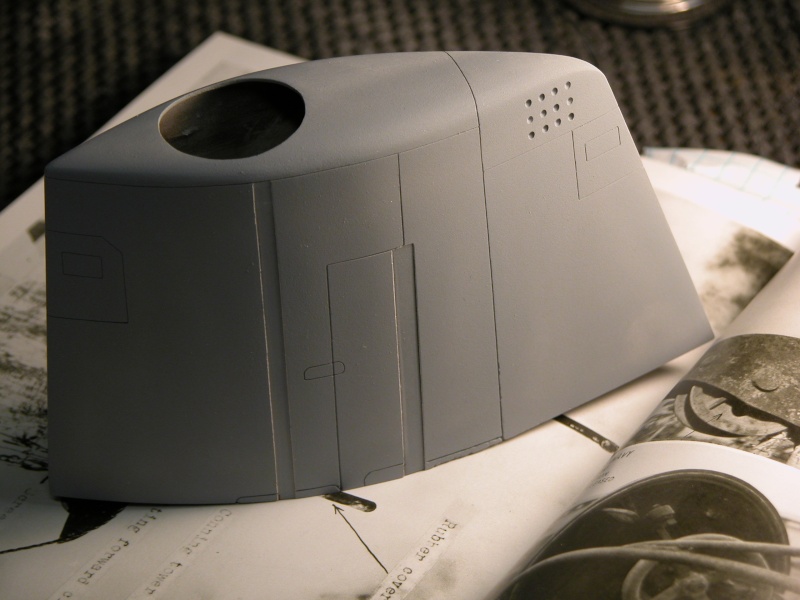
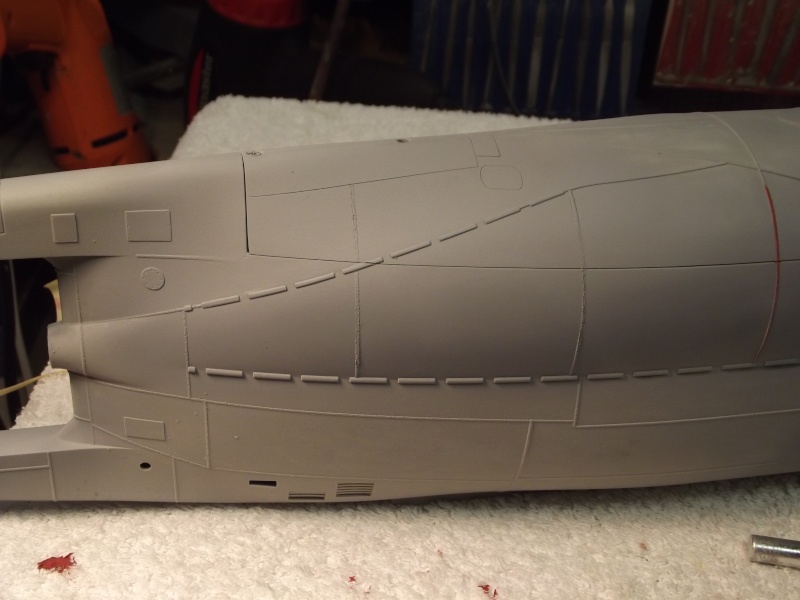
The KAIRYU featured fillet plates between the horizontal and vertical stabilizers, and mid-body 'wings' (used for depth-control, not 'lift'). The fillet plates were represented by a build up of a two-part automotive filler, screeded on with a dapping ball of appropriate radius, against the edge of applied masking tape. Once the filler had cured hard, the tape was removed revealing the high reliefe edges of the fillet plates.
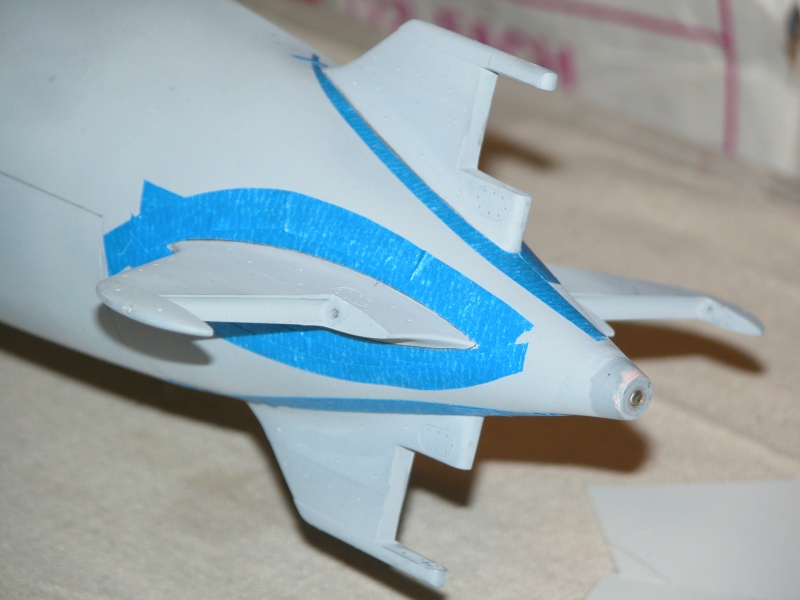
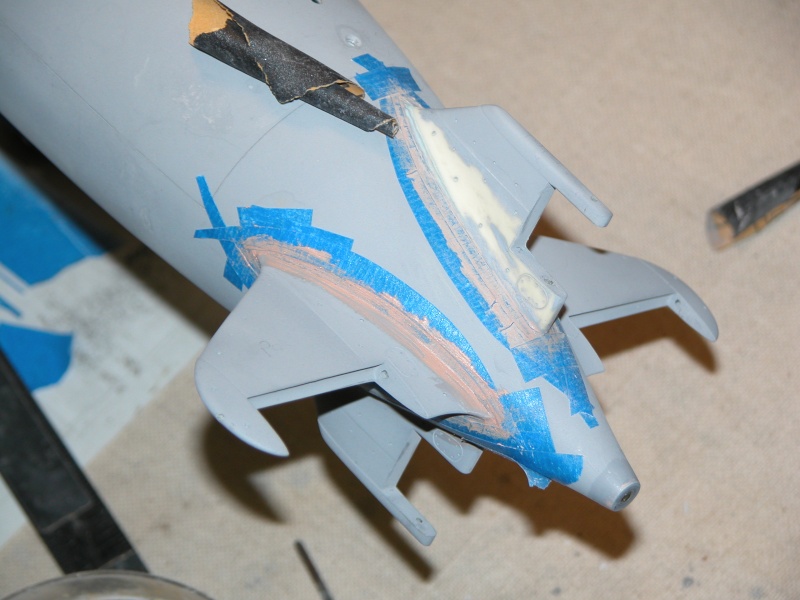
The height of the tape driving the thickness over the structure each fillet plate would have. I found, at 1/16 scale, that two layers of tap was enough to give the look of 1/8" thick fillet plate, which is a reasonable gauge for 'soft' metal skinning on a KAIRYU type vehicle.

And here you can make out the raised edges of the fillet plates on the horizontal and vertical stabilizers. I have already punched in the water drainage-vent holes in the plates and control surfaces.
While apprenticing here a few years back, Adam Carlson selected as his project, tooling for a 1/16 Japanese Type-A midget submarine. Here you see the nearly completed masters. The hull was turned from kiln dryed Sugar Pine was the tail cone. The sail was cut from dense Renshape (pattern making medium), and the horizontal and vertical surfaces were made from PVC sheet. The detailing of interest here are the high reliefe plating on the sail, mono-filiment fishing line for the hull weld seams on the hull, and stabilizer-to-hull butt plates represented by automotive two-part filler.
`

The hull has rather heavy longitudinal and radial weld lines. First thing to do was loft the location of the lines off the plan and onto the model. This fixture was employed to serve as a referrence plane for a Machinist's surface gauge outfitted with a pencil. Sliding the surface gauge along the base marked off the longitudinal lines. Holding the surface gauge steady while rotating the hull under its pencil lead marked off the radial lines.

Following the pencil lines and using a razor-saw followed by a small diameter riffler round-file, Adam cut in longitudinal and radial engraved lines enlarged to semi-circular section onto the hull. These little trenches accepting .030" diameter mono-filament fishing line. The line was pushed, half way into the hulls surface, and CA applied to glue it in place. This left enough lines of semi-circular section projecting off the hulls surface -- represent weld lines. Touch-up putty was applied and later sanded back to make tight the union between mono-filament and hull.
As you can see the half embedded mono-filament line stands out quite a bit. However after a few passes with a sanding block to reduce the height of these simulated weld beads, things look much more to scale.
The Type-A sail plating actually made way for the inner access trunk, which resulted in a slight dip between plating and pressure hull. This was represented on the model by several heavy coats of primer over tape applied where the plate gave way to pressure hull.
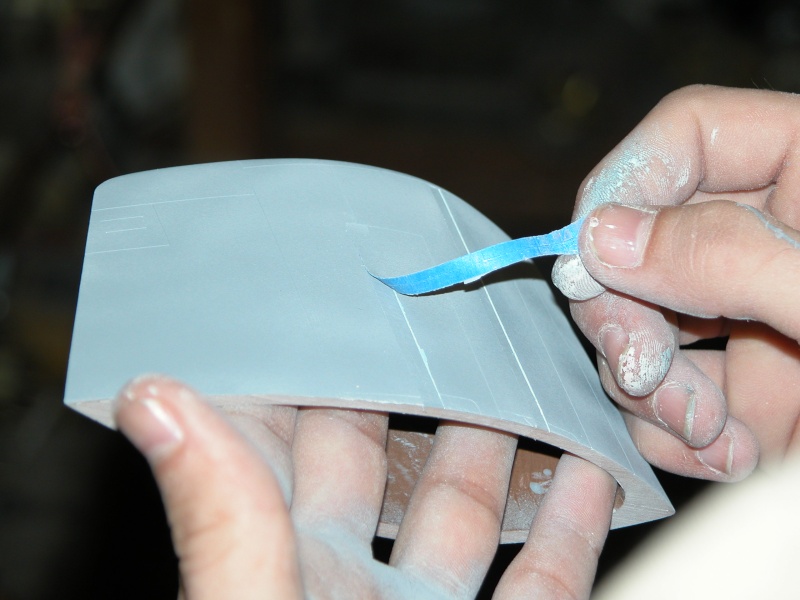
Once the primer had dried hard the tape was removed revealing the high relief edge between tape edge and primer.
building up high relief panels to represent the butt plates used to re-enforce the union of stabilizer to stern cone. All this detail presented in the massive collection of photos, books and plans Adam had gathered on the Type-A.
It's the job of the proficient model-builder to capture this detail in miniature. Adam does that very well, and is a most competent Craftsman in my not so humble opinion.
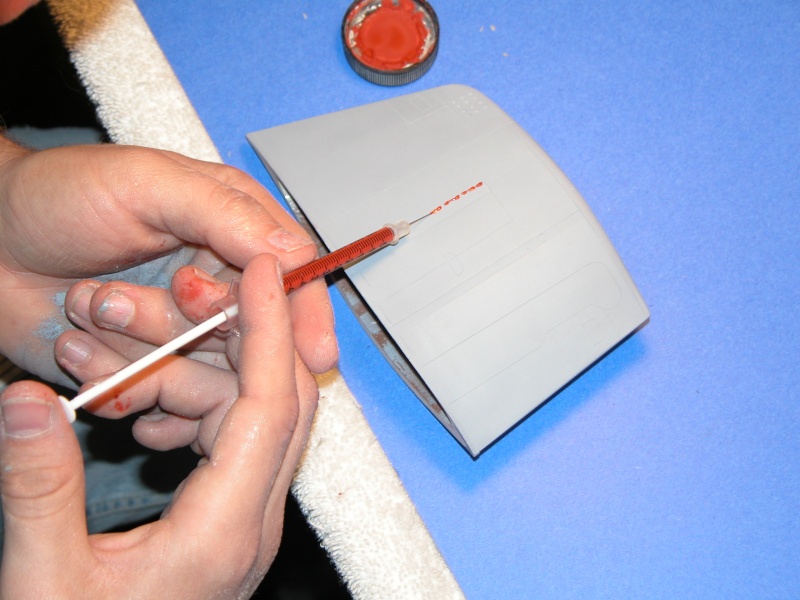
syringe applied weld beading on the sail. Doing it free hand -- following straight-edge guided pencil lines -- insured a less than perfect bead line. Just like what is observed on the prototypes.
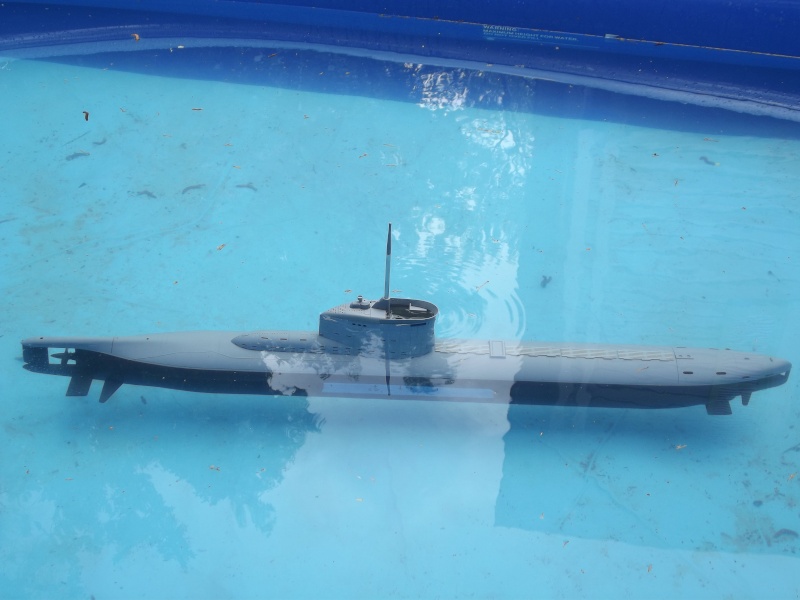
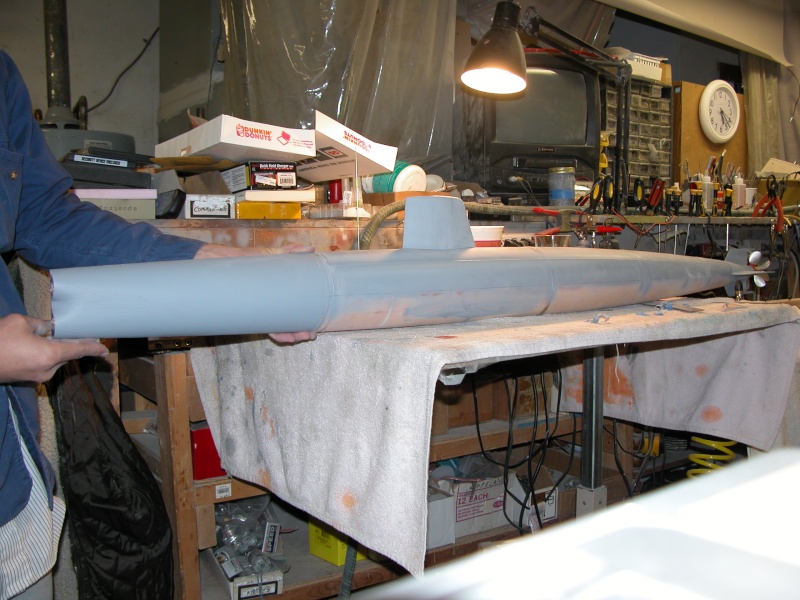
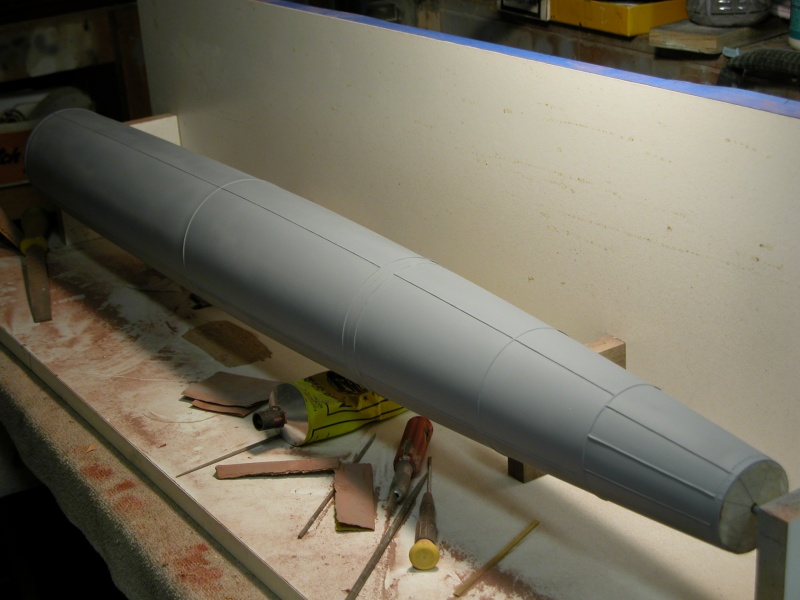
Introduction or repair of lost weld lines and simulated raised plating also applies to well detailed, traditional, injection formed, plastic model kits. Like this excellent Bronco 1/35 Type-23.
Converting this static display piece into a practical r/c model involved the splitting of the hull into an upper and lower hull half. Major surgery! And doing so eliminated the beautiful radial and longitudinal weld lines in the area of the hull half breaks -- those high relief details lost to file and sanding block. These would be built up from an air-dry putty.
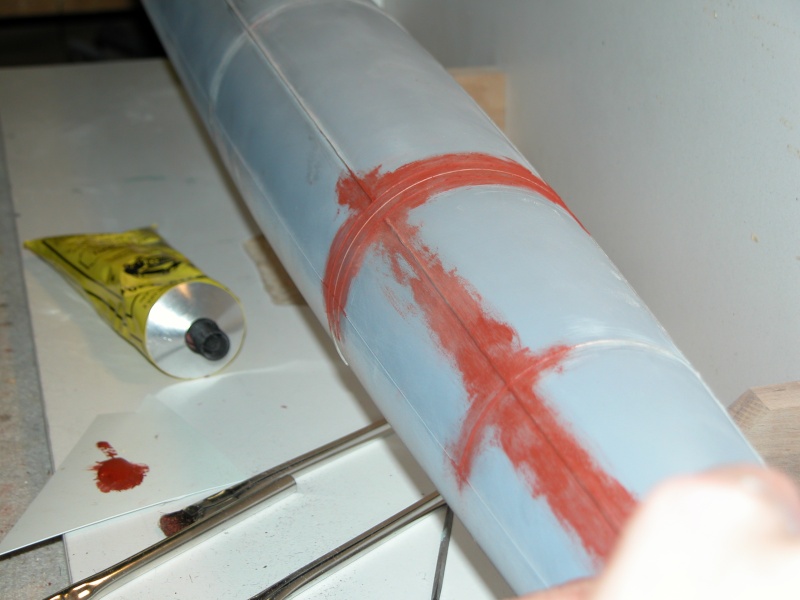
Also lost during the hull work, near the stern, was an array of 'blocks', these much more substantial detail items restored with the use of a self-curing automotive two-part filler.
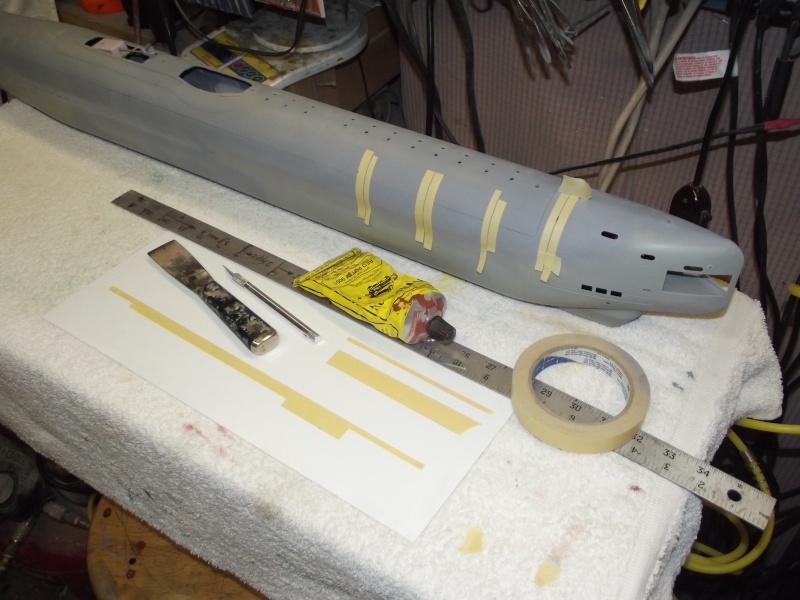
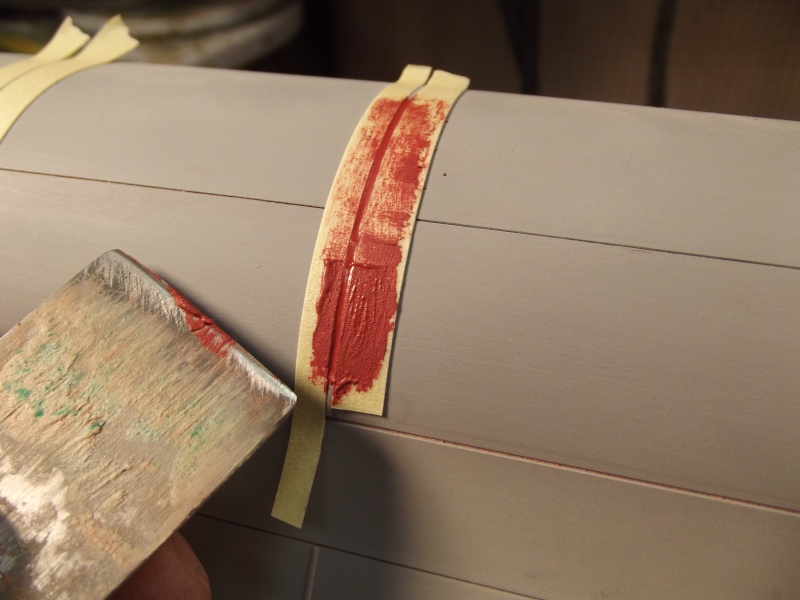
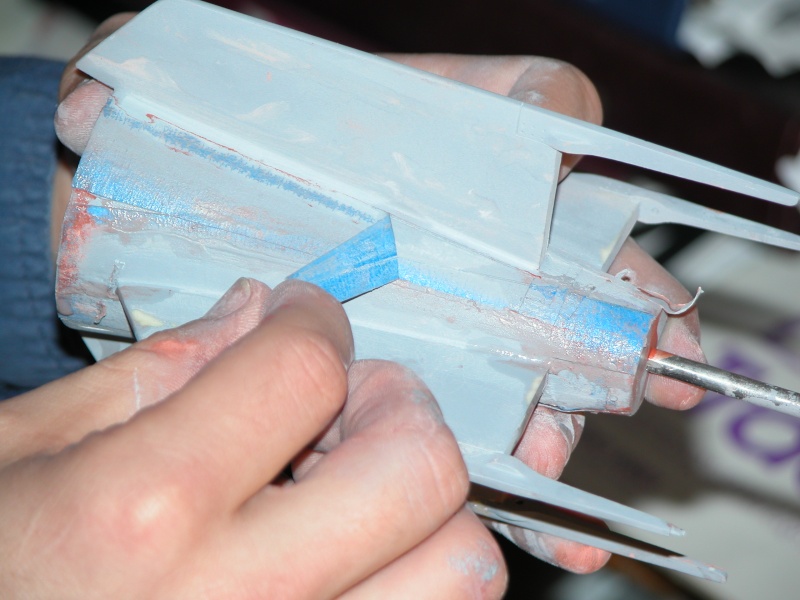
Air-dry touch-up putty was applied between the tape pieces. It took two passes to reach the height of three layers of tape, but the work went pretty quick.
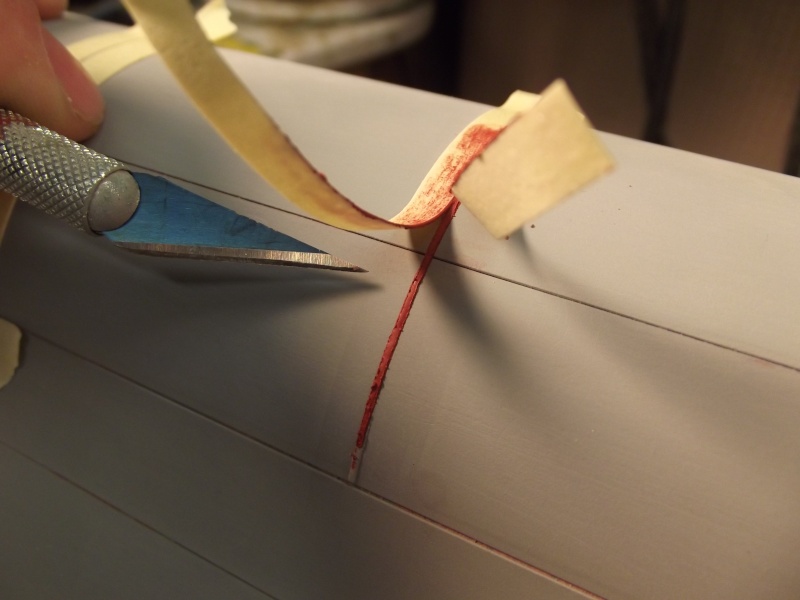
The tape is quickly removed and an X-Acto blade tip run longitudinally along the seam between the two hull halves to cut free the putty weld bead at the hull separation point. With three faces of the putty exposed to air, it dried out in a matter of hours.
https://i.servimg.com/u/f18/18/50/47/55/dscf4911.jpg

With the automotive two-part filler it matters little how long you take to remove the masking tape. In fact, removing the tape too soon risks pulling away filler that sticks to the edge of the tape. Well after the applied filler has changed state to a solid, I pull off the tape. Don't wait any longer than that when working a self-hardening filler -- you want it in the 'almost cured' state for the next operation to be an easy one.
The tape removed I was presented with an unbroken line of nearly hardened filler. I then lofted off the correct 'block' length and spacing between blocks from the undamaged line of blocks with pencil marks. It was then an easy matter to cut and scrap away the spaces between the blocks. A little sanding and a coat of primer and I had a restored line of blocks where the originals were.
David


» Modulated electric fields for submarine communication in a "heads up" from Harry!
» 868/915 Mhz as a viable frequency for submarines.
» Laser cut Robbe U47 conversion
» ExpressLRS - 868/915 Mhz equipment
» Information on camouflage patterns for German seahund
» WW2 mini sub build
» Not the hobby I expected :)
» Sheerline gasket material