


Greeting all
I've just recovered a load of photos from my old PC from the build and subsequent mods to a Scratch built submersible. Its NOT scale, indeed its not a model of a real sub and its not Grey but it was fun to build so here goes. (Fun??? only one box of swear words used...)
I was given a length of 5inch pipe and asked if I could make a sub from it cheaply.
The use of Foamex plastic was decided upon as I had a plentiful stock, it works and glues easy and was FREE.
Initial sketchs
I decided to make the nose and tail cones from layers of foamex and shape then accordingly. The disks shown are two such layers, The spoke arrangement is to aid in the hollowing out later in the construction.
All glued and clamped together on a central mandrel, note extra holes for attachment setscrews on front cone. Extra holes on spokes were to aid alignment whilst gluing up in sections.
front cone glued up
now to shape the two cones, mount on 6mm mandrels (long studs in my case) along with bulkhead and fasten assembly in drill.
(This was before I bought a lathe - don't laugh, it worked)
shaping outside of a cone
After shaping the outside with file, emery, primer/filler to show low spots we have:-
front after shaping
And checking for fit/sizes:-
front
Rear
Now for the insides of the cones:-
front cone
This shows the front cone interior and front bulkhead (stepped for O-ring)
Out with the dremel and a small milling bit, find mask and goggles and way we go.
The Spoke arrangement simplifies the amount to be cut out and stops you cutting too far in.
front bulkhead finished
The 4 nuts are o-ring sealed and retain the nose cone setscrews, the cables are for the searchlights,
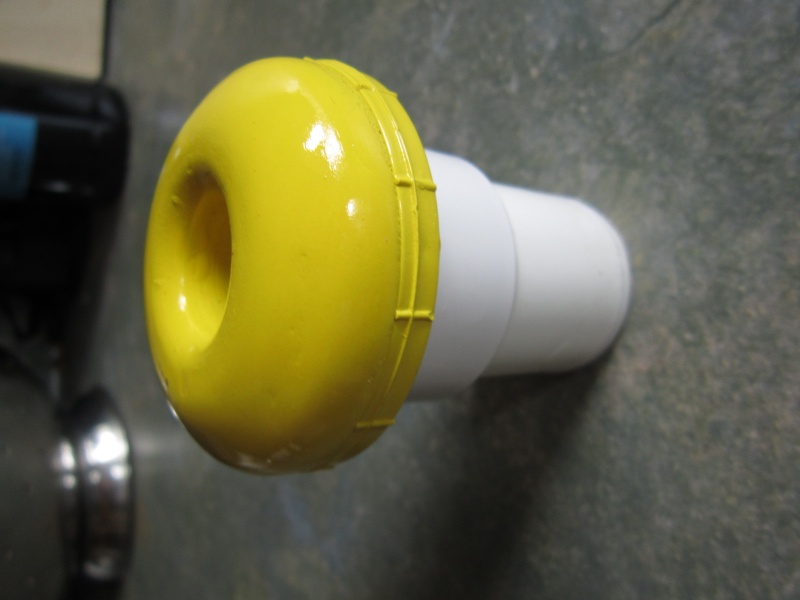
Valve for pressure checks glued in, set screw has o-ring under head for sealing.
Just a quick aside about the valve, when having two new tyres fitted I spotted lots of valves on the floor at the local tyre dealer, asked?, told "help Yourself" now have dozens.
Cut as much of the rubber off as you can then buff them up with a wire brush in an electric drill WEAR GOGGLES AND GLOVES AND MASK
interior milled out
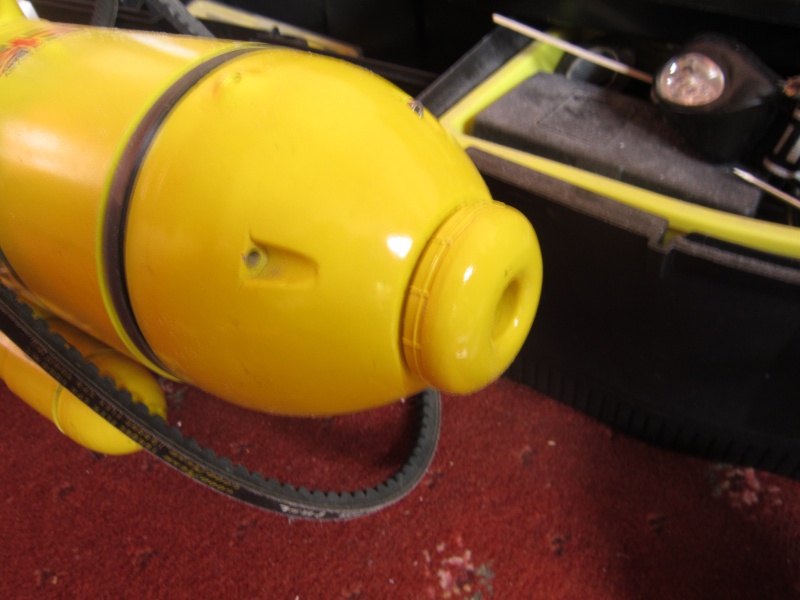
nose cone finished
The three searchlights are 10mm Ultrabrites from Component shop, 2v each , wired in series=6v and resistor for 12v. Hole at bottom is water ingress, matching small hole at top for air escape.
More to Come....
I've just recovered a load of photos from my old PC from the build and subsequent mods to a Scratch built submersible. Its NOT scale, indeed its not a model of a real sub and its not Grey but it was fun to build so here goes. (Fun??? only one box of swear words used...)
I was given a length of 5inch pipe and asked if I could make a sub from it cheaply.
The use of Foamex plastic was decided upon as I had a plentiful stock, it works and glues easy and was FREE.
Initial sketchs
I decided to make the nose and tail cones from layers of foamex and shape then accordingly. The disks shown are two such layers, The spoke arrangement is to aid in the hollowing out later in the construction.
All glued and clamped together on a central mandrel, note extra holes for attachment setscrews on front cone. Extra holes on spokes were to aid alignment whilst gluing up in sections.
front cone glued up
now to shape the two cones, mount on 6mm mandrels (long studs in my case) along with bulkhead and fasten assembly in drill.
(This was before I bought a lathe - don't laugh, it worked)
shaping outside of a cone
After shaping the outside with file, emery, primer/filler to show low spots we have:-
front after shaping
And checking for fit/sizes:-
front
Rear
Now for the insides of the cones:-
front cone
This shows the front cone interior and front bulkhead (stepped for O-ring)
Out with the dremel and a small milling bit, find mask and goggles and way we go.
The Spoke arrangement simplifies the amount to be cut out and stops you cutting too far in.
front bulkhead finished
The 4 nuts are o-ring sealed and retain the nose cone setscrews, the cables are for the searchlights,
Valve for pressure checks glued in, set screw has o-ring under head for sealing.
Just a quick aside about the valve, when having two new tyres fitted I spotted lots of valves on the floor at the local tyre dealer, asked?, told "help Yourself" now have dozens.
Cut as much of the rubber off as you can then buff them up with a wire brush in an electric drill WEAR GOGGLES AND GLOVES AND MASK
interior milled out
nose cone finished
The three searchlights are 10mm Ultrabrites from Component shop, 2v each , wired in series=6v and resistor for 12v. Hole at bottom is water ingress, matching small hole at top for air escape.
More to Come....


» Modulated electric fields for submarine communication in a "heads up" from Harry!
» Laser cut Robbe U47 conversion
» ExpressLRS - 868/915 Mhz equipment
» Information on camouflage patterns for German seahund
» WW2 mini sub build
» Not the hobby I expected :)
» Sheerline gasket material
» Choice of CAD software and Printer for 3D printing